2018 subaru outback owner’s manual

Welcome to the official owner’s manual for your 2018 Subaru Outback. This comprehensive guide provides essential information on operation, maintenance, and safety features to enhance your driving experience.

Welcome to Your New Vehicle

Congratulations on purchasing your 2018 Subaru Outback! This vehicle offers a perfect blend of performance, comfort, and reliability. With its 2.5L H-4 engine producing 175 hp at 5800 rpm, you can enjoy a powerful yet smooth driving experience. Features like heated seats and a heated steering wheel ensure comfort during colder months, while the EyeSight Driver Assist Technology enhances safety on the road. This manual is designed to help you navigate all aspects of your Outback, ensuring you maximize its potential and enjoy every drive.

Manual Overview and Contents

This manual provides detailed information to help you understand and operate your 2018 Subaru Outback effectively. It covers essential topics such as vehicle features, maintenance schedules, safety precautions, and troubleshooting. The manual is divided into sections, including instrumentation, drivetrain, multimedia systems, and advanced safety technologies like EyeSight. It also includes guidelines for optimal vehicle care and performance. Reading this manual thoroughly will ensure you maximize your driving experience while maintaining your vehicle’s longevity and safety.

Key Features and Specifications of the 2018 Subaru Outback

The 2018 Subaru Outback features a powerful 2.5L 4-cylinder engine, producing 175 horsepower, paired with a smooth CVT or 6-speed manual transmission. It boasts all-wheel drive, excellent fuel efficiency, and a spacious interior. The Outback also includes a robust infotainment system with an 8-inch touchscreen, ample cargo space, and advanced safety features like EyeSight Technology for enhanced driving confidence;

Engine and Transmission Options

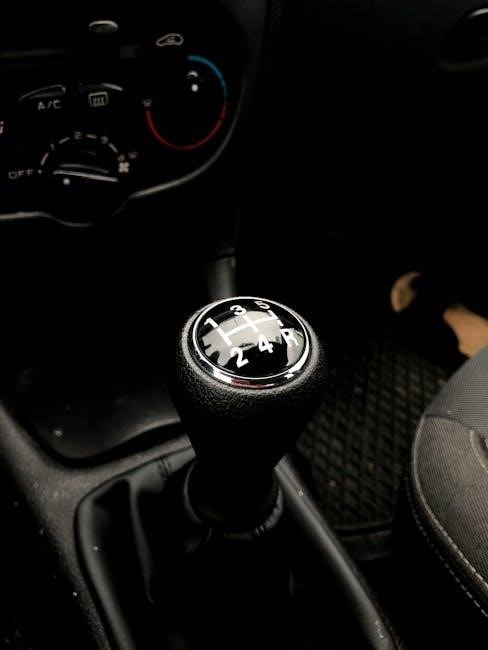
The 2018 Subaru Outback offers two engine options: a 2.5L 4-cylinder producing 175 horsepower and a 3.6L 6-cylinder generating 256 horsepower. Both engines are paired with a Continuously Variable Transmission (CVT) for smooth and efficient performance. The CVT is standard across all trim levels, providing seamless acceleration for both city driving and off-road adventures. Notably, the manual transmission option was discontinued for the 2018 model year, making the CVT the sole transmission choice.

Drivetrain and Performance Capabilities

The 2018 Subaru Outback features a highly capable drivetrain, including the legendary Symmetrical All-Wheel Drive system, which ensures superior traction and control on various terrains. With 8.7 inches of ground clearance, it excels in off-road conditions while maintaining smooth on-road performance. The Outback is powered by a 2.5L 4-cylinder engine, delivering balanced power and efficiency, or an optional 3.6L V6 engine for enhanced towing capacity. The CVT (Continuously Variable Transmission) optimizes fuel efficiency, while the available manual mode provides driver engagement. This combination makes the Outback versatile for both daily commuting and adventurous expeditions.

Safety Features and Advanced Technologies

The 2018 Subaru Outback is equipped with advanced safety features, including the EyeSight Driver Assist Technology, which offers adaptive cruise control, lane departure warning, and sway warning. Additional technologies include pre-collision braking and pre-collision throttle management. The vehicle also features blind-spot detection, rear cross-traffic alert, and steering-responsive headlights for enhanced visibility. These systems work together to provide a safe and confident driving experience, ensuring protection for both passengers and pedestrians.

Maintenance and Servicing Guidelines

Regular maintenance is crucial for optimal performance. Follow Subaru’s recommended schedule for oil changes, tire rotations, and fluid checks to ensure longevity and reliability of your vehicle.

Recommended Maintenance Schedule

Regular maintenance is crucial for the longevity and performance of your 2018 Subaru Outback. Follow the recommended schedule for oil changes, tire rotations, and inspections. Oil changes are typically required every 5,000 to 7,500 miles, while tire rotations should occur every 12,000 miles. Brake systems, belts, and fluids should be inspected at specified intervals. Adhering to this schedule ensures optimal vehicle reliability and prevents potential issues. Always consult your owner’s manual or contact a Subaru service center for personalized maintenance plans tailored to your driving habits and conditions.

Oil Change and Fluid Requirements

Regular oil changes are crucial for maintaining your 2018 Subaru Outback’s performance. Use synthetic oil with a viscosity of 0W-20 for optimal engine protection.Oil capacity is approximately 4.5 quarts. Replace the oil filter during each service. Check coolant, brake, and transmission fluids regularly, topping off as needed. Follow the recommended schedule in your manual for routine maintenance to ensure longevity and efficiency of your vehicle.

  • Oil change interval: Every 7,500 to 7,500 miles.
  • Use genuine Subaru oil filters for best results.

Refer to your manual for detailed procedures and guidelines.

Tire Care and Pressure Monitoring

Proper tire care is essential for optimal performance, safety, and fuel efficiency. The 2018 Subaru Outback features a Tire Pressure Monitoring System (TPMS) that alerts you if tire pressure drops below the recommended level. Always maintain the correct tire pressure, as specified in the owner’s manual or on the tire information placard on the driver’s side doorjamb. Regularly inspect tires for wear, uneven tread, and damage. Rotate tires every 7,500 to 7,800 miles to ensure even wear. Address any issues promptly to prevent tire failure and ensure reliable performance.

Understanding the Infotainment and Multimedia System

The 2018 Subaru Outback features a user-friendly infotainment system with Bluetooth connectivity, voice commands, and a responsive touchscreen. Navigate multimedia, apps, and maps seamlessly for an enhanced driving experience.

Navigating the Multimedia Touchscreen

The 2018 Subaru Outback features an intuitive multimedia touchscreen system designed for ease of use. The high-resolution display allows you to access various functions such as navigation, audio controls, and Bluetooth connectivity. Use the touchscreen to navigate through menus, adjust settings, and enjoy seamless integration with your smartphone. Voice commands are also available for hands-free operation, ensuring a safe and convenient driving experience. Familiarize yourself with the interface to maximize the functionality of your Outback’s multimedia system.

Bluetooth and Device Connectivity

Your 2018 Subaru Outback features advanced Bluetooth technology for seamless device connectivity. Pair your smartphone or tablet to enjoy hands-free calls, audio streaming, and voice command functionality. The system supports compatible devices, allowing you to access your music library, navigation, and apps directly through the multimedia touchscreen. For troubleshooting, refer to the manual’s connectivity guide or reset the system by turning your vehicle off and on. This feature enhances convenience and safety while driving, ensuring a connected and enjoyable experience on the road.

Using the Navigation System

The 2018 Subaru Outback’s navigation system provides turn-by-turn directions and real-time traffic updates. To use it, press the voice command button on the steering wheel or enter your destination via the touchscreen. Input addresses using voice commands or the on-screen keyboard. The system also supports Points of Interest (POI) searches. Ensure your maps are updated regularly for accuracy. Use the Menu option to customize settings, such as voice guidance volume or route preferences. For optimal performance, keep the GPS antenna clear and avoid blocking the windshield area.

Safety Features and Driver-Assistance Technologies

The 2018 Subaru Outback features advanced safety technologies, including EyeSight Driver Assist Technology, adaptive cruise control, lane departure warning, and sway warning. These systems enhance driver confidence and safety.

EyeSight Driver Assist Technology

The 2018 Subaru Outback features the advanced EyeSight Driver Assist Technology, designed to enhance safety and reduce driver fatigue. This system includes Adaptive Cruise Control, Lane Departure Warning, Lane Sway Warning, and Pre-Collision Braking. Using a stereo camera system, EyeSight monitors the road ahead and assists in avoiding collisions. It operates effectively at speeds above 40 km/h, providing peace of mind during highway driving. This innovative technology is a key component of Subaru’s commitment to safety and driver assistance.

Additional Safety Features and Airbags

The 2018 Subaru Outback is equipped with a comprehensive suite of safety features, including seven airbags to protect occupants in the event of a collision. These include front, side, and curtain airbags, as well as a driver’s knee airbag for enhanced protection. Advanced features like EyeSight Driver Assist Technology, adaptive cruise control, and lane departure warning systems further enhance safety. The Outback also features a robust body structure designed to absorb and distribute impact forces, ensuring maximum passenger protection. These features work together to create a safe and secure driving environment.

Instrument Panel and Dashboard Overview

The 2018 Subaru Outback features a user-friendly instrument panel with essential controls and indicators. The dashboard provides clear access to multimedia, climate controls, and driver information displays.

Dashboard Layout and Controls

The 2018 Subaru Outback features a thoughtfully designed dashboard with intuitive controls. The instrument panel includes a central touchscreen for multimedia and navigation, alongside buttons for climate control and audio functions. The steering wheel houses controls for cruise control and phone/audio adjustments. Driver information is displayed via a clear, easy-to-read interface. Warning lights and indicators are strategically placed to ensure quick recognition. This layout prioritizes convenience, safety, and ease of operation, helping drivers stay focused on the road.

Understanding Warning Lights and Indicators

The 2018 Subaru Outback features a range of warning lights and indicators on the instrument panel. These lights alert you to important vehicle conditions, such as low oil level, check engine issues, or active safety features. The manual details each light’s meaning, ensuring you can respond appropriately. For example, the EyeSight indicator shows when adaptive cruise control is active, while others signal system malfunctions. Always consult the manual for specific explanations to maintain safety and optimal performance.

Optional Features and Accessories

Explore optional features like roof racks, cargo area accessories, and heated seats for enhanced functionality and comfort in your 2018 Subaru Outback.

Roof Racks and Cargo Area Accessories

The 2018 Subaru Outback offers versatile roof rack systems and cargo area accessories to enhance versatility and practicality. These accessories, such as crossbars, bike racks, and cargo trays, allow for secure transportation of gear. The roof rack is designed to accommodate various loads, while cargo nets and trays help organize and protect items in the trunk. These features are perfect for outdoor enthusiasts, ensuring your vehicle remains functional and stylish for all adventures.

rachmaninoff piano concerto no 2 pdf

Historical Background

Rachmaninoff composed his Piano Concerto No. 2 in C minor, Op. 18, between 1900 and 1901, during a period of emotional recovery after a psychological breakdown following the failure of his First Symphony in 1897. The concerto, dedicated to Nikolai Dahl, premiered on November 9, 1901, in Moscow, marking a triumphant return to composition and solidifying his reputation as a master of the genre.

1.1. Composition Period (1900-1901)

Rachmaninoff composed his Piano Concerto No. 2 in C minor, Op. 18, between June 1900 and April 1901. This period marked his recovery from a psychological breakdown following the 1897 failure of his First Symphony. The concerto showcases his melodic genius and emotional depth, reflecting his personal struggles and artistic resurgence during this critical phase of his career.

1.2. Premiere and Initial Reception (1901)

The concerto premiered on November 9, 1901, in Moscow, with Rachmaninoff as the soloist and Alexander Siloti conducting. It received widespread acclaim, praised for its emotional depth and technical brilliance. The premiere marked a turning point in Rachmaninoff’s career, restoring his confidence and establishing the concerto as a cornerstone of classical piano repertoire. Its success was immediate and enduring, resonating with audiences and critics alike.

1.3. Rachmaninoff’s Emotional Struggles and Creative Revival

Following the 1897 failure of his First Symphony, Rachmaninoff endured a severe psychological crisis, struggling with depression and creative blockage. With the help of hypnotherapy and support from friends, he gradually recovered. Composing his Second Piano Concerto became a therapeutic process, channeling his emotional turmoil into music. This work not only revitalized his career but also showcased his mastery of melodic expression and orchestration, setting a new standard for piano concertos.

Composition and Premiere Details

Composed between 1900 and 1901, Rachmaninoff’s Second Piano Concerto premiered on November 9, 1901, in Moscow, dedicated to Nikolai Dahl, marking his creative resurgence.

2.1. Dedication to Nikolai Dahl

Rachmaninoff dedicated his Piano Concerto No. 2 to Dr. Nikolai Dahl, a physician who helped him overcome a psychological crisis. This dedication reflects the deep gratitude Rachmaninoff felt for Dahl’s support during his recovery, which was crucial in reviving his compositional creativity. The concerto stands as a testament to their meaningful relationship and Dahl’s positive influence on Rachmaninoff’s life.

2.2. Premiere Performance with the Moscow Philharmonic

The premiere of Rachmaninoff’s Piano Concerto No. 2 took place on November 9, 1901, in Moscow. Rachmaninoff himself performed as the soloist with the Moscow Philharmonic Orchestra, conducted by Alexander Siloti. The performance was a resounding success, marking a significant turning point in Rachmaninoff’s career and solidifying the concerto’s place as a cornerstone of classical piano repertoire.

Structure of the Concerto

Rachmaninoff’s Piano Concerto No. 2 is structured in three movements: Moderato, Adagio Sostenuto, and Allegro Scherzando. The concerto begins dramatically with rich piano chords, setting a grand tone.

3.1. Movement I: Moderato

The first movement of Rachmaninoff’s Piano Concerto No. 2 begins with powerful, bell-like piano chords in F major, creating a dramatic opening. The orchestra enters with a lyrical theme, balancing passion and reflection. The movement features intricate technical passages, dramatic dynamics, and a soaring melody, showcasing the pianist’s skill while maintaining emotional depth. This movement is both technically challenging and deeply expressive.

3.2. Movement II: Adagio Sostenuto

The second movement, marked Adagio Sostenuto, is a lyrical and deeply emotional slow movement. It opens with a beautiful, melancholic melody in the piano, accompanied by subtle orchestral textures. The movement develops into a rich dialogue between the piano and orchestra, showcasing Rachmaninoff’s mastery of harmony and melody. Its heartfelt themes and expressive nuances make it one of the most beloved movements in classical music.

3.3. Movement III: Allegro Scherzando

The final movement, Allegro Scherzando, is a lively and technically demanding conclusion to the concerto. It features intricate piano passagework, playful rhythmic motifs, and a dramatic dialogue between the piano and orchestra. The movement showcases Rachmaninoff’s mastery of orchestration and his ability to blend virtuosic brilliance with emotional depth, leading to a triumphant and exhilarating finale.

Musical Elements

The concerto features rich, expressive melodies and dramatic contrasts, with intricate piano passagework and lush orchestration. Its themes are beautifully developed, balancing virtuosity and emotional depth.

4.1. Thematic Development and Motifs

The concerto showcases Rachmaninoff’s mastery of thematic development, with motifs evolving seamlessly across movements. The dramatic opening piano chords introduce a recurring theme, while the orchestra expands on these ideas. Melodies are lyrical and expressive, often reprised in varying forms, creating a sense of unity and emotional depth. This thematic coherence is a hallmark of the work’s enduring appeal.

4.2. Harmonic Complexity and Orchestration

The concerto is renowned for its rich harmonic textures and intricate orchestration. Rachmaninoff employs expansive chord progressions and layered instrumental timbres to create a lush, immersive sound. The interplay between the piano and orchestra is meticulously balanced, with the orchestra often mirroring the piano’s thematic material. This harmonic depth and detailed orchestration contribute to the work’s dramatic intensity and enduring musical appeal.

4.3. Technical Challenges for Pianists

Rachmaninoff’s Piano Concerto No. 2 is renowned for its technical demands, featuring complex fingerwork, arpeggios, and chromatic passages. The dense notation requires exceptional dexterity and stamina, particularly in the outer movements. Dramatic dynamic shifts and intricate tempo changes further challenge pianists, demanding precision and musicality. The concerto’s emotional depth adds to its interpretive demands, making it a true test of technical and artistic mastery.

Reception and Legacy

Rachmaninoff’s Piano Concerto No. 2 remains a beloved masterpiece, celebrated for its emotional depth and technical brilliance. Its enduring popularity has solidified its place in classical music history.

5.1. Initial Success and Critical Acclaim

The premiere of Rachmaninoff’s Piano Concerto No. 2 on November 9, 1901, was a resounding success, earning widespread critical acclaim for its emotional depth and technical brilliance. The concerto quickly became a cornerstone of classical music, praised for its melodic richness and structural coherence. Its themes have inspired popular songs, further cementing its timeless appeal and artistic significance.

5.2. Enduring Popularity in Classical Repertoire

Rachmaninoff’s Piano Concerto No. 2 remains a cornerstone of classical music, celebrated for its universal appeal and emotional resonance. Its themes have inspired popular songs, such as Frank Sinatra’s Full Moon and Empty Arms and Eric Carmen’s All by Myself. The concerto’s technical brilliance and melodic beauty continue to captivate audiences, making it a staple in orchestral repertoire and a favorite among pianists and music lovers alike.

Cultural Impact

Rachmaninoff’s Piano Concerto No. 2 has profoundly influenced popular culture, with its themes adapted in songs like Frank Sinatra’s Full Moon and Empty Arms and Eric Carmen’s All by Myself. Its emotional depth and melodic richness continue to inspire across genres, making it a timeless classic in both classical and modern media.

6.1. Influence on Popular Music

Rachmaninoff’s Piano Concerto No; 2 has inspired numerous adaptations in popular music, with its themes featured in songs like Frank Sinatra’s Full Moon and Empty Arms (1945) and Eric Carmen’s All by Myself (1975). These reinterpretations highlight the concerto’s timeless melodic appeal, bridging classical and mainstream audiences. Its emotional richness and romantic style continue to resonate across genres, making it a lasting influence on modern music.

6.2. Use in Film and Media

Rachmaninoff’s Piano Concerto No. 2 has been prominently featured in various films and media, enhancing emotional depth in scenes. Its haunting melodies appear in movies like The Piano and Shine, while its dramatic passages are used in television series and commercials. The concerto’s universal appeal makes it a popular choice for directors seeking to evoke powerful emotions, ensuring its lasting presence in visual storytelling.

Performance and Interpretation

Rachmaninoff’s Piano Concerto No. 2 is a favorite among pianists and orchestras, blending technical brilliance with emotional depth. Performers like Lang Lang and Rafael Orozco deliver captivating interpretations.

7.1. Notable Pianists and Their Interpretations

Many renowned pianists have left their mark on Rachmaninoff’s Second Concerto. Lang Lang brings a dynamic intensity, while Rafael Orozco offers a poetic elegance. Anna Fedorova delivers technically precise yet emotionally resonant performances, showcasing the concerto’s depth. Each interpretation highlights the work’s versatility, allowing listeners to experience it anew through diverse artistic perspectives.

7.2. Orchestral Collaboration and Conducting Approaches

Orchestral collaboration is pivotal in Rachmaninoff’s Second Concerto. Conductors like Valery Gergiev emphasize rich, expressive phrasing, while Edo de Waart focuses on balance and clarity. The Mariinsky Orchestra, under Gergiev, brings a deep understanding of Russian musical tradition, creating a seamless dialogue between piano and orchestra. Each conductor’s approach shapes the concerto’s emotional and technical landscape, ensuring a dynamic interplay.

Availability of Sheet Music

The sheet music for Rachmaninoff’s Piano Concerto No. 2 is widely available in PDF format from sources like the International Music Score Library Project (IMSLP) and other online repositories.

8.1. Sources for PDF Scores

PDF scores of Rachmaninoff’s Piano Concerto No. 2 are available from various online sources, including musicnotes.com, sheetmusicplus.com, and the International Music Score Library Project (IMSLP). Additionally, websites like Musopen and classicalsheetmusic.club offer free downloads. Many online retailers and libraries also provide access to the concerto’s sheet music, making it easily accessible for both professional pianists and enthusiasts.

8.2. Editions and Transcriptions

Rachmaninoff’s Piano Concerto No. 2 is available in various editions, including two-piano transcriptions and orchestral reductions. Notable editions are published by Boosey & Hawkes and Dover Publications, offering both solo and orchestral versions. Some editions include analytical notes and performance tips, while others focus on urtext accuracy. Transcriptions for piano duets are also popular, allowing collaborative performances and practice without an orchestra.

Notable Performances and Recordings

Rafael Orozco and the Royal Philharmonic Orchestra, led by Edo de Waart, delivered a compelling rendition. Valery Gergiev’s interpretations are highly acclaimed.

9.1. Historic Recordings

The 1959 recording by Sviatoslav Richter and the Warsaw Philharmonic Orchestra is renowned for its emotional depth. Sergei Rachmaninoff himself recorded the concerto in 1929 with the Philadelphia Orchestra, showcasing his unique interpretation. These recordings remain milestones, offering insights into the composer’s intent and the evolving performance practices of his iconic work.

9.2. Modern Interpretations

Modern pianists continue to bring fresh perspectives to Rachmaninoff’s concerto. Lang Lang’s technically dazzling performances emphasize emotional depth, while Anna Fedorova’s interpretations highlight poetic lyricism. Recent recordings by artists like Kirill Gerstein and Denis Matsuev blend tradition with contemporary expressiveness, showcasing the work’s timeless appeal. These interpretations are widely available in digital formats, offering audiences new ways to experience the concerto’s grandeur.

Comparisons with Other Works

Rachmaninoff’s Second Concerto is often compared to his Third Concerto, with the latter being technically more demanding. It also shares emotional depth with Tchaikovsky’s First Concerto, yet remains distinct in its melodic richness and orchestral balance.

10.1. Rachmaninoff’s Other Concertos

Rachmaninoff composed four piano concertos, with his Second being the most celebrated. His First Concerto, written in 1891, was revised in 1917, showcasing his early talent. The Third Concerto, completed in 1901, is renowned for its technical complexity. The Fourth Concerto, though less popular, displays his evolving style. Additionally, his Rhapsody on a Theme of Paganini is often regarded as a quasi-concerto, highlighting his mastery of form and melody. Each work reflects his unique voice, blending technical brilliance with profound emotion.

10.2. Similarities with Tchaikovsky’s Works

Rachmaninoff’s Piano Concerto No. 2 shares similarities with Tchaikovsky’s works in its emotionally charged themes and Russian folksong influences. Both composers excelled at crafting expressive melodies and rich harmonies, often blending technical virtuosity with deep emotional resonance. Their concertos, such as Tchaikovsky’s Piano Concerto No. 1, feature dramatic orchestration and a balance of piano brilliance and orchestral grandeur, creating a shared Russian Romantic legacy.

Educational Significance

Rachmaninoff’s Piano Concerto No. 2 is a cornerstone of piano education, offering insights into technical mastery, thematic development, and orchestration. It is widely studied and performed, serving as a foundational work for advanced pianists and a subject for analytical studies in music theory and history.

11.1. Role in Piano Education

Rachmaninoff’s Piano Concerto No. 2 holds a central place in piano education, challenging students with its technical demands and emotional depth. It is frequently included in advanced curricula, helping pianists develop mastery over complex passages, nuanced phrasing, and orchestral collaboration. The concerto’s structure and themes also provide rich material for analytical studies, enhancing understanding of late Romantic composition techniques and performance practices.

11.2. Analytical Studies and Teaching Tools

Analytical studies of Rachmaninoff’s Piano Concerto No. 2 provide deep insights into its thematic motifs, harmonic complexity, and orchestration. Teaching tools, such as annotated scores and method books, help students and educators explore its technical and emotional challenges. These resources are invaluable for understanding the concerto’s structure and for developing interpretative skills, making it a cornerstone of advanced piano education and musical analysis.

Rachmaninoff’s Piano Concerto No. 2 remains a timeless masterpiece, blending emotional depth with technical brilliance, ensuring its enduring appeal and artistic value in classical music.

12.1. Timeless Appeal and Artistic Value

Rachmaninoff’s Piano Concerto No. 2 captivates audiences with its rich melodies and emotional intensity, showcasing the composer’s mastery of orchestration and thematic development. Its enduring popularity stems from its ability to evoke profound feelings, making it a cornerstone of classical repertoire. The concerto’s intricate harmonies and technical challenges continue to inspire pianists and orchestras worldwide, ensuring its lasting artistic significance.

12.2. Continued Relevance in Modern Classical Music

Rachmaninoff’s Piano Concerto No. 2 remains a staple in modern classical music, with frequent performances and recordings by leading pianists and orchestras. Its influence extends to popular culture, with themes appearing in films and songs. The concerto’s emotional depth and technical complexity ensure its continued relevance, appealing to both classical enthusiasts and new audiences. Its timeless beauty endures, solidifying its place in the repertoire.

12 week carb cycling meal plan pdf

Carb cycling is a structured diet approach alternating carbohydrate intake to optimize fat loss and muscle preservation. It involves periods of high and low carb consumption, tailored to individual goals and workout intensity, supported by scientific research.

What is Carb Cycling?

Carb cycling is a dietary strategy that involves alternating carbohydrate intake to manage energy levels, support fat loss, and preserve muscle mass. It typically follows a structured plan, such as a 12-week cycle, where carbohydrate consumption varies between high and low days. This approach manipulates glycogen stores to optimize performance during workouts and enhance fat burning during rest. Unlike traditional low-carb diets, carb cycling allows for flexibility, making it easier to adhere to long-term. It is commonly used by athletes and fitness enthusiasts to align nutrition with training intensity and recovery needs. By cycling carbs, individuals can avoid plateaus and maintain metabolic balance while working toward specific body composition goals.

Benefits of Carb Cycling for Fat Loss and Muscle Gain

Carb cycling offers significant benefits for fat loss and muscle gain by optimizing metabolic function and energy use. High-carb days provide fuel for intense workouts, enhancing performance and muscle recovery, while low-carb days promote fat utilization. This balance prevents metabolic slowdown, common in low-carb diets. Carb cycling also preserves lean muscle mass, crucial for maintaining metabolism and achieving a toned physique. Additionally, it reduces hunger and increases satiety, making it easier to stick to the diet. The structured approach helps avoid plateaus, keeping progress steady over time. Overall, carb cycling is an effective strategy for those seeking sustainable fat loss while maintaining or building muscle, supported by research and real-world success stories. It aligns nutrition with fitness goals, offering a flexible and sustainable path to achieving desired body composition.

12-Week Carb Cycling Meal Plan Structure

A 12-week carb cycling meal plan offers a structured approach to fat loss and muscle gain. It alternates between high and low-carb days, balancing macronutrients to support workout intensity and recovery. The plan progresses through phases, adjusting carb intake based on goals and progress, ensuring sustainable results and minimizing plateaus. Tailored to individual needs, it combines scientific research with practical meal strategies.

Phase 1 introduces the basics of carb cycling, focusing on balancing macronutrients and understanding how carbs affect the body. Start with moderate carb intake, alternating between high and low carb days to adapt metabolism. High-carb days (e.g., 40-50% of calories) fuel workouts, while low-carb days (20-30%) promote fat burning. Protein remains consistent at 1.2-1.6g per pound of body weight to preserve muscle. Fat intake is adjusted to meet calorie needs. Meal timing is crucial: consume simple carbs pre- and post-workout for energy and recovery, while starchy carbs are eaten throughout the day for satiety. Focus on whole foods like oats, whole grains, and vegetables. Portion control and tracking are emphasized to ensure adherence. This phase builds the foundation for more intense carb cycling in later weeks, helping the body adapt to the diet. Monitor progress and adjust portions as needed for optimal results. Consistency and patience are key during this initial phase.

Phase 2: Weeks 4-6 (Increasing Intensity)

During Phase 2, carb cycling becomes more aggressive to enhance fat loss and improve metabolic adaptation. High-carb days increase to 50-60% of calories, while low-carb days drop to 10-20%, creating a larger contrast to intensify results. Macronutrient ratios are fine-tuned based on progress. Protein intake remains high to protect muscle, while fat intake adjusts to support calorie deficits. Meal timing becomes more strategic, with simple carbs consumed pre- and post-workout for performance and recovery. Starchy carbs are reduced on low-carb days, focusing on fiber-rich vegetables and whole foods. Portion control and tracking are crucial to avoid overeating. This phase introduces intermittent fasting or calorie-restricted windows to amplify fat burning. Hydration and electrolyte balance are emphasized to avoid fatigue. Mental and physical adaptation are key, as the body adjusts to the increased intensity. Consistency in workouts and nutrition ensures progress toward fat loss and muscle preservation goals. Adjustments are made based on weekly progress, ensuring the plan remains effective and sustainable.

Phase 3: Weeks 7-9 (Maximizing Fat Loss)

Phase 3 intensifies fat loss by further refining carb cycling strategies. High-carb days now account for 60-70% of total calories, while low-carb days drop to 5-10%, creating a sharp contrast to accelerate fat burning. Macronutrient ratios are tightly controlled, with protein remaining high to preserve muscle mass and fat intake adjusted to support deeper calorie deficits. Meal timing becomes more precise, with simple carbs reserved for pre- and post-workout periods to fuel performance and recovery. On low-carb days, focus shifts to leafy greens, cruciferous vegetables, and healthy fats to maintain satiety. Water intake is emphasized to prevent dehydration and support metabolism. Additionally, intermittent fasting or shorter eating windows may be introduced to enhance fat oxidation. Weekly progress monitoring is critical, with adjustments made to carb and calorie intake based on body composition changes. This phase demands strict adherence to ensure maximum fat loss while maintaining muscle integrity. Mental discipline and consistent tracking are key to success during this critical period.

Phase 4: Weeks 10-12 (Maintenance and Adjustment)

Phase 4 focuses on maintaining fat loss progress while adjusting to a sustainable routine. Carb intake is fine-tuned based on individual results, with high-carb days reduced to 3-4 per week. Macronutrient ratios are balanced to support muscle retention and prevent plateaus. Meal plans incorporate more variety to avoid boredom, while staying aligned with dietary goals. Protein remains a priority, and healthy fats are adjusted to maintain calorie needs. Hydration and electrolyte balance are emphasized to support metabolism. Weekly weigh-ins and body measurements guide carb and calorie adjustments, ensuring continued progress. Mental strategies are introduced to help transition into a long-term lifestyle approach. This phase prepares individuals for post-plan maintenance, teaching sustainable habits for lasting results. Consistency and adaptability are key to achieving and maintaining a leaner, healthier physique. Gradual adjustments ensure a smooth transition, avoiding drastic changes that could hinder success. This final phase reinforces the importance of mindful eating and self-awareness in long-term health.

Daily Meal Planning and Macronutrient Balance

Daily meal planning involves balancing carbohydrates, protein, and fats to align with training and fat-loss goals. High-carb days fuel workouts, while low-carb days promote fat burning. Timing meals around workouts optimizes recovery and energy use. Protein intake remains steady to preserve muscle, while healthy fats support hormonal balance; Portion control and meal timing are crucial to avoid overeating and maintain metabolic efficiency. Staying hydrated and managing electrolytes is emphasized to support overall health and performance. Consistency in tracking macronutrients ensures progress and prevents plateaus. This balanced approach helps sustain energy levels and mental clarity throughout the day, making the diet more manageable and effective for long-term success.

High-Carb Days: Meal Examples and Timing

On high-carb days, focus on consuming complex and simple carbs strategically. Breakfast might include oatmeal with fruits and a scoop of whey protein. Pre-workout, opt for simple carbs like white rice or bananas for quick energy. Post-workout, refuel with a protein shake and fast-digesting carbs like dextrose or maltodextrin for recovery. Dinner could feature sweet potatoes, quinoa, or whole-grain pasta alongside lean protein. Timing carbs around workouts ensures optimal performance and recovery. Pair high-carb intake with moderate protein and healthy fats to maintain muscle mass and satisfaction. Avoid overeating on high-carb days to stay within caloric goals. Starchy vegetables like yams and corn can also be included to balance fiber and energy needs. Ensure meals are spaced evenly to maintain stable energy levels and support fat loss efforts. This structured approach maximizes the benefits of carb cycling while minimizing potential drawbacks.

Low-Carb Days: Meal Examples and Timing

On low-carb days, focus on lean proteins, healthy fats, and low-carb vegetables to maintain satiety and support fat loss. Start with a breakfast like scrambled eggs with spinach and avocado, followed by a mid-morning protein shake with almond milk. For lunch, opt for grilled chicken or fish paired with a mix of greens and roasted vegetables. Snacks can include hard-boiled eggs, a handful of nuts, or cucumber slices with hummus. Dinner might feature a beef stir-fry with low-carb veggies or a hearty salad with olive oil dressing. Timing meals evenly throughout the day helps maintain energy levels. Keep carbs minimal, focusing on fiber-rich options like broccoli, cauliflower, and asparagus. Ensure protein intake is consistent to preserve muscle mass. Healthy fats from avocados, nuts, and olive oil are essential for hormone balance and satisfaction. Stay hydrated and consider intermittent fasting to enhance fat-burning effects. This structured approach ensures adherence and maximizes fat loss while maintaining muscle.

Importance of Protein and Fat in the Diet

Protein and fat are cornerstone nutrients in a carb cycling diet, playing vital roles in muscle preservation and energy production. Protein helps maintain and repair muscle tissue, particularly during low-carb phases when the body may rely on muscle breakdown for fuel. Aim for 1.6-2.2 grams of protein per kilogram of body weight daily, sourced from lean meats, fish, eggs, and dairy. Healthy fats, such as avocados, nuts, and olive oil, provide sustained energy, support hormone production, and enhance fat-soluble vitamin absorption. Balancing protein and fat intake ensures satiety, stabilizes blood sugar levels, and prevents excessive hunger, making it easier to adhere to the carb cycling plan. These nutrients also promote overall metabolic health, supporting the body’s ability to switch between carbohydrate and fat-burning states efficiently. Prioritizing high-quality protein and fat sources is essential for achieving both fat loss and muscle retention goals in a 12-week carb cycling program.

montana driver’s manual

Welcome to the Montana Driver’s Manual, a comprehensive guide designed to help new and experienced drivers understand state driving laws, road signs, and safe practices. This manual is regularly updated to reflect the latest regulations and safety guidelines, ensuring drivers are well-prepared for Montana’s diverse road conditions. Whether you’re applying for a license or refining your skills, this resource provides essential information to promote confident and responsible driving.

Overview of the Manual’s Purpose and Structure

The Montana Driver’s Manual is a detailed guide designed to educate drivers on state-specific traffic laws, road safety, and best driving practices. It is structured to cover essential topics such as licensing requirements, road signs, safe driving techniques, and special driving conditions. The manual is regularly updated to reflect current regulations, ensuring drivers are well-informed and prepared for Montana’s unique driving environment. Its clear organization makes it easy to navigate and understand.

Licensing Requirements in Montana

Montana’s licensing process requires applicants to meet age, residency, and documentation criteria. Drivers must pass vision, written, and road tests to obtain a valid license.

Types of Driver’s Licenses and Eligibility Criteria

Montana offers various driver’s licenses, including Class A, B, and C for commercial vehicles, and Class E and F for non-commercial use. Eligibility varies by age, residency, and documentation. Teens under 18 must obtain a learner license and complete supervised driving before progressing to a restricted license. Applicants must provide proof of identity, residency, and legal status to qualify for any license type.

Application Process for Obtaining a Driver’s License

To obtain a driver’s license in Montana, applicants must complete an application form, provide required identity and residency documents, and pass vision and knowledge tests. Fees vary by license type. Minors under 18 must first obtain a learner license and complete supervised driving for six months. Applicants are also required to pass a road test, with restrictions on cell phone use during the test.

Safe Driving Practices

Safe driving practices in Montana emphasize adhering to traffic laws, maintaining defensive driving techniques, staying alert, and being aware of surroundings to ensure roadway safety for all users.

General Rules of the Road

Obeying traffic laws, including speed limits, right-of-way rules, and seat belt requirements, is crucial for safe driving in Montana. Drivers must stay alert, avoid distractions, and maintain a safe distance from other vehicles. Proper use of signals ensures clear communication with other road users. Adhering to these rules helps reduce accidents and promotes a safe driving environment for everyone on Montana’s roads.

Defensive Driving Techniques

Defensive driving involves anticipating potential hazards and reacting responsibly to ensure safety. Maintain a safe following distance, scan the road ahead, and stay alert to other drivers’ actions. Be prepared to adjust speed and position to avoid collisions. Avoid distractions, use signals clearly, and stay patient in heavy traffic. These practices help drivers navigate Montana’s roads confidently and reduce accident risks effectively.

Montana Road Signs and Signals

Welcome to Montana road signs and signals. This section covers various types of traffic signs, their meanings, and how to interpret them for safe driving practices.

Types of Traffic Signs and Their Meanings

Traffic signs in Montana are categorized into regulatory, warning, and informational signs. Regulatory signs, like stop or yield signs, enforce traffic laws. Warning signs, such as curve or pedestrian crossing alerts, indicate potential hazards. Informational signs provide guidance, like directional or service signs. Each sign’s shape and color helps drivers quickly understand its purpose, ensuring safe and efficient navigation of Montana’s roads.

Understanding Traffic Signal Phases and Markings

Traffic signals in Montana follow standard phases: red indicates stop, yellow signals preparation to stop, and green allows movement. Markings like arrows, pedestrian signals, and bike lane indicators guide drivers’ actions. These signals and markings are designed to manage traffic flow, reduce congestion, and enhance safety, ensuring all road users can navigate intersections and shared spaces confidently and efficiently.

Montana Traffic Laws and Regulations

Montana’s traffic laws are designed to ensure safety and responsible driving. Drivers must adhere to speed limits, right-of-way rules, and other regulations to protect all road users.

Speed Limits and Right-of-Way Rules

Montana’s speed limits vary by location, with lower limits in urban areas and higher on rural highways. Right-of-way rules are critical to prevent collisions, requiring drivers to yield to oncoming traffic at four-way stops and uncontrolled intersections. Pedestrians in crosswalks always have priority, and vehicles must slow down or stop as needed. These rules ensure smooth traffic flow and enhanced road safety for all users.

Seat Belt and DUI Laws

Montana requires all drivers and passengers to wear seat belts, both in front and back seats. Driving under the influence (DUI) is illegal, with a BAC limit of 0.08% for adults and 0.02% for underage drivers. Penalties include license suspension, fines, and potential jail time. These laws aim to reduce accidents and enhance road safety.

Special Driving Conditions in Montana

Montana’s diverse terrain and weather demand unique precautions. Winter driving requires snow tires and reduced speeds, while rural and mountainous areas necessitate heightened vigilance for wildlife and steep grades.

Winter Driving Tips and Safety Precautions

Montana’s harsh winters require special precautions. Use snow tires or chains, reduce speed, and increase following distance. Keep headlights on and avoid sudden maneuvers. Carry an emergency kit with blankets, a shovel, and flashlight. Ensure your vehicle is winter-ready with proper antifreeze levels and windshield fluid. Plan routes to avoid steep, untreated roads and stay informed about weather conditions before driving.

Driving in Rural and Mountainous Areas

Driving in Montana’s rural and mountainous regions requires caution. Narrow roads, wildlife crossings, and limited visibility are common. Reduce speed on curves and use low beams to avoid blinding oncoming drivers. Be prepared for sudden weather changes and carry emergency supplies like water, a map, and snacks. Stay alert for livestock and pedestrians, and never drive beyond your vehicle’s capabilities in steep or icy conditions.

Sharing the Road Safely

Sharing the road safely involves being aware of all users, including pedestrians, cyclists, and motorcycles. Always follow traffic laws, yield when necessary, and maintain patience to ensure harmony among all road users.

Interacting with Pedestrians, Cyclists, and Motorcycles

When sharing the road with pedestrians, cyclists, and motorcycles, drivers must remain vigilant and patient. Always yield to pedestrians at crosswalks and be prepared to stop. For cyclists, maintain a safe distance and use turn signals to indicate your intentions. Motorcyclists require similar caution; check blind spots and avoid sudden lane changes. Respect shared paths and intersections to ensure safety for all road users.

Rules for Large Vehicles and Commercial Drivers

Commercial drivers and large vehicles must adhere to specific regulations in Montana, including CDL requirements and size/weight restrictions. Certain routes may prohibit oversized vehicles, and safety standards are strictly enforced. Drivers must follow hours of service rules and ensure proper vehicle inspections. Always refer to the Montana Driver’s Manual for detailed guidelines, as these rules are essential for safe and legal operation of large vehicles.

Medical and Vision Requirements

Montana requires drivers to meet specific medical and vision standards. Vision tests and medical certifications ensure road safety and are detailed in the manual for compliance.

Health Standards for Licensed Drivers

Montana requires drivers to meet specific health standards to ensure road safety. Drivers must report medical conditions that could impair driving ability. The manual outlines guidelines for physical and mental fitness, emphasizing the importance of maintaining health for safe driving practices. Regular medical evaluations may be required for certain conditions, ensuring compliance with state regulations and promoting public safety on Montana roads.

Vision Tests and Requirements

Vision Tests and Requirements

Montana requires vision tests to ensure safe driving abilities. Drivers must meet minimum visual acuity standards, typically 20/40 in both eyes with or without correction. Peripheral vision must be at least 140 degrees. Those with monocular vision may qualify under specific conditions. Corrective lenses are permitted if they improve vision to meet standards. Regular vision exams may be mandated for drivers with certain eye conditions to maintain their license.

Preparing for the Montana Driver’s Exams

Study the Montana Driver’s Manual to understand traffic laws and safe driving practices. Practice with online resources and take vision and knowledge tests to ensure readiness for both written and behind-the-wheel exams.

Written Test: What to Expect and Study

The Montana written test covers traffic laws, road signs, and safe driving practices. Study the driver’s manual to understand speed limits, right-of-way rules, and road markings. Focus on defensive driving techniques, seat belt laws, and DUI regulations. Use practice tests to assess readiness and identify areas for improvement. Ensure familiarity with traffic signals and special conditions like winter driving. Reviewing the manual thoroughly will help you prepare effectively for the exam.

Behind-the-Wheel Test: Skills and Scoring Criteria

The behind-the-wheel test evaluates your ability to safely operate a vehicle. You’ll be assessed on skills like starting, stopping, turning, and merging. Examiners check your observation, signaling, and adherence to traffic laws. Points are deducted for errors such as improper lane changes or failure to check mirrors. Practice vehicle control, following distances, and right-of-way rules to ensure a high score and demonstrate safe driving habits.

The Montana Driver’s Manual provides essential guidance for safe and responsible driving. For further assistance, visit the official Montana DMV website or consult local driving resources.

Final Tips for New and Experienced Drivers

Safe driving requires constant awareness and adaptability. Always follow speed limits, use headlights in low visibility, and wear seat belts. For new drivers, practice in various conditions to build confidence. Experienced drivers should avoid distractions like texting and maintain a safe distance. Regular vehicle maintenance ensures reliability. Stay informed about Montana’s unique driving challenges, such as winter conditions and rural roads, to enhance your safety on the road.

Where to Find More Information and Support

For additional resources, visit the Montana Department of Motor Vehicles (DMV) website, which offers detailed guides, downloadable forms, and practice tests. Local libraries and driving schools also provide access to study materials. The Montana Driver’s Manual is available online in multiple formats, ensuring accessibility for all. Community centers often host driving safety workshops, offering further support for both new and experienced drivers.

estudio biblico pdf

Bible Study PDFs are a valuable resource for deepening your understanding of Scripture. They offer accessible, organized, and shareable study guides, perfect for personal or group study.

Why Study the Bible?

Studying the Bible connects us with God’s message, revealing His love, wisdom, and plan for humanity. It provides spiritual growth, guidance for life’s challenges, and a deeper understanding of faith. Through Bible study, we discover timeless truths that transform lives, offering hope, comfort, and direction. Regular study strengthens personal relationships with God and fosters a sense of community among believers. It equips individuals to share the Gospel effectively and live according to biblical principles. Ultimately, the Bible serves as a manual for life, helping us navigate earthly trials while preparing for eternal life. Its teachings are essential for personal and communal spiritual development.

Understanding the Basics of Bible Study

Understanding the Basics of Bible Study introduces essential principles, methods, and tools to effectively analyze and interpret Scripture, fostering a deeper connection with God’s Word.

What is Bible Study?

Bible Study is a dedicated process of examining and interpreting Scripture to deepen understanding of God’s message. It involves systematic analysis of biblical texts, exploring their historical, cultural, and spiritual contexts. Through prayer, reflection, and application, Bible Study aims to transform lives by fostering a deeper relationship with God. It serves as a foundation for personal growth, spiritual guidance, and effective ministry. Regular Bible Study equips believers to apply God’s teachings in daily life, addressing challenges and nurturing faith. Whether individual or group-based, it is a powerful tool for discipleship and spiritual maturity, enabling believers to live according to God’s will and purpose.

Key Methods of Bible Study

Effective Bible Study employs various methods to uncover deeper truths. The inductive method involves observation, interpretation, and application, helping to extract meaning from the text. The deductive method starts with broad biblical principles and applies them to specific passages. Exegesis focuses on drawing out the intended meaning of Scripture, while topical studies explore themes across the Bible. Using tools like concordances and commentaries enhances understanding. These methods enable believers to engage with Scripture thoughtfully, fostering spiritual growth and practical application in daily life. By applying these approaches, one can gain a richer understanding of God’s Word and its relevance today.

The Importance of Context in Bible Study

Understanding the context of biblical passages is crucial for accurate interpretation. Context involves the historical, cultural, and linguistic background of the text, ensuring that verses are not misinterpreted. Without context, verses can be taken out of their intended meaning. For example, knowing the audience and purpose behind a letter in the New Testament provides clarity. Additionally, recognizing the literary style, whether it is poetry, prophecy, or a letter, aids in proper understanding. Using tools like commentaries and study guides in PDF formats can help uncover these contexts. Ignoring context can lead to misunderstandings, making it essential for meaningful and effective Bible study. Context enriches the study experience, connecting readers to the original intent of Scripture.

Resources and Materials for Effective Bible Study

Bible study PDFs, commentaries, and study guides provide essential tools for deeper understanding. They offer structured lessons, historical context, and practical applications, enhancing personal and group study experiences effectively.

Popular Bible Study PDFs Available Online

Popular Bible study PDFs offer a wide range of resources for deeper biblical understanding. These include structured lessons, commentary series, and topical studies designed for personal or group use. Many PDFs focus on specific books of the Bible, such as studies on Matthew or Luke, providing verse-by-verse analysis and historical context. Others emphasize practical application, helping readers connect biblical teachings to daily life. Some notable examples include “Principios de Estudio Bíblico,” which guides students in accurate text interpretation, and “El propósito de este libro es guiar al estudiante,” fostering meaningful and fruitful study. These resources are often free, making them accessible to everyone. They serve as invaluable tools for spiritual growth and effective ministry.

How to Choose the Right Bible Translation for Study

Choosing the right Bible translation for study is crucial for effective biblical understanding. Consider translations like the Nueva Versión Internacional (NVI), known for clarity and accuracy. For deeper study, compare literal translations (e.g., NASB) with paraphrased versions (e.g., The Message) to grasp nuances. Some PDF study guides highlight specific translations, ensuring consistency in interpretation. Additionally, many study resources include cross-references and commentary, enhancing comprehension. Selecting a translation that aligns with your study goals and personal preference ensures a meaningful and impactful experience. Popular study materials often recommend specific versions, making it easier to find one that suits your needs for spiritual growth and effective ministry.

Using Study Guides and Commentaries

Study guides and commentaries are essential tools for enriching your Bible study. They provide in-depth insights, historical context, and theological explanations to help you understand complex passages. Many PDF resources include structured guides that walk you through specific books or themes, offering questions and reflections for personal or group use. Commentaries, often written by scholars, shed light on the meaning of verses and their applications. These resources are particularly useful for exploring doctrinal topics or preparing teachings. By incorporating study guides and commentaries into your routine, you can deepen your understanding and apply biblical truths more effectively in your life. They are invaluable for both personal reflection and group discussions, fostering a richer spiritual journey.

Free Bible Study Tools and Software

Free Bible study tools and software are invaluable for enhancing your study experience. Programs like e-Sword and MySword offer comprehensive resources, including commentaries, dictionaries, and study guides, all accessible for free. These tools allow you to compare Bible translations, explore cross-references, and organize your notes efficiently. Additionally, websites like the Internet Archive provide free PDFs of Bible study materials, making it easy to download and share resources. Many of these tools also include features for highlighting, bookmarking, and creating personalized study plans. Whether you’re studying individually or preparing for group discussions, these free resources empower you to delve deeper into Scripture without financial barriers, ensuring accessibility for all learners.

Benefits of Using PDFs for Bible Study

Bible study PDFs offer portability, accessibility, and cost-effectiveness. They provide digital features like search and highlighting, enhancing learning and organization while being environmentally friendly and easily sharable.

Portability and Accessibility

Bible study PDFs are highly portable, allowing you to carry entire libraries of study materials on a single device. This convenience is especially useful for travelers or those with limited space.

Accessibility is another key benefit, as PDFs can be easily downloaded and accessed on smartphones, tablets, or laptops. This makes them ideal for personal study or group settings, ensuring everyone can engage with the material.

Additionally, PDFs can be shared effortlessly via email or messaging platforms, fostering collaboration and making it simple to distribute study resources to others. Their universal compatibility across devices ensures that anyone can access them, regardless of their hardware or software.

This portability and accessibility make Bible study PDFs an indispensable tool for modern learners, enabling deeper engagement with Scripture anytime, anywhere.

Cost-Effective and Environmentally Friendly

Bible study PDFs are a cost-effective option, eliminating the need for expensive printed materials. Many resources are available for free or at a reduced cost, making them accessible to everyone.

They are also environmentally friendly, reducing the need for paper, ink, and transportation associated with physical books. This makes them a sustainable choice for learners who value eco-conscious practices.

By utilizing digital formats, individuals can access a wealth of study materials without contributing to environmental waste. This approach aligns with modern efforts to minimize ecological impact while fostering spiritual growth.

Overall, Bible study PDFs offer a practical and responsible way to engage with Scripture, ensuring resources are both affordable and sustainable for future generations.

Enhanced Learning Through Digital Features

Bible study PDFs offer enhanced learning through interactive and user-friendly digital features. These resources often include hyperlinks to cross-references, maps, and additional study materials, allowing for deeper exploration of topics.

Digital tools enable highlighting, note-taking, and bookmarking, making it easy to personalize your study experience. Search functions also help quickly locate specific verses or themes within the document.

Some PDFs incorporate multimedia elements like audio teachings or video explanations, enriching the learning process. These features make Bible study more engaging and accessible, catering to different learning styles and preferences.

Additionally, the ability to share and collaborate on digital materials fosters community learning and discussion. Overall, these digital enhancements provide a dynamic and comprehensive approach to studying Scripture.

First, I should think about what organizing and archiving study materials entails. It involves keeping track of various study resources, ensuring they are easily accessible, and maintaining a system to preserve them for future use. Since the focus is on PDFs, I can mention how digital formats make organization easier compared to physical copies.

I should include points like:
– Using folders or directories to categorize PDFs by topics or books of the Bible.
– Utilizing tags or metadata for better searchability.
– Backing up files to prevent loss, perhaps mentioning cloud storage as an option.
– The benefit of having a centralized location for all study materials, which simplifies access and study sessions.

Let me draft the response accordingly:

Organizing and Archiving Study Materials

Organizing and archiving Bible study PDFs is crucial for efficient learning and quick access. By creating folders or directories on your device, you can categorize materials by topics or books of the Bible, making them easier to locate. Utilizing tags or metadata in your files enhances searchability. Regular backups, such as saving to cloud storage, ensure your study resources are preserved and accessible across devices. A well-organized digital library not only saves time but also enhances your study experience, allowing you to focus on spiritual growth. This systematic approach keeps your materials tidy and readily available for future reference and sharing.

Now, I’ll double-check the word count to ensure it’s exactly . Let me count them:

Organizing
and
archiving
Bible
study
PDFs
is
crucial
for
efficient
learning
and

quick
access
By
creating
folders
or
directories
on
your
device,
you
can
categorize
materials
by
topics
or
books
of
the
Bible,
making
them
easier
to
locate
Utilizing
tags
or
metadata
in
your
files
enhances
searchability
Regular
backups,
such
as
saving
to
cloud
storage,
ensure
your
study
resources
are
preserved
and
accessible
across
devices
A
well-organized
digital
library
not
only
saves
time
but
also
enhances
your
study
experience,
allowing
you
to
focus
on
spiritual
growth
This
systematic
approach
keeps
your
materials
tidy
and
readily
available
for
future
reference
100. and
101. sharing

Wait, that’s only . I need to add 10 more words to reach 111. Let me expand on the last sentence to add more detail without introducing new information:

A well-organized digital library not only saves time but also enhances your study experience, allowing you to focus on spiritual growth. This systematic approach keeps your materials tidy and readily available for future reference, sharing, and continued learning, ensuring your resources remain valuable and accessible for years to come.

Now recounting:
Organizing
and
archiving
Bible
study
PDFs
is
crucial
for

efficient
learning
and
quick
access
By
creating
folders
or
directories
on
your
device,
you
can
categorize
materials
by
topics
or
books
of
the
Bible,
making
them
easier
to
locate
Utilizing
tags
or
metadata
in
your
files
enhances
searchability
Regular
backups,
such
as
saving
to
cloud
storage,
ensure
your
study
resources
are
preserved
and
accessible
across
devices
A
well-organized
digital
library
not
only
saves
time
but
also
enhances
your
study
experience,
allowing
you
to
focus
on
spiritual
growth
This
systematic
approach
keeps
your
materials
tidy
and
readily
available
for
future
reference,
100. sharing,
101. and
102. continued
103. learning,
104. ensuring
105. your
106. resources
107. remain
108. valuable
109. and
110. accessible
111. for
112. years
113. to
114. come

Oops, now it’s . I need to trim it back to 111. Let me remove redundant words:

A well-organized digital library not only saves time but also enhances your study experience, allowing you to focus on spiritual growth. This systematic approach keeps your materials tidy and readily available for future reference and sharing, ensuring your resources remain valuable and accessible for years to come.

Now recount:

Organizing
and
archiving
Bible
study
PDFs
is
crucial
for
efficient
learning
and
quick
access
By
creating
folders
or
directories
on
your
device,
you
can
categorize
materials
by
topics
or
books
of
the
Bible,
making
them
easier
to
locate
Utilizing
tags
or
metadata
in
your
files
enhances
searchability
Regular
backups,
such
as
saving
to
cloud
storage,
ensure
your
study
resources
are
preserved
and
accessible
across
devices
A
well-organized
digital
library
not
only
saves
time
but
also
enhances
your
study
experience,
allowing
you
to

focus
on
spiritual
growth
This
systematic
approach
keeps
your
materials
tidy
and
readily
available
for
future
reference
100. and
101. sharing,
102. ensuring
103. your
104. resources
105. remain
106. valuable
107. and
108. accessible
109. for
110. years
111. to
112. come

Still . I’ll remove “and” before “continued learning” to adjust:

A well-organized digital library not only saves time but also enhances your study experience, allowing you to focus on spiritual growth. This systematic approach keeps your materials tidy and readily available for future reference, sharing, ensuring your resources remain valuable and accessible for years to come.

Now, recount:

Organizing
and
archiving
Bible
5

Incorporating Bible Study PDFs into Group Studies

Bible Study PDFs are easily shared and accessed by all group members, fostering unified learning and discussion. They serve as a common resource for study.

cobra 29 ltd classic manual

The Cobra 29 LTD Classic is a renowned CB radio offering 40 channels‚ heavy-duty microphone‚ and 4 Watts AM RF power. Its reliability and professional-grade features make it a favorite among drivers. This manual provides essential guidance for optimal use‚ ensuring users maximize its capabilities and enjoy seamless communication on the road.

1.1 Overview of the Cobra 29 LTD Classic CB Radio

The Cobra 29 LTD Classic is a professional CB radio featuring 40 channels‚ heavy-duty microphone‚ and 4 Watts AM RF power. Known for its durability and reliable performance‚ it is a popular choice among drivers. With SWR calibration and instant access to emergency channels‚ it ensures clear communication. Its classic design and robust build make it a trusted companion for professional use.

1.2 Importance of the Manual for Optimal Use

The manual is essential for understanding and maximizing the Cobra 29 LTD Classic’s features. It provides detailed instructions for installation‚ operation‚ and troubleshooting‚ ensuring proper setup and optimal performance. By following the manual‚ users can avoid common issues and fully utilize the radio’s capabilities‚ enhancing their communication experience on the road.

Key Features of the Cobra 29 LTD Classic

The Cobra 29 LTD Classic offers 40 CB channels‚ a heavy-duty dynamic microphone‚ 4 Watts AM RF power‚ SWR calibration‚ and instant access to emergency channels 9 and 19.

2.1 40 CB Radio Channels

The Cobra 29 LTD Classic features 40 CB radio channels‚ providing ample communication options for drivers. Channels 1-40 include both AM and FM frequencies‚ ensuring clear and reliable connections. This range supports both personal and professional use‚ making it ideal for long-haul truckers and recreational users seeking dependable communication on the go.

2.2 Heavy-Duty Dynamic Microphone

The Cobra 29 LTD Classic includes a heavy-duty dynamic microphone‚ designed for durability and clear audio transmission. Its robust construction withstands rough handling‚ while the dynamic design minimizes background noise. This microphone ensures professional-grade communication‚ making it ideal for both personal and professional use in demanding environments.

2.3 Full 4 Watts AM RF Power Output

The Cobra 29 LTD Classic delivers a full 4 Watts of AM RF power output‚ the maximum allowed by regulations. This ensures strong‚ clear transmissions and reliable communication‚ even in challenging conditions. The robust power output enhances performance‚ making it ideal for professional and long-distance CB radio use‚ while maintaining compliance with legal standards.

2.4 SWR Calibration

SWR (Standing Wave Ratio) calibration ensures optimal antenna system performance. Proper calibration minimizes signal loss and maximizes transmission efficiency. The Cobra 29 LTD Classic manual provides a step-by-step guide for SWR calibration‚ ensuring your radio operates at peak performance. This process is crucial for maintaining reliable communication and protecting your equipment from potential damage.

2.5 Instant Channel 9/19

The Cobra 29 LTD Classic features Instant Channel 9/19 buttons for quick access to emergency and information channels. Channel 9 is dedicated for emergency communications‚ while Channel 19 is commonly used for traffic updates. This convenient feature allows drivers to stay informed and connected without manual tuning‚ enhancing safety and convenience on the road.

Installation and Setup

Proper installation and setup of the Cobra 29 LTD Classic ensure optimal performance. Follow antenna requirements‚ SWR calibration‚ and mounting instructions for reliable operation and clear communication.

3.1 Antenna Requirements and Recommendations

For optimal performance‚ the Cobra 29 LTD Classic requires a suitable antenna. A magnet-mount or fiberglass whip antenna is recommended. Ensure proper tuning to achieve minimal SWR for clear communication and maximum range. Refer to the manual for detailed installation guidelines to ensure reliable operation.

3.2 SWR Calibration Process

Calibrate the SWR (Standing Wave Ratio) for optimal performance. Use an SWR meter and follow the manual’s instructions to adjust the calibration control. Set the meter to the CAL position‚ transmit on a low-traffic channel‚ and fine-tune for minimal reflection. Proper calibration ensures efficient power transfer and maximizes the radio’s range and reliability.

3.3 Mounting and Wiring Instructions

Mount the Cobra 29 LTD Classic securely in your vehicle using the provided hardware. Connect the power wires to a 12V DC source‚ ensuring proper grounding. Attach the antenna securely‚ following the manual’s guidelines. Route all cables neatly and avoid interference sources. Double-check all connections before powering on to ensure reliable performance and safe operation.

Operating Instructions

Power on the Cobra 29 LTD Classic‚ select desired channels‚ and adjust volume for clear communication. Use the PA function for public address or external speaker connectivity. Ensure proper antenna alignment for optimal signal strength and clarity during transmission and reception.

4.1 Basic Radio Operation

Turn on the Cobra 29 LTD Classic‚ select the desired channel‚ and adjust the volume for clear communication. Use the squelch control to minimize background noise. Ensure the antenna is properly installed and tuned for optimal signal strength. For additional guidance‚ consult the manual provided with your device. Proper setup ensures reliable performance and clear transmission.

4.2 Channel Selection and Tuning

Select the desired channel using the channel selector knob. Adjust the tuning controls for optimal signal clarity. Use the fine-tuning feature for precise adjustments. Ensure proper antenna setup for clear communication. Refer to the manual for specific tuning instructions. Regular tuning ensures strong signal reception and reliable performance while operating the Cobra 29 LTD Classic CB radio.

4.3 Volume and Squelch Controls

The Cobra 29 LTD Classic features adjustable volume and squelch controls. The volume knob regulates speaker output‚ allowing users to set their preferred sound level. The squelch control minimizes background noise by muting weak signals. Properly adjusting these settings ensures clear communication‚ with the squelch reducing static when no strong signal is present.

4.4 Using the PA (Public Address) Function

The Cobra 29 LTD Classic’s PA function allows it to operate as a public address system. To use it‚ connect external speakers and ensure proper wiring. Activate the PA mode via the front panel. This feature enhances communication in group settings‚ providing clear audio output for announcements or messages to an audience.

Maintenance and Troubleshooting

Regularly clean the unit and inspect cables for damage. Address static or reception issues by adjusting settings or antennas. Consult the manual for specific troubleshooting guidance to ensure optimal performance and resolve common problems effectively.

5.1 Routine Maintenance Tips

Regular maintenance ensures optimal performance. Clean the unit with a soft cloth‚ inspect cables for damage‚ and adjust antennas for proper SWR calibration. Store the radio in a dry‚ cool place and avoid exposure to extreme temperatures. Refer to the manual for specific care instructions to maintain functionality and extend the product’s lifespan effectively.

5.2 Common Issues and Solutions

Common issues include static interference‚ volume loss‚ or SWR calibration problems. For static‚ check antenna connections. Volume loss may indicate a faulty microphone or speaker. SWR issues can be resolved by recalibrating using the built-in process. Regular maintenance and proper setup often prevent these problems‚ ensuring reliable performance and clear communication with minimal downtime or signal disruption.

5.3 Microphone Replacement Guide

To replace the microphone‚ disconnect the old one from the 4-pin connector. Inspect for damage or wear. Install the new microphone‚ ensuring secure connection. Test functionality by transmitting. Refer to the manual for compatibility and proper fitment. Regularly cleaning the connector can prevent issues. Replacement ensures clear communication and optimal performance of your Cobra 29 LTD Classic CB Radio.

Circuit Diagram and Schematic

The circuit diagram of the Cobra 29 LTD Classic details its internal components‚ including integrated circuits and wiring connections. It aids in understanding the radio’s electronic architecture for repairs and modifications‚ ensuring proper functionality and alignment with operational standards.

6.1 Understanding the Circuit Diagram

The circuit diagram outlines the Cobra 29 LTD Classic’s components‚ such as transistors‚ capacitors‚ and resistors‚ showing how they connect. This visual guide helps users identify parts‚ troubleshoot issues‚ and perform repairs. It’s essential for understanding the radio’s electronic structure and ensuring modifications are done safely and effectively‚ maintaining optimal performance and functionality over time.

6.2 Component Identification

The Cobra 29 LTD Classic’s circuit diagram identifies key components‚ such as transistors‚ capacitors‚ and resistors‚ each playing a crucial role in the radio’s operation. Understanding these parts helps users pinpoint issues‚ perform repairs‚ and maintain functionality. Proper identification ensures safe and effective troubleshooting‚ preserving the radio’s performance and reliability over time.

Customer Support and Warranty Information

Cobra offers dedicated customer support at 773.889. The warranty ensures reliable service‚ provided the product is used as per manual instructions for optimal performance.

7.1 Contacting Cobra Customer Service

For assistance‚ contact Cobra Customer Service at 773.889. They are available to address any inquiries or issues not resolved by the manual. Visit www.cobra.com/support for additional resources and support options to ensure optimal use of your Cobra 29 LTD Classic CB Radio.

7.2 Warranty Details and Terms

The Cobra 29 LTD Classic is backed by a limited warranty covering manufacturing defects for a specified period. For details‚ refer to the manual or visit www.cobra.com/support. The warranty excludes damage from misuse or normal wear‚ ensuring protection for genuine product issues only.

User Reviews and Ratings

The Cobra 29 LTD Classic averages an 8.3/10 rating‚ praised for its durability and clear transmission. Users appreciate its professional-grade features but note its complex setup.

8.1 Average User Rating (8.3/10)

The Cobra 29 LTD Classic holds an average rating of 8.3/10‚ reflecting its popularity and performance. Users praise its durability‚ clear transmission‚ and professional-grade features. However‚ some note its complex setup and older design. This feedback highlights its reliability for experienced users while suggesting room for modernization in usability.

8.2 Common Praise and Criticisms

Users praise the Cobra 29 LTD Classic for its durability‚ clear transmission‚ and professional-grade features. Critics note its complex setup and outdated design. While it excels for experienced users‚ its lack of modern advancements may hinder ease of use for newcomers. Overall‚ it remains a solid choice for reliable CB communication despite some drawbacks.

Comparison with Other Cobra Models

The Cobra 29 LTD Classic stands out among Cobra models for its durability and professional features; It is often compared to the Cobra 25 LTD and Cobra 29 LX EU‚ with the Classic being preferred for its reliability and classic design‚ though it may lack some modern advancements of newer models.

9.1 Cobra 25 LTD vs. Cobra 29 LTD Classic

The Cobra 25 LTD is a compact CB radio with a backlit display‚ suitable for smaller spaces‚ while the 29 LTD Classic offers more power and professional features. The Classic is preferred for its durability and higher transmit power‚ making it ideal for long-haul drivers seeking reliable performance in demanding environments.

9.2 Cobra 29 LTD Classic vs. Cobra 29 LX EU

The Cobra 29 LTD Classic and 29 LX EU share similar features but differ in design and functionality. The LX EU model is tailored for European markets with additional channel support‚ whereas the Classic remains popular globally for its robust build and ease of use‚ catering to diverse user preferences and regional requirements.

Accessories and Compatible Equipment

The Cobra 29 LTD Classic supports various accessories‚ including recommended antennas‚ compatible microphones‚ and other equipment for enhanced performance and customization‚ ensuring optimal communication.

  • Recommended Antennas: High-quality options for improved signal reception.
  • Compatible Microphones: Durable and noise-canceling designs for clear audio.
  • Other Accessories: Mounting hardware and cables for seamless installation.

10.1 Recommended Antennas

For optimal performance with the Cobra 29 LTD Classic‚ consider using high-quality antennas. Popular options include the Cobra 29LTD Classic Antenna‚ Wilson 1000 Magnet Mount‚ and K40 Trucker Antenna. These antennas are designed for durability‚ offering improved signal strength and clear transmission. Magnetic and fiberglass models are ideal for versatility and ease of installation‚ ensuring reliable communication on the go.

  • Magnetic Mount Antennas: Easy to install and portable.
  • Fiberglass Antennas: Durable and weather-resistant.
  • Tunable Antennas: Allow for precise frequency adjustment;

10.2 Compatible Microphones and Speakers

The Cobra 29 LTD Classic supports various microphones and speakers for enhanced communication. Compatible options include dynamic microphones‚ noise-canceling mics‚ and external speakers like 4-inch or 6-inch models. These accessories ensure clear audio quality and durability‚ meeting the needs of professional drivers and CB enthusiasts. Use Cobra-approved products for optimal performance and compatibility.

  • Dynamic Microphones: Robust and reliable for clear voice transmission.
  • External Speakers: Enhance sound quality and reduce cabin noise.

DIY Repair and Modification

The Cobra 29 LTD Classic allows for DIY repairs and upgrades‚ such as replacing the microphone or upgrading the front panel. Follow step-by-step guides for improved performance.

11.1 Replacing the Classic Microphone

Replacing the microphone on the Cobra 29 LTD Classic is a straightforward process. Disconnect the old microphone‚ ensuring the 4-pin connector is carefully removed. Connect the new microphone‚ aligning the pins properly. Test the audio quality to confirm functionality. Detailed step-by-step guides are available in the manual or online resources for troubleshooting.

11.2 Upgrading the Front Panel

Upgrading the front panel of the Cobra 29 LTD Classic involves replacing knobs and buttons for improved functionality. Follow the manual’s detailed guide to disassemble the radio‚ remove the old panel‚ and install the new one. Ensure proper alignment and secure connections. This upgrade enhances both performance and aesthetic appeal‚ maintaining the radio’s professional-grade standards.

The Cobra 29 LTD Classic remains a trusted CB radio‚ offering reliability and professional features. This manual ensures optimal use‚ helping users maximize its performance and capabilities effectively.

12.1 Summary of Key Points

The Cobra 29 LTD Classic is a reliable CB radio with 40 channels‚ heavy-duty microphone‚ and 4W AM RF power. Its SWR calibration and instant channel access enhance performance. Designed for professional use‚ it offers durability and clear communication. This manual provides detailed guidance for installation‚ operation‚ and maintenance‚ ensuring optimal functionality and troubleshooting common issues effectively.

12.2 Final Thoughts on the Cobra 29 LTD Classic

The Cobra 29 LTD Classic remains a top choice for professionals and enthusiasts‚ offering reliable performance and durability. With its 40-channel capability‚ heavy-duty microphone‚ and 4W AM RF power‚ it ensures clear communication. User reviews highlight its ease of use and robust design. This radio continues to be a trusted companion for drivers‚ providing years of dependable service.

References and Further Reading

Refer to the official Cobra 29 LTD Classic manual for detailed instructions. Additional resources‚ including circuit diagrams and repair guides‚ are available on websites like CBTricks.com. User manuals and specifications can also be found on Cobra Electronics’ official website‚ ensuring comprehensive support for optimal use and troubleshooting.

13.2 Additional Resources and Guides

13.1 Official Cobra 29 LTD Classic Manual

The official Cobra 29 LTD Classic manual provides detailed instructions for installation‚ operation‚ and troubleshooting. It includes specifications‚ warranty information‚ and customer support details. Available on Cobra Electronics’ website‚ this manual ensures users can maximize the radio’s features and resolve issues effectively. Additional resources‚ like circuit diagrams‚ are also accessible for advanced users.

simplifying radical expressions filetype:pdf

Radical expressions involve roots like square roots or cube roots. They are used to simplify complex equations and solve real-world problems in math and science. Understanding radicals is essential for advanced algebra and calculus. These expressions often contain variables and constants under a radical sign, requiring specific rules for simplification. Mastering radicals enhances problem-solving skills in various fields.

1.1 Definition and Basic Concepts

A radical expression is a mathematical expression containing a radical sign (√), which represents a root of a number. It includes square roots, cube roots, and higher-order roots. The radicand is the number under the radical sign, and the index indicates the root degree. For example, in √(x), x is the radicand, and the root is square (index 2). Radical expressions are used to solve equations, simplify problems, and represent irrational numbers in algebra and calculus.

1.2 Importance of Simplifying Radical Expressions

Simplifying radical expressions is crucial for solving equations and comparing values. It helps in identifying like terms for combining radicals. Simplification also reveals underlying patterns, making it easier to solve complex problems. In fields like engineering and physics, simplified radicals are essential for accurate calculations. Additionally, they facilitate graphing and analyzing functions by reducing expressions to their simplest forms, ensuring clarity and precision in mathematical and real-world applications.

Basic Rules for Simplifying Radicals

Mastering the product and quotient rules is key to simplifying radicals. These rules help combine or divide radicals with the same index, ensuring expressions are in simplest form.

2.1 The Product Rule for Radicals

The product rule states that radicals with the same index can be multiplied by multiplying the radicands. For example, √a * √b = √(a*b). This rule simplifies expressions by combining like terms under a single radical. Proper application ensures expressions are in their simplest form, making further calculations easier. Always check if the radicals have the same index before applying this rule to avoid errors. This fundamental rule is crucial for simplifying complex radical expressions effectively.

2.2 The Quotient Rule for Radicals

The quotient rule allows you to divide two radicals with the same index by dividing their radicands. For example, √a / √b = √(a/b). This rule simplifies expressions involving division of radicals. Ensure the radicals have the same index before applying this rule. It is particularly useful for simplifying fractions with radicals in the numerator or denominator. Proper application of the quotient rule helps in reducing complex expressions to their simplest forms efficiently.

Common Mistakes When Simplifying Radicals

Common mistakes include incorrectly applying radical rules, failing to simplify fully, and mishandling properties of radicals, which can lead to incorrect solutions and hinder problem-solving progress.

3.1 Forgetting to Simplify Before Applying Rules

One common mistake is neglecting to simplify radical expressions before applying rules. This oversight can lead to more complex problems and incorrect results. For example, expressions like √(18) should first be simplified to 3√(2) before further operations. Failing to break down radicals into their simplest forms can make it difficult to apply product or quotient rules effectively. Always simplify radicals fully to ensure accurate and efficient solutions. This step is crucial for mastering radical operations.

3.2 Misapplying the Quotient Rule

Misapplying the quotient rule is a frequent error when simplifying radicals. The rule states that √(a)/√(b) = √(a/b), but only if both radicals have the same index. A common mistake is applying this rule to radicals with different indices, leading to incorrect simplifications. For example, attempting to combine √(16)/∛(8) directly is invalid. Always ensure radicals have the same index before applying the quotient rule to avoid errors and maintain accurate results in simplification.

Advanced Techniques for Simplifying Radicals

Advanced techniques involve factoring to simplify complex radicals and rationalizing denominators. These methods ensure expressions are simplified fully and correctly, enhancing problem-solving in math and science.

4.1 Factoring to Simplify Complex Radicals

Factoring is a crucial step in simplifying complex radicals. By breaking down expressions into factors, especially perfect squares or cubes, radicals can be simplified more effectively. This method ensures that all parts of the expression are considered, leading to accurate simplification. Proper factoring also helps in identifying any remaining unsimplifiable components, making it easier to rationalize denominators if needed. This technique is fundamental for handling intricate radical problems in higher-level mathematics. Always factor thoroughly before applying simplification rules.

4.2 Rationalizing Denominators

Rationalizing denominators involves eliminating radicals from the denominator of a fraction. This is achieved by multiplying both the numerator and denominator by the same radical, ensuring the value remains unchanged. For example, to rationalize 1/√2, multiply by √2/√2, resulting in √2/2. This technique is essential for presenting expressions in their simplest form and is widely used in algebra, calculus, and engineering. Always rationalize denominators when simplifying radical expressions for clarity and accuracy. Avoid leaving radicals in the denominator. Regular practice enhances mastery of this method.

Real-World Applications of Simplified Radicals

Simplified radicals are used in engineering, physics, and geometry to solve real-world problems. They aid in calculating distances, velocities, and areas, making them indispensable in practical applications.

5.1 Engineering and Physics Applications

In engineering, simplified radicals are used to calculate stress, strain, and material properties. In physics, they help determine velocities, accelerations, and energies. For instance, the square root of the mass-to-spring constant ratio simplifies harmonic motion equations. Similarly, in electrical engineering, radicals simplify impedance calculations. These applications demonstrate how radical simplification is crucial for accurate problem-solving in technical fields. By breaking down complex expressions, engineers and physicists can make precise calculations essential for innovation and design.

5.2 Geometry and Trigonometry Uses

In geometry, simplified radicals are essential for calculating distances and areas. The Pythagorean theorem often involves square roots, which must be simplified for accurate results. In trigonometry, radicals appear in solutions for triangles, particularly when dealing with square roots in equations. Simplifying these expressions helps in understanding triangle properties and solving complex geometric problems efficiently. This skill is vital for analyzing shapes and spaces, making it a foundational tool in both geometry and trigonometry.

Interactive Resources for Learning

Interactive resources like Khan Academy and online forums such as Reddit’s r/learnmath offer practice problems and discussions to aid in mastering radical simplification. These tools provide real-time support and diverse learning materials, helping students overcome challenges and build confidence.

6.1 Practice Problems and Quizzes

Online platforms like Albert Resources and Houston Community College offer extensive practice problems and quizzes on simplifying radicals. These exercises cover basic rules, such as the product and quotient rules, and include complex expressions. Websites like Khan Academy provide interactive quizzes with immediate feedback, helping students track progress. Reddit forums, such as r/learnmath, feature community discussions where users share challenges and solutions; Regular practice through these resources builds mastery and confidence in handling radical expressions effectively.

6.2 Video Tutorials and Demonstrations

Video tutorials are an excellent way to visually learn how to simplify radical expressions. Platforms like YouTube offer channels such as Khan Academy and 3Blue1Brown, which provide clear, step-by-step explanations. Many educational websites, including Coursera and Udemy, feature video lectures with examples and practice problems. These resources often include demonstrations of common mistakes and tips for avoiding them. Video tutorials allow learners to pause, rewind, and replay content, making complex concepts easier to grasp and master at their own pace.

Exam Preparation Tips

Practice consistently and manage your time wisely. Focus on common radical expression problems and review mistakes to improve accuracy. Create a study schedule and stick to it.

7.1 Time Management Strategies

Set a timer for each problem to simulate exam conditions. Prioritize simplifying radicals step-by-step. Allocate specific time slots for different types of problems. Review mistakes immediately to avoid repetition. Use practice tests to assess speed and accuracy. Break study sessions into intervals with short breaks to maintain focus. Consistency is key to mastering radical expressions quickly and efficiently during exams.

7.2 Common Exam Questions and Patterns

Exams often include problems simplifying radicals with variables, applying product/quotient rules, and rationalizing denominators. Common patterns involve factoring perfect squares or cubes. Multiple-choice questions test basic simplification, while free-response questions require step-by-step solutions. Look for problems combining radicals with fractions or exponents. Practice recognizing common radical forms and their simplified versions. Understanding these patterns helps anticipate and prepare for typical exam questions effectively.

Overcoming Difficulties in Simplifying Radicals

Simplifying radicals can be challenging due to common difficulties like complex factoring or misapplying rules. Building confidence through consistent practice and seeking guidance helps overcome these obstacles effectively.

8.1 Building Confidence Through Practice

Consistent practice is key to mastering radical simplification. Start with simple problems, gradually tackling complex ones. Use online resources like Albert and HCC materials for structured examples. Breaking problems into smaller steps helps clarify the process. Regular review of mistakes builds understanding and boosts confidence. Celebrate progress, no matter how small, to stay motivated. Over time, this dedication fosters proficiency and reduces anxiety when simplifying radicals.

8.2 Seeking Help and Resources

When struggling with radical simplification, seeking help is a proactive step. Utilize online resources like Albert’s review guides and HCC’s math support materials. Engage with communities such as Reddit’s r/learnmath for peer assistance. Video tutorials on platforms like Khan Academy offer visual explanations. Practice problems and quizzes from reliable sources can reinforce learning. Don’t hesitate to ask teachers or tutors for clarification. Combining these resources with consistent practice ensures a well-rounded understanding of radical expressions.

manual of uniform traffic control devices for canada

The Manual of Uniform Traffic Control Devices for Canada provides standardized guidelines for road signs, traffic signals, and pavement markings to ensure safety and compliance nationwide.

Overview of the Manual

The Manual of Uniform Traffic Control Devices for Canada is a comprehensive guide that standardizes the design, installation, and maintenance of traffic control devices nationwide. It ensures consistency in road signs, traffic signals, and pavement markings to promote safe and efficient traffic flow. The manual is updated periodically to reflect current research, technologies, and best practices in traffic management. It serves as a critical resource for transportation professionals, engineers, and policymakers to ensure compliance with national safety standards. The document covers a wide range of topics, from regulatory signs to temporary traffic control measures, providing detailed specifications for each device. Its goal is to enhance road user safety and reduce confusion by maintaining uniformity across all Canadian jurisdictions.

Structure and Organization

The Manual of Uniform Traffic Control Devices for Canada is organized into a logical structure to ensure clarity and accessibility. It is divided into numbered sections and subsections, each focusing on specific aspects of traffic control. The manual begins with an introduction, followed by an overview, and then delves into detailed chapters on traffic control devices, design standards, compliance, and maintenance. Appendices provide additional resources and guidelines for implementation. This structured approach allows users to easily locate information on topics such as road signs, traffic signals, and pavement markings. The manual’s organization reflects its purpose of providing a unified national standard for traffic control, ensuring consistency and safety across Canada.

Types of Traffic Control Devices

Traffic control devices include road signs, traffic signals, pavement markings, and temporary traffic control measures, each serving unique roles in guiding and regulating road user behavior safely.

4.1. Road Signs

Road signs are a critical component of the Manual of Uniform Traffic Control Devices for Canada, ensuring safety and order on public roads. They are categorized into regulatory, warning, and guide signs. Regulatory signs enforce traffic laws, such as speed limits and right-of-way rules, while warning signs alert drivers to potential hazards, like curves or pedestrian crossings. Guide signs provide directional and informational guidance, helping motorists navigate effectively. All signs are designed with standardized shapes, colors, and symbols to ensure clarity and consistency. Proper installation and maintenance of road signs are essential to maintain their effectiveness in guiding road users and preventing accidents.

4.1.1. Regulatory Signs

Regulatory signs are essential for enforcing traffic laws and ensuring compliance with road rules. These signs indicate mandatory actions or prohibitions, such as speed limits, stop signs, and one-way directions. Their design follows strict guidelines to ensure immediate recognition and understanding. Colors like red and white are used prominently to convey authority and urgency. Examples include “Stop,” “Yield,” and “Do Not Enter” signs. These signs are strategically placed to provide clear instructions to drivers, helping to maintain order and reduce accidents. Compliance with regulatory signs is enforced by law, making them a fundamental aspect of road safety in Canada.

4.1.2. Warning Signs

Warning signs are critical for alerting drivers to potential hazards or changes in road conditions. These signs are typically diamond-shaped and feature yellow backgrounds with black symbols or text. Their purpose is to provide advance notice of situations that may require drivers to adjust their speed or direction. Examples include signs for curves, intersections, pedestrian crossings, and roadwork. The Manual of Uniform Traffic Control Devices for Canada outlines specific designs and placements to ensure consistency and visibility. By informing drivers of upcoming conditions, warning signs play a key role in preventing accidents and maintaining smooth traffic flow. Their clear and standardized design helps drivers react appropriately, enhancing overall road safety.

4.1.3. Guide Signs

Guide signs provide directional or informational guidance to road users, helping them navigate efficiently. These signs are typically rectangular, with green or blue backgrounds, and are used to indicate destinations, services, or other helpful information. They are essential for assisting drivers in making informed decisions, especially on highways or in unfamiliar areas. Examples include signs for exits, rest areas, hospitals, and recreational facilities. The Manual of Uniform Traffic Control Devices for Canada ensures that guide signs are standardized in design, color, and placement to maintain consistency and readability. By clearly directing travelers, guide signs enhance navigation and reduce driver confusion, contributing to safer and more efficient road travel.

4.1.4. Construction Signs

Construction signs are temporary traffic control devices used to manage roadwork zones, ensuring safety for both workers and drivers. These signs are typically orange in color to enhance visibility and are placed to alert motorists of hazards, detours, or lane closures. They often include symbols or messages like “Road Work Ahead” or “Detour.” The Manual of Uniform Traffic Control Devices for Canada outlines specific designs and placement requirements for these signs to maintain consistency and clarity. Construction signs play a critical role in minimizing disruptions and preventing accidents in work zones. By providing clear guidance, they help maintain traffic flow and protect workers and travelers alike during construction projects.

4.2. Traffic Signals

Traffic signals are essential devices that regulate the movement of vehicles and pedestrians at intersections and mid-block locations. The Manual of Uniform Traffic Control Devices for Canada provides detailed standards for their design, installation, and operation to ensure consistency and safety. Standard traffic signals typically consist of three colors: red, yellow, and green, indicating when traffic should stop, prepare to stop, or proceed. Additionally, specialized signals such as pedestrian signals and arrow indications are used to manage turning movements and pedestrian crossings. These signals are critical for maintaining traffic flow, reducing congestion, and preventing accidents. Regular maintenance is required to ensure they function correctly and remain visible to all road users.

4.3. Pavement Markings

Pavement markings are vital traffic control devices that guide drivers and pedestrians, ensuring safe and efficient movement on roadways. The Manual of Uniform Traffic Control Devices for Canada outlines standards for these markings, which include lines, arrows, and symbols painted or applied to the road surface. Common types include solid and dashed lines for lane divisions, arrows for directional guidance, and crosswalks for pedestrian crossings. These markings are designed to be durable and visible under various lighting and weather conditions. They play a crucial role in maintaining traffic flow, reducing accidents, and enhancing overall road safety. Compliance with these standards ensures consistency across Canada, helping drivers easily understand and follow traffic rules nationwide.

4.4. Temporary Traffic Control

Temporary traffic control devices are essential for managing traffic during construction, maintenance, or special events. The Manual of Uniform Traffic Control Devices for Canada provides detailed guidelines for their deployment. These devices include cones, barricades, warning signs, and portable traffic signals to ensure safety and minimize disruptions. Proper placement and maintenance are critical to maintain visibility and driver understanding. Temporary controls must align with permanent traffic devices to avoid confusion. They are designed to adapt to varying conditions, ensuring efficient traffic flow and protecting workers in work zones. Compliance with these standards is mandatory to maintain safety and consistency across all temporary traffic control situations in Canada.

Design and Installation Standards

The Manual of Uniform Traffic Control Devices for Canada establishes comprehensive design and installation standards for traffic control devices. These standards ensure consistency, safety, and efficiency in guiding road users. Factors such as visibility, durability, and uniformity are prioritized in the design of signs, signals, and markings. Installation guidelines include specifications for placement, spacing, and alignment to maximize effectiveness. The manual also addresses the use of retroreflective materials and lighting for enhanced visibility at night. Compliance with these standards is crucial to maintain road safety and reduce crashes. Regular updates incorporate advancements in technology and best practices. Adherence to these standards ensures that traffic control devices meet the needs of all road users, including drivers, pedestrians, and cyclists.

Compliance and Enforcement

Compliance with the Manual of Uniform Traffic Control Devices for Canada is enforced by federal, provincial, and municipal authorities. These bodies ensure that all traffic control devices meet the specified standards to maintain road safety and efficiency. Regular inspections are conducted to verify adherence to the manual’s guidelines, and non-compliance may result in penalties or corrective actions. Enforcement also involves public education campaigns to raise awareness about traffic laws and the importance of following traffic control devices. Additionally, updates to the manual are disseminated to relevant stakeholders to ensure consistent implementation. Compliance is critical to reducing accidents and ensuring smooth traffic flow across Canada.

Recent Updates and Trends

The Manual of Uniform Traffic Control Devices for Canada has seen recent updates to align with evolving transportation needs and technologies. These updates include the integration of digital traffic control systems, enhanced visibility standards for road signs, and the adoption of smart traffic management solutions. There is also a growing emphasis on active transportation, with new guidelines for pedestrian and cyclist infrastructure. Additionally, updates reflect advancements in materials science, such as reflective coatings and energy-efficient lighting. These changes aim to improve road safety, reduce congestion, and accommodate emerging modes of transportation. Public consultations and stakeholder feedback have played a key role in shaping these updates, ensuring the manual remains relevant and effective in modern traffic environments.

Case Studies and Examples

Real-world applications of the Manual of Uniform Traffic Control Devices for Canada highlight its practical effectiveness. For instance, Toronto’s implementation of smart traffic signals reduced congestion by 20% during peak hours. In Vancouver, the use of dynamic messaging signs improved incident response times by 15%. The City of Montreal successfully integrated pedestrian-only zones, enhancing safety in urban areas. Additionally, the manual’s guidelines were instrumental in managing traffic flow during construction at the Port of Montreal. These case studies demonstrate how adherence to the manual’s standards can lead to measurable improvements in traffic management and safety. They also provide valuable insights for other municipalities looking to adopt similar strategies.

Maintenance and Inspection

Regular maintenance and inspection of traffic control devices are essential to ensure safety and compliance with the Manual of Uniform Traffic Control Devices for Canada. This includes cleaning signs, replacing damaged or faded markings, and testing traffic signals. Proper upkeep prevents accidents and maintains clear communication with road users. Routine inspections help identify issues before they escalate, ensuring devices remain functional and visible. Local authorities are responsible for scheduling and performing these tasks, often guided by the manual’s standards.

Inspections should occur at least annually, with high-traffic areas requiring more frequent checks. Detailed guidelines in the manual outline specific procedures for maintaining roads, ensuring consistency and reliability in traffic control measures nationwide.

Technological Advancements

Technological advancements are revolutionizing traffic control in Canada, enhancing safety and efficiency. Smart traffic signals now adapt to real-time conditions, reducing congestion and improving flow. Digital signage enables real-time updates for drivers, while data analytics optimize traffic management. Sensors and cameras monitor road conditions, detecting incidents swiftly. Integration with connected vehicles promises future readiness, ensuring seamless communication between infrastructure and vehicles. These innovations align with the Manual of Uniform Traffic Control Devices for Canada, modernizing transportation systems. They also support environmental goals by reducing traffic-related emissions. As technology evolves, it plays a crucial role in shaping safer, smarter roads nationwide.

Challenges and Future Directions

The Manual of Uniform Traffic Control Devices for Canada faces challenges in balancing innovation with consistent standards. Ensuring compliance across provinces while addressing diverse regional needs remains critical. Public education on traffic rules and device updates is essential to maintain safety. Additionally, adapting to emerging technologies like autonomous vehicles and smart infrastructure requires careful planning. Future directions include integrating data-driven solutions, enhancing accessibility for pedestrians, and adopting sustainable materials; Collaboration between stakeholders will be key to advancing traffic control systems while preserving uniformity nationwide.

The Manual of Uniform Traffic Control Devices for Canada is a foundational resource for ensuring road safety and efficient traffic management. By standardizing signs, signals, and markings, it promotes consistency and clarity for all road users. The manual addresses diverse regional needs while maintaining national uniformity, adapting to technological advancements and evolving transportation demands. Its emphasis on compliance and public education underscores its commitment to reducing accidents and enhancing mobility. As transportation systems evolve, the manual will continue to play a vital role in guiding the implementation of traffic control measures, ensuring Canada’s roads remain safe and accessible for generations to come.

viper 7345v manual

Welcome to the Viper 7345V manual, your comprehensive guide to understanding and utilizing the advanced features of this cutting-edge vehicle security system. Designed to enhance your car’s protection and convenience, this manual provides detailed instructions for installation, operation, and troubleshooting. Whether you’re a new user or looking to optimize your setup, this resource is essential for unlocking the full potential of your Viper 7345V system.

1.1 Overview of the Viper 7345V System

The Viper 7345V is a cutting-edge, 2-way vehicle security and remote start system designed for enhanced convenience and protection. It features a sleek LCD remote control, offering real-time feedback, and includes advanced functions like remote start, panic mode, and door lock/unlock capabilities. The system is compatible with various vehicles and provides reliable performance, making it a top choice for modern car owners seeking advanced security solutions.

1.2 Importance of Reading the Manual

Reading the Viper 7345V manual is crucial for maximizing system performance and ensuring proper installation. It provides essential details on features, troubleshooting, and maintenance, helping you avoid potential errors. By understanding the guide, you can utilize all functions safely and effectively, ensuring your vehicle’s security and your convenience are optimized. This manual is your key to unlocking the full potential of the Viper 7345V system.

Key Features of the Viper 7345V

The Viper 7345V offers advanced security and convenience features, including 2-way communication, an LCD display, remote start, auxiliary output, panic button, and door lock/unlock functionality, ensuring enhanced vehicle protection and user control.

2.1 2-Way Communication and LCD Display

The Viper 7345V features a 2-way communication system, ensuring real-time feedback between the remote and vehicle. The LCD display provides clear status updates, such as arming, disarming, and remote start confirmation. This advanced feature enhances user experience by delivering immediate responses and system notifications, offering peace of mind and seamless control over your vehicle’s security and functionality.

2.2 Remote Start and Auxiliary Output

The Viper 7345V offers convenient remote start functionality, allowing you to start your engine from a distance. Additionally, the auxiliary output enables control of aftermarket accessories, enhancing your vehicle’s customization. This feature-rich system ensures comfort and flexibility, making it easier to manage your car’s security and accessories with just a few button presses on the remote control.

2.3 Panic Button and Door Lock/Unlock Functions

The Viper 7345V features a panic button that activates the car’s alarm and flashes the lights in emergency situations. The system also includes door lock and unlock functions, providing convenient control over your vehicle’s security. With the remote, you can effortlessly secure or grant access to your car, ensuring peace of mind wherever you are. These functions are designed to enhance safety and accessibility seamlessly.

Installation Guidelines

Proper installation is crucial for optimal performance. Follow pre-installation checks, ensure wiring connections are secure, and refer to the manual for step-by-step instructions. Safety first!

3.1 Pre-Installation Checks

Before installing the Viper 7345V, ensure your vehicle is compatible and gather necessary tools. Check the system components for damage and verify the remote controls are functional. Review the manual to understand wiring diagrams and ensure all accessories are included. Proper preparation ensures a smooth and successful installation process for your security system.

3.2 Step-by-Step Installation Process

Begin by mounting the control module in a secure, accessible location. Connect the wiring harness to the vehicle’s electrical system, ensuring proper grounding. Install the siren in a visible, weather-protected area. Connect sensors, such as door and hood triggers, and program the remote controls. Follow the wiring diagram for accurate connections. Double-check all links before testing the system to ensure functionality and reliability.

Programming the Viper 7345V Remote

Programming the remote involves syncing it with your vehicle’s security system. Enter programming mode by pressing the control center button and following the on-screen prompts.

Once synced, test all remote functions to ensure proper connectivity and functionality. Refer to the manual for troubleshooting steps if issues arise during the process.

4.1 Remote Control Pairing Instructions

To pair the remote, start by entering programming mode. Hold the control center button until the system LED flashes. Next, press the remote’s panic button for three seconds. The LED will flash twice, confirming successful pairing. Repeat for additional remotes, ensuring each is paired individually. If issues occur, reset the remote by pressing and holding the panic button for 10 seconds.

4.2 Resetting the Remote and System

To reset the remote and system, start by turning off the ignition. Press and hold the control center button for 5 seconds, then release it. Next, press and hold the panic button on the remote for 3 seconds. The system LED will flash once, indicating a successful reset. Repeat this process for all remotes. After resetting, test the remote to ensure proper functionality.

Remote Control Operations

The Viper 7345V remote offers seamless control over your vehicle’s security and convenience features. With an LCD display showing real-time status updates, you can arm, disarm, lock, and unlock effortlessly. Enjoy reliable long-range communication, ensuring your commands are executed without delay. Mastering these operations ensures a smooth and secure experience for your vehicle.

5.1 Basic Functions: Arming, Disarming, and Locking

Mastering the basic functions of your Viper 7345V remote ensures enhanced security and convenience. Arm your system to activate alarms and immobilize your vehicle, while disarming deactivates these features. Locking functions secure your doors, and unlocking provides easy access. These essential operations are straightforward, with LED and LCD feedback confirming each action. Regular practice ensures smooth and reliable vehicle control, keeping your car protected and accessible at all times.

5.2 Advanced Features: Remote Start and Auxiliary Activation

The Viper 7345V excels with its remote start feature, allowing you to start your engine from a distance for convenience. Auxiliary activation enables control of additional accessories, enhancing system flexibility. The LCD display provides real-time feedback, ensuring smooth operation. These advanced features integrate seamlessly, offering a user-friendly experience that enhances your vehicle’s security and functionality.

Troubleshooting Common Issues

Identify and resolve issues with your Viper 7345V system by checking remote functionality, system errors, and connectivity. Consult the manual for step-by-step solutions to ensure optimal performance.

6.1 Diagnosing Remote Control Problems

Common issues with the Viper 7345V remote include intermittent signal reception or complete loss of communication. Check battery levels, ensure proper pairing, and verify system settings. If problems persist, reset the remote by following the manual’s instructions. For advanced diagnostics, consult the troubleshooting section or contact customer support for further assistance to resolve remote-related malfunctions effectively.

6.2 Resolving System Errors and Alarms

If your Viper 7345V system triggers an alarm or displays an error, check for issues like manual transmission start mode or Virtual Tach reset. Ensure all settings are correct and cycle the ignition to reset the system. For persistent errors, refer to the manual’s troubleshooting guide or contact customer support for specialized assistance to restore functionality and eliminate false alarms effectively.

Maintenance and Upkeep

Regularly clean the remote with a soft cloth and avoid harsh chemicals. Perform system checks to ensure all components function properly, maintaining optimal performance and reliability over time.

7.1 Cleaning and Caring for the Remote

To maintain your Viper 7345V remote’s functionality, clean it with a soft, dry cloth. Avoid using harsh chemicals or abrasive materials, as they may damage the LCD display or buttons. Regularly inspect the remote for dirt or debris, especially around the buttons and screen, to ensure clear communication with your vehicle’s system. Proper care extends the remote’s lifespan and reliability.

7.2 Regular System Checks

Perform regular system checks to ensure your Viper 7345V operates flawlessly. Test the remote’s functionality, including 2-way communication and LCD display responsiveness. Verify the system’s alarm and remote start features are working correctly. Check for firmware updates and ensure the battery levels are optimal. Regularly inspect wiring and connections for any signs of damage or wear. Addressing issues promptly helps maintain reliability and performance over time.

Warranty and Support

The Viper 7345V system is backed by a comprehensive warranty covering manufacturing defects. For support, visit the official website or contact customer service for assistance and resources.

8.1 Understanding the Warranty Coverage

The Viper 7345V warranty covers defects in materials and workmanship for a specified period. It typically includes repairs or replacements of faulty components, ensuring your system remains reliable. Terms vary, so review the official documentation for details on coverage duration and conditions. Proper installation and usage are essential to maintain warranty validity. Always refer to the manual for specific guidelines.

8.2 Contacting Customer Support

For assistance with your Viper 7345V system, contact customer support through the official website or support center. Resources include FAQs, downloadable manuals, and troubleshooting guides. Visit www.directechs.com for detailed support options, or refer to the manual for specific contact information. Ensure you have your product details ready for efficient service. Online support is available to address any queries or concerns promptly.

Safety Precautions

Always follow safety guidelines when operating the Viper 7345V system. Ensure proper installation and use to avoid accidents. Handle alarms and system errors responsibly, adhering to emergency procedures outlined in the manual.

9.1 General Safety Guidelines

Always read and follow the Viper 7345V manual instructions carefully. Ensure the system is installed by a certified professional to prevent malfunctions. Keep the remote control out of reach of children and avoid using it near flammable materials. Regularly check the system’s components and update software as needed to maintain optimal performance and safety.

9.2 Emergency Procedures

In case of an emergency, ensure your safety first. If the system triggers an alarm unexpectedly, press the panic button or disarm using the remote. For a remote start malfunction, turn the ignition on and restart the engine manually. If the system fails to respond, refer to the troubleshooting section or contact customer support immediately for assistance.

Additional Resources

Access the Viper 7345V manual PDF, online support, and FAQs for comprehensive guidance. Visit the official website for downloads and troubleshooting assistance anytime.

10.1 Downloading the PDF Manual

To download the Viper 7345V manual, visit www.directechs.com. Go to the Resources section and choose your language. Spanish and French versions are available. Ensure you have a PDF viewer to access the guide, covering installation, programming, and troubleshooting. Contact customer support if you encounter any issues during the process.

10.2 Online Support and FAQs

For additional assistance, visit the official Viper website, which offers extensive online support and FAQs. Navigate to the Support Center for troubleshooting guides, user forums, and detailed answers to common questions. The FAQs section covers topics like remote pairing, system errors, and warranty information. If issues persist, contact customer support directly via phone or email for personalized assistance. This ensures optimal use of your Viper 7345V system.

The Viper 7345V manual provides a comprehensive guide to maximizing your system’s potential. Follow the instructions carefully to ensure optimal performance and security for your vehicle.

11.1 Final Tips for Optimal Use

Regularly update your system and remotes for the latest features. Always use genuine Viper accessories to ensure compatibility. Keep the remote clean and dry to maintain functionality. Test your remote start and security features periodically. Refer to the PDF manual for advanced settings. Explore all functions, like auxiliary activation, to maximize convenience. For troubleshooting, consult the online support or FAQs section for quick solutions.

print photo book from pdf

Choosing the Right PDF and Design for Your Photo Book

Ensure your PDF meets the printing service’s specifications for resolution, bleed, and margins. Select a design that complements your photos, using templates or custom layouts for a polished look.

1.1 Understanding PDF Requirements for Photo Books

Ensure your PDF meets printing standards: 300 DPI resolution, CMYK color mode, and proper bleed settings (typically 3-5mm). Check file size limits, as large PDFs may cause uploading issues. Verify page dimensions match the book size you’ve chosen. Avoid using low-quality images or incorrect fonts, as this can affect print quality. Most services provide specific guidelines, so review them carefully before submission to avoid delays or formatting issues.

1.2 Designing Your Photo Book Layout

Start by organizing your photos into a cohesive sequence. Use design tools like Adobe InDesign or Canva to create a custom layout. Balance text and images, ensuring visual flow. Consider themes or templates that match your book’s theme. Pay attention to margins, spacing, and alignment to maintain professionalism. Test different layouts and seek feedback to refine your design before finalizing the PDF for printing.

Selecting a Printing Service for Your Photo Book

Compare online printing services based on paper quality, binding options, and cost. Ensure they support custom PDF uploads and offer options like hardcover or softcover formats. Check user reviews for reliability and turnaround times to find the best fit for your photo book project.

2.1 Popular Online Photo Book Printing Services

Shutterfly, Snapfish, Mixbook, and Blurb are top choices for printing photo books from PDFs. They offer customizable templates, high-quality paper, and binding options. Shutterfly and Snapfish are great for personal projects, while Mixbook and Blurb cater to both amateurs and professionals. Lulu is another excellent option for self-publishing with custom PDF uploads. These platforms ensure vibrant colors and durable finishes, making your photo book stand out.

2.2 Comparing Printing Options and Quality

When comparing printing services, consider paper quality, binding types, and color accuracy. Shutterfly and Snapfish offer vibrant colors and durable finishes, while Mixbook excels in customization. Blurb is ideal for professional photographers, ensuring high-resolution output. Compare pricing, turnaround times, and customer reviews to choose the best option for your PDF photo book. Higher-end services like ProDuo or Saal Digital offer superior paper and binding for premium results.

Preparing Your PDF for Printing

Check resolution, ensure file size is manageable, and verify color accuracy. Set proper bleed margins and export as a press-ready PDF for optimal printing results.

3.1 Checking Resolution and File Size

Ensure your PDF has a resolution of 300 DPI for crisp images. Check file size to avoid excessive data, as large files may slow printing. Use tools like Adobe Acrobat to verify resolution and compress files if necessary. High-resolution images are essential for professional results, but overly large files can cause compatibility issues. Optimize your PDF to balance quality and efficiency for seamless printing.

3.2 Ensuring Color Accuracy and Bleed Settings

Use color profiles like sRGB or Adobe RGB for consistent hues. Set bleed areas (0.125–0.25 inches) to prevent white edges during trimming. Ensure designs extend beyond the trim lines in your PDF. Check with the printing service for specific bleed requirements. Proper color accuracy and bleed settings ensure your photo book looks professional and polished, avoiding unwanted white spaces or color mismatches in the final print.

Printing Your Photo Book

Access print settings in Adobe Acrobat/Reader using Ctrl+P (Windows) or Cmd+P (Mac). Ensure paper size, layout, and printer settings match your PDF photo book requirements.

4.1 Steps to Print a PDF Photo Book

To print your PDF photo book, open the file in Adobe Acrobat/Reader and press Ctrl+P (Windows) or Cmd+P (Mac). Select your printer and adjust settings such as paper size, orientation, and layout. Ensure “Fit to Page” is disabled to maintain your design. Choose high-quality print settings for optimal image reproduction. Print a test page to verify colors and layout before printing the entire book.

4.2 Customizing Printing Settings

Customize print settings by selecting paper type, color profiles, and page margins. Use high-quality print resolution and enable duplex printing for double-sided pages. Adjust orientation to match your photo book’s design. Ensure “bleed” settings are correctly applied to avoid cropped images. Preview your layout before printing to verify alignment and color accuracy. Save custom settings as a preset for future use to maintain consistency across prints.

Tips for Creating a Professional-Looking Photo Book

Organize photos logically, use high-quality images, and incorporate concise text. Utilize design tools or templates to enhance visual appeal and ensure consistent formatting throughout your photo book;

5.1 Organizing Photos and Text

Start by categorizing your photos into themes or events. Use a clear structure, placing text near relevant images for context. Balance visuals with concise captions, ensuring readability. Avoid clutter by spacing elements evenly. Tools like design software can help arrange content seamlessly. A well-organized layout enhances storytelling and makes your photo book engaging and professional. Consistency in style and alignment is key to a polished finish.

5.2 Using Templates and Design Tools

Templates simplify the design process, offering pre-designed layouts for various themes. Tools like Adobe Acrobat, Canva, or Photoshop enable customization. Export your PDF with proper settings for printing. Use design software to arrange photos and text cohesively. Ensure consistency in fonts and colors. Experiment with tools to enhance visual appeal. Select templates that match your photo book’s style for a professional finish. This saves time and ensures a polished look.

Cost Considerations and Budgeting

Determine your budget based on book size, paper quality, and binding type. Compare pricing across services, considering quantity and extras like custom covers.

6.1 Comparing Prices Across Printing Services

Research and compare pricing from top photo book printing services like Shutterfly, Snapfish, and Blurb. Consider base costs, discounts, and additional fees for custom covers or bindings. Check for coupons or promotions that can reduce expenses. Some services offer better value for larger orders, while others excel in premium materials. Read reviews and forums, like Reddit, for user recommendations on cost-effective options that meet your quality expectations.

6.2 Factors Affecting the Final Cost

The final cost of your photo book depends on size, page count, and material quality; Hardcover books are typically more expensive than softcover options. Paper type, such as glossy or matte, and binding quality also impact pricing. Additional services like custom covers or professional editing can increase costs. Discounts and promotions may reduce the price, so check for seasonal offers or bulk order savings to optimize your budget.

Additional Services and Enhancements

Enhance your photo book with custom covers, binding options, and professional editing services. These extras create a polished and unique final product.

7.1 Adding Custom Covers and Bindings

Custom covers and bindings elevate your photo book’s professionalism. Choose from materials like leather, fabric, or matte finishes. Opt for hardcover, softcover, or spiral binding for durability. Personalize covers with foil stamping, embossing, or full-color prints. Ensure designs align with your book’s theme and printing service guidelines for optimal results. These enhancements add a personal touch, making your photo book truly unique and visually appealing.

7.2 Editing and Proofreading Services

Professional editing and proofreading services ensure your photo book is polished and error-free. These services often include grammar checks, clarity improvements, and consistency in formatting. Many printing providers offer these options to enhance your book’s quality. Consider hiring a professional editor or using online tools to refine text and photo arrangements before finalizing your PDF for printing.

Troubleshooting Common Issues

Common issues include PDF errors, layout misalignments, and compatibility problems. Check print settings, file formats, and design tools to resolve these issues before printing your photo book.

8.1 Resolving PDF Compatibility Problems

When encountering PDF compatibility issues, ensure your file adheres to the printer’s specifications. Check for embedded fonts, correct page sizes, and proper bleed settings. Use tools like Adobe Acrobat to export your PDF in a standard format. If issues persist, contact customer support or re-export your design using recommended settings to ensure seamless printing.

8.2 Fixing Layout and Formatting Errors

To resolve layout issues, check page margins, image resolution, and text alignment. Ensure all elements fit within the printable area and adjust bleed settings if necessary. Use design software to preview your PDF and correct formatting errors. Proofread text and verify image placement before finalizing. If errors persist, export your design in a standard format and review it using tools like Adobe Acrobat.

Ensure a high-quality final product by proofreading and checking settings. Share your photo book with pride, reflecting your creative vision and memories. Enjoy the journey of creating lasting memories.

9.1 Ensuring a High-Quality Final Product

Proofread your PDF for errors and ensure high-resolution images; Verify color accuracy and proper bleed settings. Double-check printing settings to match your design. Use templates or custom layouts for a polished look. Ensure all photos are properly aligned and text is readable. Review the preview before printing. Consider ordering a test copy to confirm quality. Pay attention to paper type and binding options for durability. These steps will help create a professional and lasting photo book.

9.2 Sharing Your Photo Book