la la land cafe nutrition information pdf free

La La Land Cafe offers transparent nutrition information, providing customers with a free PDF guide to make informed choices․ Their commitment to kindness extends beyond food, fostering community impact and youth support․

Overview of La La Land Cafe’s Commitment to Transparency

La La Land Cafe prioritizes transparency by providing free nutrition information to empower health-conscious customers․ Their commitment extends beyond food quality, fostering trust through accessible PDF guides and online resources․ This approach reflects their mission to support both customer well-being and community impact, ensuring everyone can make informed choices while enjoying their menu offerings․

Importance of Accessing Nutrition Information for Health-Conscious Customers

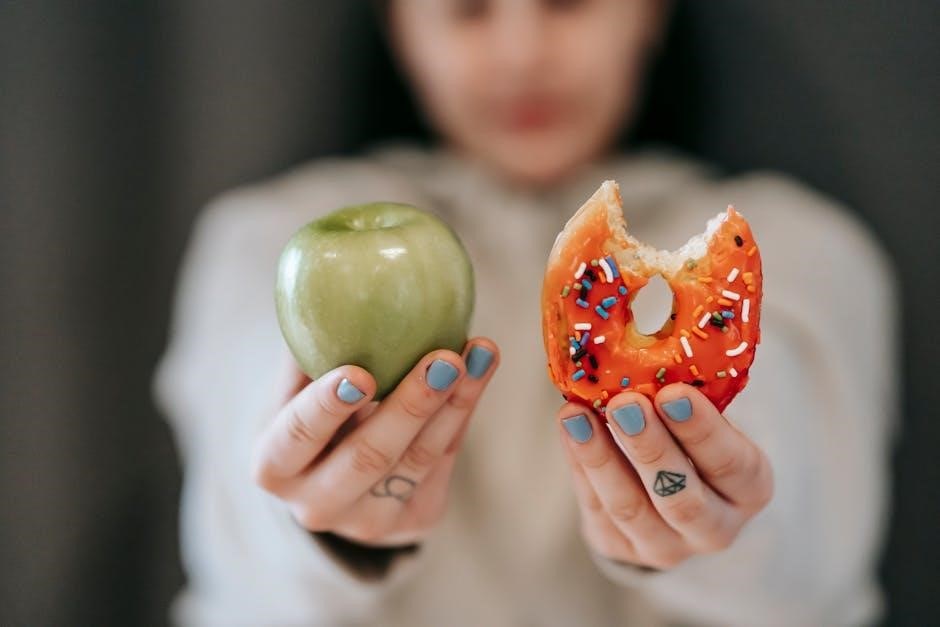
For health-conscious customers, accessing nutrition information is crucial for making informed dietary decisions․ La La Land Cafe’s free PDF guide provides detailed insights into calories, macronutrients, and dietary fiber, enabling customers to align their choices with personal health goals․ This transparency supports those managing specific diets or preferences, fostering trust and satisfaction with their dining experience․

How to Access La La Land Cafe Nutrition Information for Free

Access La La Land Cafe’s nutrition information for free by downloading their PDF guide from the official website or mobile app, ensuring comprehensive details at your fingertips․

Steps to Download the Nutrition Information PDF

Visit La La Land Cafe’s official website and navigate to the Nutrition or Menu section․ Locate the Download PDF option and click to access the guide․ The PDF is well-organized, covering items like coffee, salads, and toast, with detailed nutritional facts including calories, fiber, and sugar content․ This free resource aids health-conscious diners in making informed choices, reflecting the cafe’s commitment to transparency and customer well-being․

Availability of Nutrition Data on the Official Website and Mobile App

La La Land Cafe provides comprehensive nutrition data on their official website and mobile app, ensuring easy access for customers․ The website features detailed nutritional facts for each menu item, while the app offers a user-friendly interface to explore calories, macronutrients, and dietary fiber․ Additionally, the PDF guide can be downloaded directly from these platforms, making it simple for diners to review and plan their meals accordingly, anytime and anywhere․

Menu and Nutrition Information Details

La La Land Cafe’s menu offers detailed nutrition facts, including calories, carbs, and fiber, for items like signature coffees, coolers, salads, and bowls, ensuring informed dining choices․

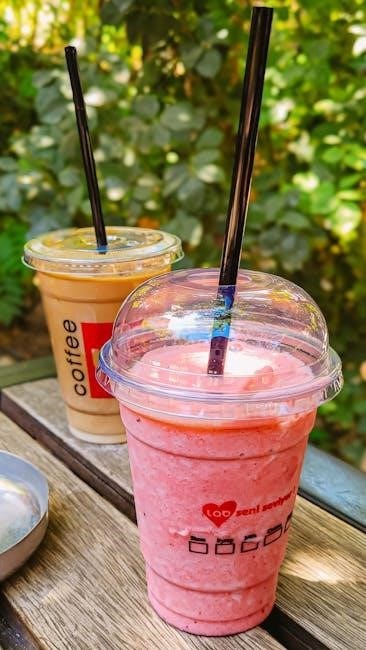
Signature Coffee and Cooler Beverages Nutritional Breakdown

La La Land Cafe’s signature coffee and cooler beverages provide detailed nutrition facts, including calories, carbs, and fiber․ An iced latte ranges from 130-150 calories, with 20-25g of carbs and 0-1g of fiber․ Coolers, like the chia tea latte, offer similar profiles․ The PDF guide highlights these breakdowns, ensuring customers can make informed choices․ Customization options, such as alternative milks, further tailor nutritional content to individual preferences, aligning with the cafe’s commitment to transparency and customer health․

Detailed Nutritional Facts for Salads, Bowls, and Toast

La La Land Cafe provides comprehensive nutritional details for salads, bowls, and toast in their free PDF guide․ The cucumber salad, for instance, contains approximately 120 calories, 8g of protein, 6g of fat, and 10g of carbs, with 4g of dietary fiber․ These balanced profiles cater to health-conscious diners, ensuring transparency and informed choices․ The detailed facts highlight the cafe’s commitment to offering wholesome, nutritious options that align with diverse dietary needs and preferences, making every meal a mindful one․

Popular Menu Items and Their Nutritional Highlights

La La Land Cafe’s menu features popular items like iced lattes and cucumber salad․ The iced latte contains 120 calories, 3g fat, and 15g sugar, while the cucumber salad offers 100 calories, 2g fat, and 5g protein․ These items are highlighted for their balanced nutritional profiles, catering to health-conscious diners seeking delicious yet mindful options․

Calorie and Macronutrient Content of Iced Lattes and Cucumber Salad

La La Land Cafe’s iced lattes provide 120 calories, 3g of fat, 15g of sugar, and 4g of protein, making them a moderately indulgent choice․ The cucumber salad offers 100 calories, 2g of fat, 6g of dietary fiber, and 5g of protein, serving as a lighter, nutrient-rich option․ Both items are popular for their balanced macronutrient profiles, catering to health-conscious diners․ These details are available in the free nutrition information PDF on their official website and mobile app․

Dietary Fiber and Sugar Content in Signature Items

La La Land Cafe’s signature items, such as their cucumber salad, contain 6g of dietary fiber and 4g of sugar, promoting digestive health․ Their iced lattes have 15g of sugar, while their toast options offer 3g of fiber․ These balanced profiles cater to health-conscious diners․ The free nutrition PDF provides detailed fiber and sugar content for all menu items, ensuring transparency and helping customers make informed choices aligned with their dietary goals․

Healthy Options and Recommendations

La La Land Cafe offers high-fiber and low-calorie options, such as salads and whole-grain toast, perfect for health-conscious diners․ Their nutrition PDF guide helps customers make informed choices․

Low-Calorie and High-Fiber Options for Health-Conscious Diners

La La Land Cafe provides a variety of low-calorie and high-fiber options, including fresh salads, whole-grain toast, and lighter beverages․ Their nutrition PDF guide details each menu item, making it easy for diners to identify healthier choices․ With options like the popular cucumber salad and iced lattes, customers can enjoy flavorful meals while maintaining their dietary preferences․ The cafe’s commitment to transparency ensures that health-conscious diners can make informed decisions without compromising on taste․

Customization Tips for Special Dietary Needs

La La Land Cafe accommodates special dietary needs by offering customization options․ Customers can opt for alternative milks, such as non-dairy varieties, and request modifications like reduced sugar or no whipped cream․ The cafe also allows adjustments to temperature and flavor preferences․ For those with specific restrictions, notifying staff ensures tailored preparations․ Additionally, optional add-ons like CBD can enhance beverages without compromising flavor․ These flexible options empower diners to enjoy meals that align with their unique preferences and requirements․

Availability of Nutrition Information in PDF Format

La La Land Cafe provides a free, downloadable PDF guide containing detailed nutrition information for all menu items, ensuring easy access for health-conscious customers․

Features of the La La Land Cafe Nutrition Guide PDF

The La La Land Cafe Nutrition Guide PDF is a comprehensive resource offering detailed nutritional breakdowns for every menu item․ It includes calorie counts, macronutrients, and dietary fiber content, making it easy for customers to make informed decisions․ The guide is well-organized and user-friendly, ensuring a seamless experience․ Additionally, it highlights healthy options and provides insights into customization tips for special dietary needs, making it an essential tool for health-conscious diners․

Verification of PDF Availability and Accessibility

The La La Land Cafe Nutrition Guide PDF is readily available for download on their official website and mobile app․ Customers can access it for free, ensuring transparency and convenience․ While some sources confirm its existence, it’s recommended to verify directly on their platform for the most accurate and updated information․ The guide is designed to be user-friendly, making it easy for customers to navigate and find detailed nutritional data for their favorite menu items․

Customer Concerns and Frequently Asked Questions

Customers often inquire about the availability and accessibility of the La La Land Cafe Nutrition Information PDF․ Many wonder where to find it and if it’s free․ The PDF guide is indeed available for download on their official website and mobile app, ensuring easy access to detailed nutritional data for menu items․ This resource helps customers make informed choices about their meals, aligning with the cafe’s commitment to transparency․

Common Queries About Nutritional Facts and PDF Downloads

Customers frequently ask about accessing La La Land Cafe’s nutrition information and whether it’s available for free․ Many seek details on calorie counts, macronutrients, and dietary fiber in menu items like iced lattes and salads․ The PDF guide is a popular topic, with inquiries about its availability on the website and mobile app․ Some users also request clarification on how to download the PDF and whether it includes comprehensive data for all items․ These queries highlight the demand for transparent nutritional information․

La La Land Cafe’s Response to Customer Inquiries

La La Land Cafe actively addresses customer inquiries, ensuring transparency and support․ They provide a free PDF guide for easy access to nutrition information, available on their website and mobile app․ The cafe also offers customization options for special dietary needs, such as low-calorie or high-fiber requests․ By engaging with feedback, La La Land Cafe demonstrates its commitment to customer satisfaction and kindness, aligning with its mission to foster community impact and youth empowerment․

La La Land Cafe’s Future Plans and Initiatives

La La Land Cafe plans to expand locations and menu offerings while maintaining its commitment to kindness and community impact, ensuring nutrition transparency remains a priority․

Expansion of Locations and Menu Offerings

La La Land Cafe is actively expanding its locations beyond Los Angeles, Houston, and Dallas, aiming to bring its unique coffee experience and community-focused mission to new areas․ The cafe plans to introduce new seasonal menu items and specialty beverages while maintaining its commitment to nutrition transparency․ This strategic growth ensures customers in more regions can enjoy their signature offerings, including nutrient-detailed options, aligning with their dedication to kindness and accessibility․

Commitment to Kindness and Community Impact

La La Land Cafe is renowned for its mission of fostering kindness and supporting local communities․ By hiring foster youth, the cafe promotes opportunities for young individuals to grow․ Their commitment extends to transparency in nutrition, ensuring customers can make informed choices․ The availability of free nutrition information PDFs reflects their dedication to accessibility and care for their patrons’ well-being, aligning with their broader goal of creating a positive social impact․

La La Land Cafe’s dedication to transparency and kindness shines through their free nutrition PDF․ Their mission to empower youth and provide healthy options makes a lasting impact․

Importance of Nutrition Transparency in the Cafe Industry

Nutrition transparency is crucial in the cafe industry, enabling customers to make informed dietary choices․ La La Land Cafe exemplifies this by offering free PDF guides, ensuring accessibility for all․ This practice fosters trust and accountability, aligning with their mission of kindness and community impact․ By providing detailed nutritional data, cafes empower health-conscious diners and support those with specific dietary needs, ultimately enhancing customer satisfaction and loyalty․ Transparency not only benefits individuals but also elevates industry standards, promoting a culture of openness and care․

Encouragement to Utilize the Free Nutrition Resources

La La Land Cafe encourages customers to take advantage of their free nutrition resources, including the downloadable PDF guide․ This tool empowers diners to make informed choices, aligning with their health goals and dietary preferences․ By utilizing these resources, customers can explore menu options confidently, ensuring their selections support their well-being․ Embracing transparency, La La Land Cafe prioritizes customer satisfaction and health, making it easier than ever to enjoy meals mindfully and deliciously․

tableau cuisson sous vide pdf

Sous vide cooking involves sealing food in airtight bags and cooking it in water at precisely controlled temperatures, ensuring even doneness and flavor preservation. This modern technique offers consistent results, making it popular among chefs and home cooks for achieving perfect textures and tastes. The method relies on precise temperature control, allowing for customized cooking experiences tailored to specific ingredients and desired outcomes. Sous vide has become a cornerstone in culinary innovation, bridging professional and home kitchens with its versatility and efficiency.

What is Sous Vide Cooking?

Sous vide cooking is a culinary method where food is sealed in airtight bags and cooked in a water bath at a precisely controlled temperature. This technique ensures even cooking throughout the ingredient, preserving flavors and textures. The sealed pouch prevents moisture loss, while the controlled temperature avoids overcooking. Popularized by professional chefs, sous vide has become accessible to home cooks, offering consistent results for meats, vegetables, and more. It relies on precise temperature control, making it ideal for achieving specific doneness levels and enhancing culinary creativity.

Benefits of Sous Vide Cooking

Sous vide cooking offers unmatched precision, ensuring evenly cooked dishes with consistent results. It retains nutrients and flavors, as food cooks in its own juices without evaporation. This method reduces overcooking risks, allowing for perfect doneness every time. Sous vide is versatile, suitable for meats, vegetables, and delicate fish, while maintaining their natural textures. It simplifies meal preparation, as pre-sealed ingredients can be cooked effortlessly. This technique is ideal for both professional chefs and home cooks, providing a modern, efficient way to achieve culinary excellence with minimal effort.

Sous Vide Cooking Safety Guidelines

Sous vide cooking requires careful attention to pasteurization, safe temperature ranges, and proper food storage to prevent bacterial growth and ensure food safety. Always handle equipment and sealed food appropriately to avoid contamination risks.

Understanding Pasteurization

Pasteurization is a critical concept in sous vide cooking, ensuring food safety by eliminating harmful pathogens. It involves heating food to a specific temperature, typically between 130°F and 190°F, for a set duration. This process prevents bacterial growth without overcooking, maintaining the food’s texture and flavor. Proper pasteurization is essential for safely cooking delicate items like eggs or fish. By following guidelines, you can achieve both safety and quality in your sous vide dishes.

Safe Temperature Ranges

Sous vide cooking requires precise temperature control to ensure food safety and quality. Safe temperature ranges vary by food type: poultry typically cooks between 130°F and 190°F, while red meat and fish range from 120°F to 160°F. These ranges prevent bacterial growth and foodborne illness. Always refer to validated guidelines to maintain safety without overcooking, ensuring optimal texture and flavor. Proper temperature control is vital for achieving consistent, delicious, and risk-free sous vide results.

Proper Food Storage After Sous Vide Cooking

After sous vide cooking, promptly cool sealed food to 40°F (4°C) within 4 hours to prevent bacterial growth. Use an ice bath or cold water to accelerate cooling. Store cooked food in the refrigerator at 40°F (4°C) or below within 2 hours. For longer storage, freeze at 0°F (-18°C) or below. Always label and date stored items. Proper storage ensures food safety and maintains quality. Follow USDA guidelines for safe handling and storage of sous vide-cooked foods to enjoy them at peak freshness and safety.

Best Practices for Sous Vide Cooking

Use fresh, high-quality ingredients and ensure proper sealing to maintain flavor. Preheat the water bath accurately and monitor temperature consistently. Avoid overcrowding the water bath for even cooking. Season generously and rest cooked items briefly before serving for optimal results. Always follow safety guidelines and recommended time-temperature tables for specific foods.

Sealing Techniques

Proper sealing is crucial for sous vide cooking to prevent air pockets and ensure even cooking. Use a vacuum sealer or displacement method to remove air thoroughly. Pat dry food to avoid moisture buildup, which can hinder sealing. Portion food evenly to fit bags neatly. For delicate foods, use gentle suction or manual compression. Double-check seals before cooking to prevent leakage. Label bags with contents and dates for easy organization. Proper sealing ensures flavor retention and food safety, making it a cornerstone of successful sous vide cooking.

Seasoning Before Sealing

Seasoning food before sealing is essential for enhancing flavor in sous vide cooking. Apply salt, pepper, herbs, or marinades directly to the food, ensuring even distribution. For meats, rubs or spices can be added, while delicate fish or vegetables may benefit from lighter seasoning. Allow seasoned food to rest briefly before sealing to let flavors meld. Acidic ingredients like citrus or vinegar can be added to bags for extra depth. Proper seasoning ensures that the food is flavorful once cooked, as sous vide locks in the seasonings effectively.

The Importance of Resting After Cooking

Resting after sous vide cooking is crucial for optimal results; It allows juices to redistribute, ensuring tender and evenly cooked food. For meats, resting prevents the loss of moisture, avoiding toughness. The process helps retain the food’s internal temperature, maintaining doneness. Proper resting enhances texture and flavor, making the dish more enjoyable. This step is often overlooked but is vital for achieving professional-level outcomes in sous vide cooking, ensuring a perfect balance of taste and consistency.

Sous Vide Temperature and Time Tables

Sous vide cooking relies on precise temperature and time controls. Tables provide guidelines for different foods, ensuring optimal doneness. Adjustments are made based on thickness and desired results.

Red Meat Temperature Guide

Red meat sous vide cooking requires precise temperature control for optimal results. A filet mignon cooks at 56°C for 30 minutes, while a ribeye at 54°C for 45 minutes. Rare beef is typically cooked at 50-52°C, medium-rare at 54-55°C, and medium at 57-59°C. Thicker cuts may need longer times. Refer to sous vide tables for detailed guidelines, ensuring perfectly cooked red meat every time. These charts are often available in PDF format for easy reference and consistent results.

Poultry Cooking Parameters

Poultry sous vide cooking requires careful temperature and time adjustments for safety and flavor. Chicken breasts are often cooked at 64°C for 1.5–3 hours, while thighs may require 68°C for 2–4 hours. Eggs can be sous vide at 63°C for 1–2 hours for a runny yolk. Turkey breasts cook at 65°C for 2–4 hours. Always refer to sous vide tables for precise guidelines, ensuring food safety and desired doneness. These charts are widely available in PDF formats for easy access and consistent results.

Fish and Seafood Recommendations

Fish and seafood sous vide cooking requires precise temperature control to avoid overcooking. Delicate fish like salmon cooks at 55°C for 30–45 minutes, while firmer fish may need higher temps. Shrimp and scallops thrive at 54°C for 15–30 minutes to retain tenderness. Seafood like lobster is best at 58°C for 20–30 minutes. Refer to sous vide charts for specific guidelines, ensuring optimal texture and flavor. Detailed tables in PDF formats provide tailored recommendations for various fish and seafood types, thicknesses, and desired doneness levels.

Equipment for Sous Vide Cooking

The essential tools include a sous vide water bath or circulator, vacuum sealer, and food-safe plastic bags. A container for water circulation is also necessary for precise temperature control.

Vacuum Sealers

A vacuum sealer is essential for sous vide cooking, removing air from food pouches to prevent bacterial growth and ensure even cooking. Manual or automatic models are available, with automatic offering precise control. Some include adjustable settings for delicate foods or wet ingredients. Using a vacuum sealer ensures proper food preservation and maintains flavor integrity. When selecting, consider ease of use, durability, and additional features like chamber sealing for bulk items. Proper sealing is crucial for safe and effective sous vide cooking.

Water Baths and Circulators

Water baths and circulators are central to sous vide cooking, maintaining precise temperatures for consistent results. Circulators heat and circulate water evenly, ensuring uniform cooking. They often include timers and adjustable temperature settings. Water baths can be preheated to desired levels, with circulators offering superior control. This setup prevents hot spots and overcooking, making it ideal for delicate foods. Using a water bath with a circulator ensures precise temperature management, a key factor in achieving perfect sous vide results every time.

Visualizing Sous Vide Data with Tableau

Tableau enhances sous vide cooking by transforming temperature and time data into interactive dashboards, allowing chefs to analyze and refine their techniques visually for optimal results.

Creating Sous Vide Cooking Dashboards

With Tableau, sous vide enthusiasts can create detailed, interactive dashboards to track cooking parameters like temperature, time, and doneness. These visual tools allow for easy analysis of complex data, enabling precise control over the cooking process. Dashboards can be customized to display key metrics, such as temperature ranges for different meats or ideal cooking times for various thicknesses. This data-driven approach enhances culinary creativity and ensures consistent, high-quality results. It also aids in refining techniques and sharing insights with others in the culinary community.

Temperature and Time Visualization

Tableau enables the creation of detailed visualizations for sous vide cooking, plotting temperature and time parameters to ensure precise control. These dashboards allow users to monitor real-time data, such as water temperature stability and food doneness. Visualizing temperature curves helps in achieving consistent results, while time tracking ensures dishes are cooked to perfection. This approach simplifies complex data, making it easier to refine techniques and experiment with new recipes. It also aids in troubleshooting and sharing insights with fellow cooking enthusiasts.

Advanced Sous Vide Techniques

Explore advanced sous vide methods like multiple-day cooking and combining sous vide with grilling or pan-searing for enhanced textures and flavors. These techniques elevate dish sophistication and creativity, offering precise control over complex culinary processes. By mastering these approaches, chefs and home cooks can achieve restaurant-quality results with innovative and versatile meal preparations.

Multiple-Day Cooking

Multiple-day sous vide cooking allows for extended preparation, ideal for tenderizing tougher cuts of meat or infusing deep flavors over time. This method is perfect for dishes like short ribs or brisket, which benefit from 24 to 48 hours of slow, even cooking. The precise temperature control ensures consistent results, while the extended time enhances texture and flavor. This technique is particularly useful for meal prep or special occasions, offering convenience and culinary excellence without sacrificing quality or taste.

Combining Sous Vide with Other Cooking Methods

Sous vide can be seamlessly combined with traditional cooking techniques like grilling, searing, or roasting to enhance texture and flavor. This hybrid approach allows for precise doneness using sous vide, followed by high-heat finishing for a crispy exterior. It’s ideal for achieving restaurant-quality results, such as a perfectly seared steak or caramelized vegetables. This method bridges innovation with classic culinary practices, offering chefs and home cooks endless creative possibilities to elevate their dishes.

Troubleshooting Common Issues

Address sealing failures, uneven cooking, or overcooking by ensuring proper bag sealing, accurate temperature settings, and adherence to recommended sous vide time and temperature guidelines.

Overcooking Prevention

To prevent overcooking, ensure precise temperature control and monitor water bath stability. Use a timer to avoid exceeding recommended sous vide times. Proper sealing prevents uneven heat distribution, while regular checks maintain food texture. Always refer to sous vide PDF guides for specific food and thickness parameters. These practices ensure dishes retain their desired doneness and flavor, making sous vide cooking reliable for both novice and experienced cooks alike.

Troubleshooting Sealing Issues

Common sealing issues in sous vide cooking include air pockets, improper bag sizing, and food not being fully submerged. To resolve this, ensure food is dry before sealing and use the correct bag size. A “water test” can detect air pockets. Additionally, double-check the vacuum sealer’s operation and consider using a reliable sealer for consistent results. Addressing these issues ensures even cooking and prevents food spoilage, maintaining the integrity of the sous vide process and its desired outcomes.

Sous vide cooking offers unparalleled precision and consistency, making it a valuable technique for achieving perfect doneness. By leveraging controlled temperatures and proper sealing, it ensures even cooking and retains flavors. This method is ideal for both professional chefs and home cooks, providing versatility across various foods. With its growing popularity, sous vide continues to revolutionize kitchens, offering a modern approach to culinary excellence. Experiment with different parameters to unlock its full potential and enjoy consistently delicious results.

harem pants pattern pdf free

Discover the comfort and style of harem pants with a free PDF pattern. Perfect for DIY sewing, these patterns offer a unique, versatile design that’s easy to customize.

What Are Harem Pants?

Harem pants are loose-fitting, stylish trousers characterized by a dropped crotch and tapered legs. Originating from traditional Middle Eastern and Asian designs, they offer a comfortable, trendy alternative to conventional pants. Often featuring an adjustable waist, harem pants are versatile for various body types and preferences. They are popular for their unique silhouette, which combines practicality with a fashionable appeal. Available in diverse fabrics and styles, harem pants can be dressed up or down, making them suitable for both casual and formal occasions. Their design allows for easy movement, while the tailored fit ensures a flattering look. Perfect for sewists, harem pants patterns are a great project for crafting custom, one-of-a-kind garments.

Why Choose a Free PDF Pattern?

Choosing a free PDF pattern for harem pants offers numerous advantages. It provides an affordable way to explore sewing without financial commitment. These patterns are easily accessible online, allowing immediate downloading. Many free PDF patterns include step-by-step instructions, making them ideal for beginners. They often come with customizable options, enabling users to tailor designs to their preferences. Additionally, free patterns encourage creativity and experimentation, allowing sewists to test styles before investing in paid versions. With a wide variety available, users can find patterns that suit their skill level and fabric choices. This accessibility makes sewing harem pants a fun and budget-friendly project for all.

Popular Free Harem Pants Patterns Available Online

Explore various free harem pants patterns online, such as Freestyle Harem Pants, DIY Belly Dancer designs, and easy sewing patterns with step-by-step guides for all skill levels.

Freestyle Harem Pants, Capris & Shorts Pattern

This versatile pattern offers a range of styles, from full-length harem pants to capris and shorts. Designed for comfort and flexibility, it includes an adjustable waistband and inseam pockets for convenience. Perfect for sewers of all skill levels, the pattern provides clear instructions and customizable options. Whether you prefer loose-fitting pants or tailored shorts, this pattern adapts to your needs. Its simplicity makes it ideal for beginners, while advanced sewers can add unique embellishments. Available as a free PDF, it’s a great way to create stylish, functional garments with ease. The pattern also supports various fabrics, ensuring a flawless fit every time.

DIY Belly Dancer Harem Pants Tutorial

Bring the elegance of belly dance style into your wardrobe with this DIY tutorial. Designed for those who love the flow and grace of traditional harem pants, this guide offers a step-by-step approach. No pattern is needed; instead, it uses simple measurements and basic sewing skills. The tutorial includes tips for choosing the right fabric and adding decorative elements like fringe or beads. Perfect for beginners, it provides clear instructions for creating a pair of harem pants that are both comfortable and visually striking. With this tutorial, you can craft custom-fit pants that capture the essence of belly dance fashion at home.

Easy Harem Pants Sewing Pattern with Step-by-Step Instructions

This pattern is designed for sewists of all skill levels, featuring real color step-by-step instructions. It includes stitching lines diagrammed directly on the pattern, making it easy to follow. Perfect for beginners, the guide offers a straightforward approach to creating harem pants. The pattern allows for customization, with options for adjustable waistbands and inseam pockets. Layered printing is supported, ensuring a seamless experience; Whether you’re making pants for casual wear or a specific style, this tutorial provides clarity and simplicity. It’s a great way to create a comfortable, fashionable wardrobe staple with minimal effort and maximum creativity.

Key Features of Harem Pants Patterns

Harem pants patterns offer adjustable waistbands for a perfect fit, inseam pockets for convenience, and customizable designs to suit various styles and body types, ensuring comfort and style.

Adjustable Waist and Fit

An adjustable waist and fit are essential features of harem pants patterns, ensuring a comfortable and tailored look for any body type. The waistband is designed to accommodate a range of sizes, allowing you to customize the fit to your preferences. This feature is particularly useful for sewists who want a snug yet flexible fit, as it eliminates the need for multiple patterns or alterations. With an adjustable waist, you can achieve a secure and flattering fit without compromising on comfort, making harem pants a versatile and practical choice for everyday wear or special occasions.

Inseam Pockets for Added Convenience

Inseam pockets are a practical and stylish feature often included in harem pants patterns, offering a convenient way to carry small items like keys, phones, or snacks. These pockets are seamlessly integrated into the design, maintaining the pants’ sleek appearance while providing functionality. Many free PDF patterns include step-by-step tutorials for adding inseam pockets, ensuring even beginners can achieve professional-looking results. This feature not only enhances the usability of the pants but also adds a touch of sophistication to the overall design. With inseam pockets, you can enjoy both comfort and practicality in your handmade harem pants, making them perfect for everyday wear or special occasions.

Customizable Designs and Sizes

One of the standout features of free harem pants PDF patterns is their customizability. Patterns often come in multiple sizes, allowing sewists to choose the perfect fit. Additionally, designs can be tailored to suit personal style, with options to adjust waistbands, leg widths, and lengths. Many patterns include instructions for modifying the design, such as adding embroidery or unique embellishments. This flexibility makes it easy to create harem pants that are both functional and fashionable, catering to various preferences and body types. Whether you’re making them for yourself or as a gift, the ability to personalize ensures a one-of-a-kind garment that stands out.

How to Download and Use a Free Harem Pants Pattern

Download your free harem pants pattern, print it, and follow the step-by-step instructions. Ensure proper sizing and fabric selection for a seamless sewing experience.

Step-by-Step Guide to Printing Your Pattern

Start by downloading the free harem pants pattern PDF and ensure your printer is set to the correct paper size and orientation. Print a test page to confirm the scale. Once satisfied, print all pages, checking that the rulers match to ensure accuracy. Use scissors or a craft knife to carefully cut along the pattern lines. Arrange the pages as indicated in the assembly guide, taping them together to form the full-size pattern. Double-check the fit by comparing the measurements to your body before cutting fabric. This method ensures precision and a professional finish.

Measuring and Selecting the Right Size

Accurate measuring is crucial for a perfect fit. Use a flexible tape measure to record your waist, hip, and inseam measurements. Compare these to the size chart provided in the pattern to select the correct size. Harem pants patterns often include an adjustable waist, ensuring a snug fit. Double-check your measurements to avoid resizing later. Print a test page to confirm scaling accuracy before cutting fabric. Proper sizing ensures comfort and style, making your sewing experience enjoyable and stress-free. Take your time to ensure a flawless fit tailored to your body, ensuring your harem pants are both comfortable and stylish.

Customizing Your Harem Pants Pattern

Personalize your harem pants by adding unique details, modifying fabrics, or adjusting styles. Use online tutorials for inspiration, ensuring your design reflects your creativity and preferences perfectly.

Adding Unique Details and Embellishments

Elevate your harem pants with creative embellishments. Add intricate embroidery, bold patches, or decorative buttons for a personalized touch. Use ruffles or lace trim along the hems and waistband for a feminine flair. Incorporate contrasting stitching to highlight seams or create geometric patterns. Appliques and beadwork can add cultural or bohemian inspiration. Experiment with fabric paint or tie-dye techniques for a vibrant, one-of-a-kind design. These details enhance the pants’ visual appeal while showcasing your individual style. Ensure your embellishments complement the fabric and overall aesthetic of your harem pants, making them a true fashion statement.

Modifying the Pattern for Different Fabrics

When working with various fabrics, it’s essential to adjust your harem pants pattern accordingly. Start by considering the fabric’s weight and drape—lighter fabrics like silk or chiffon may require adjustments to prevent bulkiness, while stiffer fabrics like canvas might need a more structured approach. Stretch fabrics, such as knits, may need modifications to account for their elasticity, possibly by adding stabilizing elements or reducing ease. For non-stretch fabrics, ensure adequate ease for comfort. Additionally, consider using interfacing in areas like waistbands to maintain stability. Adjust seam allowances and hem widths based on fabric thickness and fraying tendencies. Finally, opt for appropriate threads and needles to suit the fabric type, ensuring durable and professional-looking results. By tailoring the pattern to your fabric, you achieve a polished and comfortable fit.

Harem pants patterns offer a perfect blend of comfort and style, making them a versatile choice for any wardrobe. Embrace creativity and sew your own today!

Final Tips for Sewing Harem Pants

For a polished finish, choose fabrics with drape and softness. Follow pattern instructions carefully, ensuring accurate measurements. Add inseam pockets for practicality. Customize with unique embellishments like embroidery or trim. Opt for adjustable waists for a perfect fit. Consider layering patterns for size flexibility. Use step-by-step tutorials for guidance, especially for beginners. Print patterns on high-quality paper for clarity. Measure twice and cut once to avoid mistakes. Don’t hesitate to modify designs for personal style or different fabrics. Sewing harem pants is a rewarding project—enjoy the process and embrace creativity!

heart rpg pdf

HEART RPG offers emotional storytelling and dynamic gameplay, appealing to players seeking depth and creativity. Its PDF format ensures easy access, making it a popular choice for tabletop enthusiasts worldwide.

Overview of HEART RPG

HEART RPG is a tabletop role-playing game designed to emphasize emotional storytelling and player-driven narratives. It focuses on creating a deeply immersive experience, encouraging collaboration and creativity among players. The game’s dynamic gameplay and versatile mechanics allow for a wide range of playstyles, catering to both newcomers and experienced players. Its unique approach to character development and conflict resolution sets it apart in the RPG genre, making it a standout choice for those seeking a fresh tabletop experience.

Availability as a PDF

The HEART RPG is conveniently available in PDF format, providing players and GMs with easy access to its rules, lore, and artwork. This digital version ensures portability and accessibility, allowing enthusiasts to engage with the game from any device. The PDF is widely distributed across popular platforms, making it simple for newcomers and experienced players alike to download and start their adventures in the HEART RPG universe.

Key Features of HEART RPG

HEART RPG combines emotional storytelling with dynamic gameplay, offering a unique tabletop experience. Its modular system allows for high customization, catering to diverse playstyles and narratives, making it a standout RPG.

Unique Mechanics

HEART RPG introduces the Emotional Heartbeat System, where players track their characters’ emotions to influence decisions and outcomes. This mechanic adds a layer of depth and realism, making storytelling more immersive. The game also features a modular system, allowing players to customize rules and create unique experiences. These mechanics set HEART RPG apart, offering a fresh take on traditional tabletop role-playing games while maintaining engaging and dynamic gameplay.

Art Style and Presentation

The HEART RPG PDF features a visually distinct art style that blends minimalistic designs with vivid imagery, creating an immersive atmosphere. The layout is clean and organized, making it easy for players to navigate rules and stories. The art style emphasizes emotional expression, aligning with the game’s focus on storytelling and character depth. This presentation enhances the overall gaming experience, drawing players deeper into the world of HEART RPG.

Game Mechanics

HEART RPG introduces emotional storytelling and dynamic gameplay, blending narrative depth with strategic elements. Its mechanics emphasize player choice and character growth, as detailed in the PDF.

Core Systems and Rules

HEART RPG relies on a dice-based resolution system, emphasizing storytelling and player agency. Emotional attributes and narrative choices drive character interactions and conflict resolution. The game uses a flexible rule set to balance creativity and structure, allowing players to craft unique experiences. Core mechanics include attribute checks, skill progression, and dynamic combat systems, all designed to enhance immersive gameplay and collaborative storytelling.

Character Progression

Character progression in HEART RPG is driven by experience points and emotional growth. Players can enhance abilities, unlock new skills, and deepen their character’s backstory. The system emphasizes narrative development, allowing characters to evolve based on choices and interactions. Skill mastery and attribute improvements are achieved through consistent play, ensuring a rewarding and immersive journey for players.

Character Development

Character development in HEART RPG focuses on emotional storytelling and narrative depth, allowing players to craft unique identities and backstories that evolve through gameplay and choices.

Creation and Customization

HEART RPG offers extensive character creation tools, allowing players to craft unique identities with detailed backstories and custom traits. The PDF format includes comprehensive guides for building characters, ensuring a personalized experience. Players can tailor abilities and select roles that align with their narrative preferences, making each character distinct and meaningful in the game world. This depth of customization enhances immersion and engagement for all players.

Skills and Abilities

HEART RPG features a dynamic skill system that allows players to tailor their characters with unique abilities and traits. The PDF guide provides detailed progression paths, enabling characters to grow and evolve through strategic choices. Players can unlock powerful abilities and enhance skills, creating a highly customizable experience that blends combat and narrative seamlessly, ensuring depth and versatility in gameplay.

The Setting of HEART RPG

HEART RPG is set in a richly crafted world with deep lore and diverse environments. Players explore vibrant landscapes, uncover ancient secrets, and engage in meaningful storytelling within this immersive universe.

World-Building and Lore

HEART RPG features a richly detailed world with complex lore that shapes player experiences. The setting combines emotional depth with strategic gameplay, creating an immersive narrative. Players uncover ancient secrets and engage with dynamic environments, where their choices influence the story’s direction. The lore is deeply intertwined with the game’s mechanics, offering a unique blend of storytelling and adventure that keeps players engaged and invested in the world.

Environments and Exploration

HEART RPG offers vibrant, diverse environments that invite immersive exploration. Players navigate mystical forests, ancient ruins, and dynamic cities, each with unique challenges and secrets. The game encourages curiosity-driven gameplay, where every decision impacts the story. Exploration is not just about discovery but also about emotional engagement, as the environment reflects the characters’ inner journeys, creating a deep connection between the world and its inhabitants;

Themes and Storytelling

HEART RPG explores identity, redemption, and emotional growth, weaving deep narratives that resonate with players. Its story-driven design emphasizes player agency, allowing choices to shape the world and its vibrant characters.

Central Themes

HEART RPG delves into identity, redemption, and emotional growth, offering a narrative rich in character-driven arcs. The game emphasizes player agency, allowing individuals to shape their journey through meaningful choices. Themes of light and darkness are central, with players navigating moral dilemmas and personal struggles. The system fosters emotional storytelling, encouraging deep connections between characters and the world they inhabit.

The game’s emotional core is designed to resonate with players, creating a vibrant, dynamic experience that evolves with each decision. This focus on storytelling and growth makes HEART RPG a compelling choice for those seeking depth and engagement in their tabletop adventures.

Narrative Structure

HEART RPG features a modular narrative design, allowing players to shape the story through their choices. The game emphasizes player agency, with a focus on collaborative storytelling. Scenes are framed dynamically, enabling players to declare actions that drive the plot forward. This structure encourages emotional engagement and character-driven arcs, making each session unique and responsive to player input. The system’s flexibility ensures a dynamic, evolving narrative tailored to the group’s preferences.

Community and Resources

The HEART RPG community is active and supportive, with forums, Discord groups, and social media platforms for players to share ideas and resources. Official PDF resources, including adventures and character sheets, are widely available, alongside fan-made supplements that enhance gameplay. Community events and live streams further foster engagement and creativity among players.

Player and GM Community

The HEART RPG community is vibrant and engaged, with players and GMs collaborating through forums, Discord, and social media. Active discussions revolve around character builds, homebrew content, and creative storytelling. Community events, such as live streams and virtual meetups, foster connections and inspire new ideas. Players and GMs share resources, feedback, and experiences, creating a supportive environment that enhances the overall gaming experience for everyone involved.

Official and Fan-Made Resources

HEART RPG is supported by a wealth of official resources, including rulebooks, adventure modules, and character sheets, all available in PDF format. The community also thrives on fan-made content, with players creating custom scenarios, art, and homebrew rules. These resources enhance gameplay and provide endless inspiration for both new and experienced players, fostering creativity and expanding the game’s possibilities while maintaining its core essence.

Tips for New Players

New players should focus on understanding core mechanics and declare actions clearly. Engage with the story, collaborate with others, and embrace creativity to fully enjoy the experience.

Getting Started

New players should start by understanding the core mechanics and reviewing the character creation process. Familiarize yourself with the PDF manual and join a session zero to discuss expectations. Focus on declaring actions clearly and collaborating with others. Embrace creativity and immerse yourself in the story, as your choices shape the narrative. Engage with the GM and other players to enhance your experience and enjoy the game’s unique emotional depth.

Strategies for Success

To excel in HEART RPG, understand the core mechanics and leverage emotional storytelling. Communicate clearly with your GM and fellow players to shape the narrative. Focus on character development and collaborative problem-solving. Embrace the game’s unique dynamic gameplay and immerse yourself in the story. Regularly review and adapt your strategies to enhance your experience and contribute to the group’s success.

Comparison with Other RPGs

HEART RPG stands out with its emotional depth and collaborative focus, differing from traditional RPGs by emphasizing storytelling over combat and fostering player-driven narratives in a unique way.

Differences from Traditional RPGs

HEART RPG diverges from traditional RPGs by prioritizing emotional storytelling and collaborative gameplay. It emphasizes player-driven narratives over rigid structures, allowing for more creative freedom. Unlike many RPGs, HEART focuses less on combat and more on character development and interpersonal dynamics. Its unique mechanics encourage improvisation and shared storytelling, making it a refreshing alternative to traditional systems that often center on dice rolls and rule-heavy gameplay.

Market Positioning

HEART RPG stands out with its unique blend of emotional storytelling and collaborative gameplay, appealing to players seeking more than traditional combat-focused RPGs. Its accessible PDF format and innovative mechanics attract both veteran players and newcomers. By focusing on character-driven narratives, HEART RPG positions itself as a standout title in the tabletop RPG market, offering a fresh alternative to more rules-heavy systems and gaining recognition for its creative approach to storytelling and gameplay.

HEART RPG concludes as a compelling, story-driven experience. Its PDF accessibility and innovative gameplay ensure its place as a beloved tabletop RPG with promising future potential.

Final Thoughts

HEART RPG stands out for its emotional storytelling and player-driven narratives. Players appreciate its depth and creativity, while the PDF format enhances accessibility. The game’s ability to balance strategy and role-playing makes it a standout title in the tabletop RPG genre. With a passionate community and consistent updates, HEART RPG continues to captivate audiences, offering a unique experience that resonates with both newcomers and veteran players alike.

Future Prospects

HEART RPG shows promising growth with plans for new expansions and community-driven content. The PDF format allows for easy updates, ensuring the game stays fresh. Players can expect thrilling adventures and innovative mechanics in future releases. With a passionate fan base and active development, HEART RPG is poised to remain a dynamic force in the tabletop RPG scene, offering endless possibilities for creative storytelling and engaging gameplay.

ap calculus bc multiple choice 2019 pdf

Understanding the 2019 AP Calculus BC Multiple-Choice Section

The 2019 AP Calculus BC multiple-choice section consists of 45 questions, divided into Part A and Part B, with no calculator allowed. It evaluates critical thinking, problem-solving, and the ability to apply calculus concepts to various scenarios, covering topics from limits to differential equations.

Structure of the Exam

The 2019 AP Calculus BC multiple-choice section is divided into two parts: Part A and Part B. Part A contains 30 questions, and Part B contains 15 questions, totaling 45 questions. Students are allotted 105 minutes to complete this section, with no calculator allowed. The questions are designed to assess a wide range of calculus concepts, including limits, derivatives, integrals, and differential equations, as well as their applications in various contexts. The exam emphasizes critical thinking and problem-solving skills, requiring students to interpret graphical, numerical, and algebraic information. Each question is weighted equally, and the section accounts for 50% of the total exam score. The format ensures a balance between conceptual understanding and computational proficiency. Understanding the structure helps students allocate time effectively and prioritize problem types during preparation.

Key Features of the 2019 Multiple-Choice Questions

The 2019 AP Calculus BC multiple-choice questions were designed to assess both conceptual understanding and computational skills. A notable feature was the emphasis on critical thinking and problem-solving, requiring students to interpret graphical, numerical, and algebraic information. The questions covered a wide range of topics, including limits, derivatives, integrals, and differential equations, with a focus on practical applications. Many questions incorporated real-world scenarios to test the ability to apply calculus concepts effectively. Another key feature was the inclusion of questions that evaluated understanding of mathematical practices, such as modeling and justification. The section also included a mix of straightforward and complex problems, ensuring a balanced assessment of proficiency levels. Additionally, the questions were carefully aligned with the course curriculum, reflecting the skills and knowledge outlined in the AP Calculus BC Course and Exam Description. This structure allowed for a comprehensive evaluation of students’ readiness for advanced calculus studies.

Preparing for the 2019 AP Calculus BC Exam

Effective preparation involves utilizing official resources like the AP Calculus Course and Exam Description and practice workbooks. Timed practice tests and focusing on understanding mathematical practices are key strategies to enhance problem-solving skills and exam readiness.

Recommended Resources

Preparing for the 2019 AP Calculus BC exam requires access to high-quality study materials. The official AP Calculus Course and Exam Description (Fall 2019) is an essential resource, providing detailed course frameworks and sample questions. Additionally, practice workbooks like Multiple Choice Questions to Prepare for the AP Calculus BC Exam: 2019 Calculus BC Exam Preparation offer targeted exercises to master the multiple-choice format.

The official AP Calculus BC 2019 full exam PDF is another valuable tool, featuring both multiple-choice and free-response sections. It includes answer keys and explanations, allowing students to identify areas for improvement. Free-response questions from past exams, along with scoring guidelines and sample responses, are also available for download.

Students can benefit from structured study guides that align with the exam’s content and format. Timed practice exams and focused review of mathematical practices are strongly recommended to build confidence and problem-solving skills.

  • Official AP resources and practice exams.
  • Targeted workbooks for multiple-choice practice.
  • Past exam questions with scoring guidelines.

These resources provide a comprehensive approach to understanding and mastering the 2019 AP Calculus BC exam.

Strategies for Success

To excel in the 2019 AP Calculus BC multiple-choice section, adopt a strategic approach to maximize your score. Begin by thoroughly understanding the exam format: 45 questions divided into Part A (30 questions) and Part B (15 questions), with no calculator allowed. Time management is crucial, so allocate approximately 1.5 minutes per question to ensure you attempt all.

Develop a problem-solving mindset by skimming through questions to identify familiar concepts first, tackling easier ones early to build confidence. Eliminate obviously incorrect answers to improve your chances of guessing correctly. Practice with official past exams to familiarize yourself with question types and improve critical thinking under timed conditions.

Stay calm and avoid rushing, as this leads to careless errors. Use the exam booklet for scratch work to visualize problems better. Review concepts like limits, derivatives, and integrals, as they are frequently tested. Focus on applying mathematical practices, such as reasoning and communication, to enhance your problem-solving skills.

  • Skim questions to identify familiar topics first.
  • Eliminate incorrect answers to narrow down choices.
  • Practice with past exams to build time management skills.
  • Stay calm and use scratch paper effectively.

By combining these strategies, you can approach the exam with confidence and maximize your performance.

Common Challenges in the 2019 Exam

The 2019 AP Calculus BC exam posed challenges like time management, complex applications of calculus concepts, and the need for precise critical thinking. Rushing and not thoroughly reading questions led to avoidable errors, emphasizing the importance of a strategic approach to tackle demanding problems effectively.

Identifying Difficult Question Types

AP Calculus BC multiple-choice questions from 2019 often included complex applications of calculus concepts, such as related rates and differential equations, requiring precise critical thinking. These questions demanded not only formula recall but also the ability to interpret and apply concepts in non-routine scenarios, making them particularly challenging. Additionally, the need to evaluate limits, understand parametric and polar functions, and interpret graphical representations added layers of complexity. Rushing through these questions often led to errors, as they required a meticulous approach. Students who struggled with time management or failed to thoroughly read each question were more likely to make mistakes. Recognizing these challenging question types and practicing similar problems were crucial for success. The exam emphasized the importance of a strategic approach, ensuring students could tackle demanding problems effectively within the allotted time.

Time Management Tips

Mastering time management is crucial for success in the 2019 AP Calculus BC multiple-choice section. With 45 questions and 105 minutes, students have approximately 2 minutes and 20 seconds per question. To optimize this, consider skimming through the entire section first to identify and answer easier questions quickly, reserving time for more challenging ones. Allocate specific time blocks for different question types, such as 30 seconds for straightforward problems and up to 4 minutes for complex scenarios. Avoid getting stuck on a single question; instead, mark it for review and move forward. Utilize the process of elimination to increase the likelihood of selecting the correct answer when unsure. Additionally, budget 5-10 minutes at the end to review your answers and address any skipped questions. Prioritize careful reading of each question to avoid misinterpretation, as rushing often leads to unnecessary errors. By adopting a strategic and disciplined approach to time management, students can efficiently navigate the exam and maximize their score.

renault duster automatic or manual

The Renault Duster offers both automatic and manual transmission options, catering to diverse driving preferences․ The automatic transmission provides smooth gear shifts and ease in city driving, while the manual variant delivers better control and fuel efficiency, making it ideal for highway and off-road scenarios․ Both options ensure optimal performance and adaptability to varying road conditions․

1․1 Overview of Automatic and Manual Transmission Types

The Renault Duster is available with both automatic and manual transmission options․ The automatic variant features a smooth, Easy-R automated manual transmission (AMT) or an Efficient Dual Clutch (EDC) system, offering seamless gear shifts and effortless city driving․ The manual transmission, on the other hand, provides precise control and better fuel efficiency, making it ideal for drivers who prefer a more engaging experience or need to tackle challenging terrain․ Both options are designed to deliver optimal performance and adaptability․

1․2 Importance of Choosing the Right Transmission for Duster

Selecting the appropriate transmission for the Renault Duster is crucial for optimizing driving comfort and efficiency․ Automatic transmissions are ideal for city commutes, offering ease of use in heavy traffic, while manual transmissions provide better fuel economy and control, especially on highways and off-road․ Matching the transmission type to personal driving habits ensures enhanced performance, lower maintenance costs, and a more satisfying ownership experience overall․

Fuel Efficiency Comparison

The Renault Duster’s manual transmission generally offers better fuel economy, especially on highways, while the automatic version provides convenience but slightly lower efficiency in city driving conditions․

2․1 Fuel Consumption in Automatic vs․ Manual Duster

The Renault Duster’s manual transmission typically offers superior fuel efficiency, particularly in urban driving, with reported mileage of up to 10% better than its automatic counterpart․ The automatic version, while convenient, consumes slightly more fuel due to the torque converter and gear-shifting mechanisms․ Real-world tests indicate that the manual Duster achieves approximately 18-20 km/l on highways, compared to the automatic’s 15-17 km/l․ Engine capacity and driving habits also influence these figures, making the manual a more economical choice for budget-conscious drivers․

2․2 Real-World Mileage Differences

Real-world testing reveals that the manual Renault Duster consistently delivers better mileage, especially in city driving, where it can be 10-15% more efficient than the automatic variant․ On highways, the manual version typically offers 5-8% better fuel economy․ While the automatic Duster still performs well, its mileage is slightly lower due to the added weight and complexity of the automatic transmission system․ Driving habits and road conditions further influence these differences, making the manual a more cost-effective choice for many drivers․

Driving Experience and Performance

The automatic Duster offers a smooth, effortless driving experience ideal for city commutes, while the manual variant provides precise control and engagement, perfect for enthusiasts and off-road adventures․

3․1 Acceleration and Smoothness in Automatic Duster

The automatic Renault Duster delivers seamless acceleration and smooth gear transitions, enhancing urban driving comfort․ Its responsive throttle ensures quick pickup, making it ideal for city traffic and frequent stop-and-go situations․ The automatic transmission minimizes driver fatigue, offering a refined experience with minimal interruptions in power delivery․ This makes it a practical choice for those prioritizing ease and convenience without compromising on performance․

3․2 Gear Control and Driver Engagement in Manual Duster

The manual Duster offers precise gear control, allowing drivers to fully engage with the driving experience․ Its responsive gearshifts provide a sense of connection to the vehicle, enhancing acceleration and responsiveness․ Ideal for enthusiasts, the manual transmission enables better control during overtaking or climbing steep terrain․ The tactile feedback from shifting gears adds to the satisfaction, making it a preferred choice for those who value driving dynamics and hands-on involvement․

Maintenance and Repair Costs

Maintenance costs for manual Duster are generally lower due to fewer complex components․ Automatic transmissions, while convenient, often incur higher repair expenses due to advanced parts and technology․

4․1 Cost of Ownership for Automatic Duster

The automatic Renault Duster generally has higher ownership costs due to advanced transmission components and slightly higher fuel consumption․ Repair expenses for automatic transmissions are typically more expensive than manual ones, especially for parts like torque converters and sensors․ Additionally, the automatic variant may require more frequent maintenance checks, adding to long-term costs․ However, the convenience it offers often justifies the investment for many drivers seeking a hassle-free driving experience․

4․2 Maintenance Requirements for Manual Duster

The manual Renault Duster typically requires less maintenance compared to its automatic counterpart․ The simpler mechanical design reduces the need for complex repairs, lowering overall costs․ However, components like the clutch may wear out faster with aggressive driving․ Regular checks of the clutch pedal and gear oil are recommended to ensure smooth operation․ Despite these needs, manual transmissions generally remain more cost-effective and durable, making them a practical choice for budget-conscious drivers․

Driving Conditions and Suitability

The Renault Duster’s automatic transmission excels in city driving, offering smooth navigation through traffic, while the manual variant is better suited for highway and off-road adventures, ensuring control and efficiency in diverse terrains․

5․1 Automatic Duster in City and Traffic Conditions

The automatic Renault Duster shines in urban environments, offering smooth and seamless gear transitions that reduce driver fatigue․ Its ease of use in stop-and-go traffic makes it ideal for city commutes․ The automatic transmission’s responsiveness ensures quick acceleration when needed, while its low-speed maneuverability enhances parking and tight-space navigation․ These features combine to provide a stress-free and comfortable driving experience in congested city conditions, making it a practical choice for daily urban driving needs․

5․2 Manual Duster in Highway and Off-Road Scenarios

The manual Renault Duster excels on highways and off-road terrains, offering precise gear control and driver engagement․ Its manual transmission provides better fuel efficiency on long drives and enhanced traction in challenging off-road conditions․ The ability to shift gears manually ensures optimal performance when navigating steep inclines or uneven surfaces․ This makes the manual Duster a preferred choice for adventurous drivers seeking control and efficiency in both highway cruising and off-road adventures․

Reliability and Durability

The Renault Duster’s automatic and manual transmissions are known for their robust build and durability․ Both options are designed to withstand harsh driving conditions, ensuring long-term performance and minimal repairs․

6․1 Long-Term Reliability of Automatic Transmission

The automatic transmission in the Renault Duster is engineered for durability and long-term reliability․ It performs consistently in various driving conditions, with smooth gear shifts and minimal maintenance requirements․ Owners have reported low incidence of mechanical issues, contributing to its reputation as a dependable choice for city and highway driving․ The automatic variant is particularly suited for drivers seeking convenience without compromising on performance over time․

6․2 Durability of Manual Transmission in Duster

The manual transmission in the Renault Duster is known for its durability and robust build, making it a reliable choice for long-term use․ The gear system is designed to withstand various driving conditions, including off-road terrains, ensuring consistent performance․ Drivers appreciate the control and engagement it offers, which enhances the overall driving experience․ With proper maintenance, the manual transmission can last for many years, providing a cost-effective option for those who prefer a hands-on driving approach․ Many owners have reported high mileage without significant issues, further testament to its reliability․

Technology and Features

The Renault Duster offers advanced technology features, including a multimedia system with Android Auto compatibility, parking sensors, and automatic central locking․ Both automatic and manual variants provide driver aids like ABS and EBD, ensuring enhanced safety and convenience․ These features cater to modern driving needs, making the Duster a versatile choice for urban and off-road environments alike․ The integration of technology enhances overall driving comfort and efficiency, making it a competitive option in its class․

7․1 Advanced Features in Automatic Duster

The automatic Renault Duster comes equipped with advanced features such as a responsive touchscreen infotainment system, Android Auto compatibility, and automatic climate control․ Additionally, it offers driver aids like rear parking sensors and a reverse camera, enhancing convenience and safety․ The automatic variant also includes features like cruise control and steering-mounted controls, providing a more comfortable and modern driving experience․ These features make the automatic Duster a tech-savvy choice for urban commuters seeking ease and innovation․

7․2 Technological Benefits of Manual Transmission

The manual Renault Duster offers technological benefits such as improved fuel efficiency and lower maintenance costs․ It delivers a more engaging driving experience with precise gear control and a smooth clutch system․ The manual transmission’s mechanical simplicity reduces potential issues and repair expenses․ These features make it a practical choice for drivers seeking reliability and cost-effectiveness without compromising on performance․

Resale Value

The Renault Duster with manual transmission tends to hold its value better due to lower maintenance and repair costs․ Automatic variants, while convenient, may depreciate slightly faster․ Regional demand and driving preferences significantly influence resale value, making both options viable depending on market conditions and buyer priorities․

8․1 Resale Value of Automatic Duster

The automatic Renault Duster generally commands a higher resale value in urban markets due to its convenience and ease of driving in traffic․ However, its slightly higher maintenance costs and lower fuel efficiency compared to the manual version can affect long-term depreciation․ Buyers seeking comfort often prioritize automatic models, ensuring steady demand and relatively stable resale prices, especially in regions where automatic transmissions are preferred for city commuting and traffic-heavy conditions․

8․2 Resale Value of Manual Duster

The manual Renault Duster tends to retain its value well, particularly in regions where fuel efficiency and lower maintenance costs are prioritized․ Its appeal to budget-conscious buyers and driving enthusiasts ensures steady demand, though it may not fetch as high prices as automatic variants in urban areas․ The manual transmission’s durability and cost-effectiveness make it a practical choice, contributing to its stable resale value in both domestic and used car markets focused on affordability and performance․

The Renault Duster offers both automatic and manual transmission options, each catering to different driving preferences․ The choice depends on whether convenience, fuel efficiency, or driver engagement is prioritized․

9․1 Summary of Key Differences

The Renault Duster’s automatic transmission offers seamless gear shifts, ideal for city driving and traffic, while the manual variant provides better fuel efficiency and control, especially on highways and off-road․ Automatic models feature advanced technologies like paddle shifters and adaptive modes, enhancing comfort․ Manual transmissions, however, often have lower maintenance costs and higher resale value, appealing to budget-conscious drivers․ Both options deliver reliable performance, making the choice depend on personal preferences and driving habits․

9․2 Recommendations Based on Driver Preferences

Drivers prioritizing comfort and convenience in city driving should opt for the automatic transmission, which offers smooth shifts and reduced fatigue․ For those seeking better fuel efficiency and control, especially on highways or off-road, the manual transmission is ideal․ Automatic models are perfect for urban commuters, while manuals appeal to enthusiasts who enjoy driving engagement․ Budget-conscious buyers may prefer manuals due to lower maintenance costs and higher resale value․ Choose based on your lifestyle and preferences for the best ownership experience․

wulf flat plus manual

Welcome to the Wulf Flat Plus Manual‚ your comprehensive guide to understanding and optimizing your vaping experience. This manual covers key features‚ setup‚ and maintenance tips to ensure safe and efficient use of your device. By following these instructions‚ you’ll unlock the full potential of your Wulf Flat Plus vape pen.

Overview of the Wulf Flat Plus Vape Pen

The Wulf Flat Plus Vape Pen is a sleek and powerful device designed for a seamless vaping experience. It features advanced settings like variable voltage control and a preheat function‚ ensuring optimal performance. With a robust 900mAh battery and USB-C charging‚ it offers convenience and longevity; Compatible with various cartridges‚ the Flat Plus is versatile and user-friendly‚ making it a top choice for enthusiasts seeking reliability and quality in a compact design.

Importance of Following the Manual

Following the Wulf Flat Plus Manual is crucial for ensuring optimal performance‚ safety‚ and longevity of your device. Proper setup‚ charging‚ and maintenance procedures outlined in the manual prevent potential damage and hazards. Adhering to guidelines helps maximize battery life and vapor quality‚ while also ensuring compliance with safety standards. By understanding and following the manual‚ you can enjoy a hassle-free and satisfying vaping experience with your Wulf Flat Plus.

Key Features of the Wulf Flat Plus

The Wulf Flat Plus features variable voltage settings‚ a preheat function‚ and USB-C charging. It offers a range of battery capacities and is compatible with various cartridges.

Variable Voltage Settings

The Wulf Flat Plus offers variable voltage settings‚ allowing users to customize their vaping experience. By adjusting the voltage‚ you can control the flavor and vapor production to suit your preferences. This feature ensures optimal performance with different cartridges. Simple button presses let you cycle through voltage levels‚ providing flexibility and enhancing your overall satisfaction. Proper use of this feature is detailed in the manual to ensure safety and efficiency.

Preheat Function

The Wulf Flat Plus features a convenient preheat function designed to prepare your cartridge for optimal vaping. This mode ensures a consistent and even heating process‚ enhancing flavor and vapor quality. To activate‚ press the power button twice. The device will heat at a lower temperature for a short period‚ readying your material without burning it. This function is ideal for maintaining a smooth experience and preventing cold hits‚ ensuring your sessions are consistently enjoyable and flavorful.

USB-C Charging

The Wulf Flat Plus supports USB-C charging‚ offering fast and reliable battery replenishment. Simply connect the device to a USB-C cable and a compatible power source. The LED light will indicate charging status: red for charging and green when fully charged. This feature ensures quick top-ups‚ making it convenient for on-the-go use. Always use the provided cable or a high-quality alternative to maintain safety and battery health. Proper charging habits will extend the lifespan of your Wulf Flat Plus vape pen.

How to Use the Wulf Flat Plus

Master the basics of your Wulf Flat Plus vape pen by following simple steps. Turn it on/off with five quick clicks of the power button‚ adjust voltage settings for optimal performance‚ and ensure cartridges are securely connected for a seamless vaping experience.

Turning the Device On and Off

To turn the Wulf Flat Plus on‚ press the power button located at the top of the battery five times in a row. The device will flash a white light five times to confirm it’s active. To turn it off‚ repeat the same process of pressing the power button five times. This feature ensures safe and convenient operation‚ allowing you to control your vaping sessions effortlessly. Always remember to turn it off when not in use to conserve battery life.

Setting Up the Device for First Use

Before using your Wulf Flat Plus‚ ensure the battery is fully charged using the provided USB-C cable. Once charged‚ attach your preferred cartridge by securely connecting it to the battery. Turn the device on by pressing the power button five times. The white light will confirm activation. Select your desired voltage setting and allow the cartridge to heat up. For optimal performance‚ take a few priming puffs to ensure the cartridge is ready for use.

Using the Variable Voltage Function

To utilize the variable voltage function‚ press the power button three times to cycle through the available settings. Each voltage level is indicated by a different LED color: low (red)‚ medium (blue)‚ and high (green). Choose the setting that best suits your cartridge for optimal performance. Adjusting the voltage ensures a tailored vaping experience. Always select a voltage compatible with your cartridge to avoid damage and ensure consistent results.

Charging the Wulf Flat Plus

The Wulf Flat Plus features USB-C charging for convenience and faster charging speeds. To charge‚ locate the USB-C port‚ typically found at the bottom of the device. Use a compatible USB-C cable and charger. The initial charge may take approximately 2 hours. The device may have an indicator light that signals when charging is complete. Avoid overcharging to maintain battery health. If the device does not charge‚ ensure the port and cable are functioning properly. Follow these guidelines to ensure safe and effective charging.

Initial Charging Instructions

Before first use‚ charge your Wulf Flat Plus using the provided USB-C cable. Connect the device to a compatible charger and allow it to charge for 2 hours. The battery indicator light will signal when charging is complete. Ensure the device is fully charged to maximize performance. Avoid overcharging to preserve battery longevity. Proper initial charging ensures optimal functionality and extends the lifespan of your vape pen. Follow these steps carefully for a smooth vaping experience.

Long-Term Charging Maintenance

To maintain the Wulf Flat Plus battery’s health‚ charge it correctly. Use the provided USB-C cable for safe and efficient charging. Avoid overcharging‚ as it can degrade the battery over time. Store the device in a cool‚ dry place when not in use. Clean the charging port regularly to prevent dirt buildup. For optimal performance‚ keep the battery level between 20% and 80% if possible. Proper maintenance ensures long-term reliability and extends the lifespan of your vape pen.

Cartridge Maintenance and Usage

Proper cartridge maintenance ensures optimal performance. Clean connections regularly to prevent residue buildup. Secure cartridges firmly without over-tightening. Use only compatible cartridges for best results.

How to Connect and Disconnect Cartridges

To connect a cartridge‚ ensure the device is off. Locate the connection point at the top of the battery. Align the cartridge and screw it in gently until secure. For disconnecting‚ turn off the device first. Unscrew the cartridge counterclockwise carefully to avoid spills. Clean the connection area with a soft cloth after removal to maintain hygiene and prevent residue buildup. Always use compatible cartridges for optimal performance and safety.

Cleaning the Cartridge and Battery

Cleaning your Wulf Flat Plus is essential for optimal performance. Use a cotton swab dipped in isopropyl alcohol to gently wipe the battery’s connection point and cartridge threads. Remove any residue or oil buildup to ensure a secure connection. For the cartridge‚ dab it lightly with a clean cloth to absorb excess oil. Avoid harsh chemicals or submerging the device in water. Regular cleaning prevents clogging and maintains vapor quality. Keep the device dry and free of debris for longevity.

Troubleshooting Common Issues

This section addresses common issues like the device not turning on or cartridges not heating‚ offering solutions to ensure smooth operation and optimal performance.

Device Not Turning On

If your Wulf Flat Plus isn’t turning on‚ check if the battery is fully charged. Ensure the power button is functioning correctly by pressing it five times rapidly. Verify that the cartridge is securely connected and not loose. If issues persist‚ reset the device by pressing the power button 15 times. Allow it to cool down for a few minutes before retrying. Consult the manual for further troubleshooting steps to resolve the issue effectively.

Cartridge Not Heating Properly

If the cartridge isn’t heating‚ ensure it’s securely connected to the battery. Check for any blockages or residue in the cartridge’s airflow. Use the preheat function to warm up the coil before vaping. Verify that the voltage setting is appropriate for your cartridge type. Avoid overcharging‚ as this can affect performance. If issues persist‚ consult the manual or contact support for further assistance to resolve the heating problem effectively.

Safety Tips for Using the Wulf Flat Plus

Handle the device with care‚ avoiding drops. Store in a cool‚ dry place away from flammable materials. Keep out of reach of children and pets. Always avoid extreme temperatures to maintain optimal performance and safety.

Proper Storage and Handling

Store the Wulf Flat Plus in a cool‚ dry place away from direct sunlight and flammable materials. Keep it out of reach of children and pets to prevent accidental damage or ingestion. Avoid extreme temperatures‚ as this can degrade battery performance. When not in use‚ disconnect the cartridge to preserve battery life. Use a protective case for travel to prevent damage. Clean the device regularly with a soft cloth and isopropyl alcohol to maintain functionality. Always handle the device gently to avoid drops and potential damage.

Avoiding Overcharging

To prevent overcharging‚ unplug the Wulf Flat Plus once it reaches full charge. Use the provided USB-C charger or a high-quality alternative to avoid damage. Avoid leaving the device charging overnight‚ as this can strain the battery. Monitor the charging time‚ typically 1-2 hours‚ depending on the battery capacity. Overcharging can reduce battery life and performance‚ so always charge responsibly to maintain your device’s health and safety.

Wulf Flat Plus vs Other Yocan Models

The Wulf Flat Plus stands out with its 900mAh battery and advanced features like variable voltage and USB-C charging‚ surpassing smaller models in the Yocan Flat series.

Comparison with Yocan Flat Mini

The Wulf Flat Plus offers a larger 900mAh battery compared to the Yocan Flat Mini’s 400mAh‚ providing longer sessions between charges. It also features variable voltage settings and a preheat function‚ which the Mini lacks. The Plus model includes USB-C charging for faster power-ups‚ while the Mini uses standard charging. Overall‚ the Flat Plus delivers more power‚ customization‚ and convenience‚ making it a superior choice for users seeking enhanced performance and flexibility.

Comparison with Yocan Flat Slim

The Wulf Flat Plus surpasses the Yocan Flat Slim in battery capacity‚ offering a robust 900mAh compared to the Slim’s 350mAh. While both devices feature sleek designs‚ the Flat Plus includes advanced features like variable voltage control and a preheat function‚ which the Slim lacks. Additionally‚ the Flat Plus supports faster USB-C charging‚ enhancing convenience for users. This makes the Flat Plus a more versatile and powerful option for those seeking extended sessions and customizable vaping experiences.

Frequently Asked Questions

Explore common inquiries about the Wulf Flat Plus‚ addressing battery life‚ cartridge compatibility‚ and troubleshooting. Find clear answers to enhance your vaping experience.

How Long Does the Battery Last?

The Wulf Flat Plus battery life varies depending on usage patterns and voltage settings. With a 900mAh capacity‚ it typically lasts several sessions. Charging via USB-C takes about 1-2 hours. Higher voltage settings reduce battery life‚ while conservative use extends it. Proper maintenance‚ like avoiding overcharging‚ ensures longevity. For heavy users‚ it may last a full day‚ while casual users can expect multiple days on a single charge.

Can I Use the Wulf Flat Plus with Other Cartridges?

The Wulf Flat Plus is designed to work seamlessly with Yocan Flat Series cartridges‚ including 510-threaded and magnetic options. While it may physically fit other cartridges‚ compatibility and performance are not guaranteed. Using non-recommended cartridges can lead to poor functionality or damage. For optimal results‚ stick to Yocan-approved cartridges. The manual provides detailed guidance on compatible options to ensure a smooth vaping experience.

The Wulf Flat Plus manual provides essential insights for optimal device use. By following these guidelines‚ you’ll enhance your vaping experience and maintain your device’s longevity effectively.

Final Thoughts on the Wulf Flat Plus

The Wulf Flat Plus is a versatile and user-friendly vape pen designed for seamless performance. With its variable voltage settings and preheat function‚ it offers a customizable experience. The USB-C charging feature ensures quick and efficient battery replenishment. Its sleek design and durable construction make it a great choice for both beginners and experienced users. By adhering to the manual’s guidelines‚ you can maximize the device’s functionality and enjoy a superior vaping experience consistently.

Encouragement to Follow the Manual

Adhering to the Wulf Flat Plus manual is essential for optimal performance and safety. It provides clear guidelines on setup‚ usage‚ and maintenance‚ ensuring a seamless vaping experience. By following the instructions‚ you can maximize the device’s functionality‚ prolong its lifespan‚ and avoid potential issues. The manual is designed to be user-friendly‚ making it easy for both newcomers and experienced users to get the most out of their Wulf Flat Plus. Always refer to it for troubleshooting and care tips to enhance your vaping journey.

secondary math pacing guide

A secondary math pacing guide is a structured tool for educators, aligning instruction with academic standards and providing a timeline for teaching key mathematical concepts effectively.

What is a Secondary Math Pacing Guide?

A secondary math pacing guide is a detailed, structured document outlining the timeline and content for teaching mathematical concepts in middle and high school. It aligns instruction with academic standards, ensuring consistency and coherence across the curriculum. The guide typically includes unit timelines, key topics, instructional resources, and assessment benchmarks. It serves as a roadmap for educators, helping them manage lesson planning and ensure students meet learning objectives. Pacing guides are flexible and regularly updated to reflect educational goals and student needs.

Key Components of a Secondary Math Pacing Guide

Key components include curriculum maps, unit timelines, instructional resources, and assessment benchmarks. These elements ensure alignment with academic standards and provide a structured approach to teaching mathematical concepts effectively;

Middle School Math Curriculum Overview

The middle school math curriculum spans grades 6-8, focusing on foundational skills in numbers, operations, algebra, geometry, and data analysis. Courses include Math 6, Math 7, and Math 8, with advanced options like Pre-Algebra and Algebra 1 for accelerated learners. These programs emphasize problem-solving, critical thinking, and real-world applications, ensuring students are prepared for high school math. The curriculum is structured to build sequentially, with pacing guides ensuring alignment with academic standards and providing teachers with a clear framework for instruction and assessment.

High School Math Curriculum Overview

The high school math curriculum (grades 9-12) builds on middle school foundations, offering courses like Algebra 1, Geometry, Algebra II, and advanced options such as Pre-Calculus and Calculus. These programs emphasize deeper understanding of mathematical concepts, problem-solving, and critical thinking. Pacing guides ensure alignment with academic standards, providing teachers with structured lesson plans and assessment timelines. The curriculum is designed to prepare students for college, careers, and real-world challenges, fostering mathematical literacy and reasoning skills through a progression of courses tailored to diverse learning needs and abilities.

Benefits of Using a Secondary Math Pacing Guide

Secondary math pacing guides ensure alignment with academic standards, enhance teacher planning, and improve student outcomes by providing a structured, goal-oriented framework for instruction.

Alignment with Academic Standards

Secondary math pacing guides ensure curriculum alignment with academic standards, such as CCSS and TEKS, providing a clear framework for teaching essential mathematical concepts. These guides incorporate benchmarks and learning objectives, ensuring students master required skills. By structuring lessons around state and national standards, pacing guides promote consistency across classrooms and districts. Regular updates reflect changes in educational standards, maintaining relevance and rigor. This alignment helps educators deliver targeted instruction, ensuring students meet proficiency levels and prepare for assessments.

Support for Teacher Instruction and Planning

Secondary math pacing guides provide teachers with a structured framework for lesson planning, ensuring instructional consistency and alignment with curriculum goals. These guides offer a detailed timeline for teaching specific topics, helping educators allocate time effectively and cover all necessary content. By organizing resources and activities, pacing guides enable teachers to deliver coherent lessons and maintain academic rigor. They also support new educators by offering a clear roadmap, enhancing instructional confidence and classroom efficiency while fostering a collaborative teaching environment.

Implementation Strategies for Secondary Math Pacing Guides

Secondary math pacing guides are essential tools for educators, aiding in the organization of lesson plans and ensuring comprehensive coverage of mathematical concepts while maintaining academic standards.

Integrating Pacing Guides into Lesson Planning

Secondary math pacing guides serve as structured timelines for educators, ensuring lessons align with academic standards and cover essential mathematical concepts. By breaking down content into manageable units, these guides help teachers organize instruction effectively. They also suggest resources and activities to support learning objectives. Flexibility within pacing guides allows teachers to adapt instruction based on student needs and progress. Regularly updating these guides ensures relevance and responsiveness to curriculum changes, fostering a cohesive and goal-oriented teaching approach in secondary math education.

Challenges in Creating and Using Pacing Guides

Creating pacing guides requires balancing flexibility with structure, addressing diverse learning paces, and ensuring alignment with standards while adapting to curriculum updates and teacher feedback.

Addressing Variability in Student Learning Paces

One significant challenge in using pacing guides is accommodating students’ varying learning speeds. While some students grasp concepts quickly, others need more time, leading to potential gaps. To address this, educators can incorporate flexible strategies, such as differentiated instruction and formative assessments, to ensure all students meet benchmarks. Additionally, pacing guides can be adapted to include optional enrichment or remediation activities, allowing teachers to cater to diverse needs while maintaining the overall curriculum structure and pacing. Regular updates to pacing guides also help reflect student progress and adapt to classroom dynamics.

Best Practices for Developing Effective Pacing Guides

Effective pacing guides involve collaboration among educators, alignment with academic standards, and regular feedback. They should remain flexible to adapt to teaching needs and student progress.

Incorporating Flexibility and Adaptability

Pacing guides should remain flexible to accommodate varied teaching styles and student needs. Educators can adjust timelines based on class performance or incorporate additional resources. Regular feedback from teachers and students helps refine the guides, ensuring they remain relevant and effective. Digital tools facilitate easy updates, allowing for real-time adjustments. Flexibility ensures the curriculum stays dynamic, addressing diverse learning paces while maintaining alignment with academic standards. This adaptability fosters a responsive educational environment, keeping instruction engaging and impactful for all learners.

Technology and Tools for Managing Pacing Guides

Digital platforms and tools, like Google Sheets, enable efficient organization and updates of pacing guides, enhancing collaboration and accessibility for educators and administrators.

Utilizing Digital Platforms for Pacing Guide Organization

Digital platforms, such as Google Sheets, offer dynamic tools for organizing and managing pacing guides. These platforms allow educators to collaborate, share resources, and track progress efficiently. With features like real-time updates and centralized storage, teachers can access and modify pacing guides seamlessly. Additionally, digital tools enable integration with other educational software, enhancing lesson planning and alignment with curriculum standards. This approach streamlines communication and ensures consistency across districts, supporting both teacher instruction and student success.

Resources for Parents and Students

Parents and students can access pacing guides, curriculum maps, and instructional resources online, ensuring transparency and understanding of math course structures and expectations.

Understanding the Role of Pacing Guides in Education

Pacing guides outline the structure and timeline for teaching math concepts, ensuring alignment with academic standards and curriculum goals. They help educators organize lessons, assess progress, and maintain consistency across classrooms. These guides also assist students and parents by providing clear expectations and milestones, fostering better academic planning and preparation. By breaking down the curriculum into manageable segments, pacing guides support a balanced and effective learning experience, ensuring students meet graduation requirements and are well-prepared for assessments and post-secondary opportunities.

Continuous Improvement of Pacing Guides

Continuous improvement involves regular updates and revisions to pacing guides based on educator feedback, student performance, and evolving academic standards to enhance instructional effectiveness.

Regular Updates and Revisions Based on Feedback

Pacing guides undergo periodic revisions to reflect teacher input, student progress, and curriculum changes. Feedback from educators and students ensures the guides remain relevant and effective, addressing learning needs and aligning with academic standards. Updates often include new resources, adjusted timelines, and enhanced strategies to improve instruction. This iterative process ensures pacing guides adapt to educational demands, fostering a dynamic and responsive learning environment. Regular reviews maintain their effectiveness in supporting both teachers and students throughout the academic year.

Secondary math pacing guides are essential tools for aligning curriculum, supporting teachers, and ensuring consistent, high-quality instruction, ultimately enhancing student learning and academic success in mathematics.

The Importance of Secondary Math Pacing Guides in Modern Education

Secondary math pacing guides play a crucial role in modern education by ensuring alignment with academic standards, supporting teacher instruction, and promoting student equity. They provide a structured timeline for teaching key concepts, helping educators manage curriculum delivery effectively. Pacing guides also facilitate adaptability, allowing adjustments based on student needs and feedback. By maintaining consistency and focus, they enhance learning outcomes and prepare students for future academic challenges, making them an indispensable tool in secondary mathematics education.

timeguard 7 day timer instructions

Welcome to the Timeguard 7 Day Timer, a versatile and energy-efficient solution for managing your appliances. This digital timer offers 7-day programming, allowing you to customize schedules for your devices, ensuring convenience and energy savings. Designed for ease of use, it features a user-friendly interface and compatibility with room thermostats, making it ideal for modern homes. With its robust build and intuitive controls, this timer is perfect for controlling lighting, heating, and other household appliances efficiently;

Overview of the Timer

The Timeguard 7 Day Timer is a compact, wall-mounted digital timer designed for controlling various household appliances. It offers flexible scheduling with 7-day programming, allowing users to set up to 6 ON/OFF periods daily. Suitable for domestic use, it can handle outputs up to 16A, making it ideal for lighting, heating, and other devices. Its user-friendly interface features a blue luminescent screen and simple push-button controls. Compatible with room thermostats, it ensures efficient energy management. Designed for ease of installation and operation, this timer is a practical solution for modern homes seeking precise control over appliance usage.

Key Features and Benefits

The Timeguard 7 Day Timer boasts an array of features that enhance its functionality and user experience. It offers 7-day programming with up to 6 ON/OFF periods daily, providing precise control over appliance operations. The timer is compatible with room thermostats, enabling seamless integration into heating systems. Its blue luminescent screen ensures visibility, while the push-button controls make programming straightforward. With a maximum load capacity of 16A, it is suitable for various domestic applications. Energy-saving capabilities and manual override functionality add to its convenience, making it an ideal choice for homeowners seeking efficient and reliable appliance management.

Compatibility and Usage Scenarios

The Timeguard 7 Day Timer is designed for versatility, fitting seamlessly into various domestic and small commercial settings. It is compatible with room thermostats, making it ideal for heating systems, and can control appliances up to 16A. Suitable for wall mounting, it fits a single gang box, ensuring a neat installation. Whether managing lighting, boilers, or other devices, its 7-day or 5-2 programming options offer flexibility for different lifestyles. Perfect for households or businesses needing precise scheduling, this timer adapts to diverse usage scenarios, ensuring efficient and reliable operation across various applications.

Safety Precautions and Installation

Always switch off mains electricity before installation or maintenance. Ensure the timer is not overloaded and avoid use with discharge lighting. Securely insert appliance plugs into the timer outlet to prevent hazards and ensure reliable operation.

Important Safety Information

Safety First: Always switch off mains electricity before installation or maintenance. Ensure the timer is not overloaded and avoid use with discharge lighting. Never plug in appliances exceeding the timer’s capacity (up to 16A). Always fully insert appliance plugs into the timer outlet to prevent hazards. Keep the timer away from water and moisture. Avoid touching electrical components during installation. Ensure proper ventilation around the device. Follow all instructions carefully to prevent damage or injury. If unsure, consult a qualified electrician or contact Timeguard support for assistance.

Installation Requirements and Setup

Ensure the timer is installed by a qualified electrician or competent DIYer. The device fits a single gang wall box, requiring a 35mm depth. Switch off mains electricity before starting. Mount the timer in a dry, well-ventilated area, avoiding extreme temperatures. Use compatible wiring (up to 16A) and secure all connections tightly. Ensure the wall box is sturdy and correctly sized. Align the timer flush with the wall for proper fit. Follow local electrical regulations and double-check wiring before powering up. The timer is designed for straightforward installation, ensuring safe and reliable operation.

Electrical Connections and Wiring

Connect the timer to the mains supply, ensuring all wires are securely attached. Use the correct terminals for live, neutral, and earth wires. The timer supports up to 16A loads, so verify appliance compatibility. Avoid overloading the circuit. Double-check all connections before powering on. Use high-quality cables to prevent interference. Ensure no wires are loose or damaged. Follow the wiring diagram provided in the manual. If unsure, consult a licensed electrician. Proper connections are crucial for safe and reliable operation of the timer with your home’s electrical system;

Programming the Timer

The Timeguard 7 Day Timer offers flexible programming with 5-2 or 7-day modes. Set custom schedules using the program copy function. Easily override settings with manual controls. LED indicators provide status updates, ensuring precise control over your appliances. Follow the manual guidelines for smooth operation and energy efficiency.

Setting the Clock and Calendar

To set the clock and calendar on your Timeguard 7 Day Timer, press the MANUAL key to display the current time. Use the navigation buttons to select the correct day and time, ensuring accuracy for your schedules. Choose between 12-hour or 24-hour formats and set the AM/PM option if applicable. Once satisfied, press the SET key to save your settings. The timer will automatically update, ensuring all programmed schedules align with the correct time. Regularly check and update the clock, especially after power outages, to maintain precise control over your appliance timings.

Understanding Programming Modes (5-2 vs. 7-Day)

The Timeguard 7 Day Timer offers two programming modes: 5-2 and 7-Day. The 5-2 mode allows you to set one schedule for weekdays (Monday to Friday) and another for weekends (Saturday and Sunday). This is ideal for routines that differ between workdays and leisure days. In contrast, the 7-Day mode lets you program each day individually, providing maximum flexibility for unique schedules. To switch modes, adjust the jumper on the timer’s rear (see Fig. 2). Once selected, both modes support up to 6 ON/OFF periods daily, ensuring precise control over your appliances. Choose the mode that best fits your lifestyle for optimal energy management.

Creating Custom Schedules and Timings

With the Timeguard 7 Day Timer, you can create custom schedules tailored to your needs. Simply select the desired day or days and set the ON/OFF times using the intuitive controls. The timer allows up to 6 ON/OFF periods daily, enabling precise control over your appliances. For added flexibility, the manual override function lets you temporarily switch devices on or off without altering the programmed schedule. The minimum setting interval is 2 hours, ensuring efficient energy management. By programming specific days and times, you can optimize your energy usage and ensure your home runs smoothly according to your routine.

Operating the Timer

The Timeguard 7 Day Timer offers a user-friendly interface with manual override functionality and LED indicators for status updates. Designed for domestic use, it ensures efficient appliance control.

Manual Override Functionality

The Timeguard 7 Day Timer features a manual override option, allowing users to switch appliances ON or OFF without altering programmed schedules. This function is accessed via the MANUAL key, which toggles the display between ON and OFF states. Activating manual mode does not affect pre-set programs, ensuring schedules resume automatically. A red LED indicator confirms the override status, providing clear visual feedback. This feature is ideal for temporary adjustments, offering flexibility without the need to reprogram the timer. It ensures seamless control over connected devices, enhancing overall operational convenience and efficiency.

Understanding LED Indicators and Status

The Timeguard 7 Day Timer utilizes LED indicators to provide real-time status updates. A red LED indicates manual override mode, while a green LED shows when the timer is actively controlling an output. These visual cues help users monitor the timer’s operational state without needing to access the menu. The LEDs also flash during programming to signal errors or successful program saves, ensuring clear feedback for troubleshooting. This intuitive system allows users to quickly assess the timer’s status, making it easier to manage and maintain their schedules effectively. The LEDs are essential for seamless operation and user confidence.

Navigating the User Interface

The Timeguard 7 Day Timer features an intuitive user interface designed for simplicity and ease of use. The interface includes a clear display and straightforward buttons for navigating settings. Users can easily switch between programming modes, adjust schedules, and monitor the timer’s status. The menu is structured logically, with options for setting days, hours, and minutes. Visual feedback through LED indicators and button responses ensures users can confirm their selections. This user-friendly design makes it easy to customize and manage schedules, even for those less familiar with digital timers, ensuring a seamless experience for all users. The interface is both functional and accessible, providing a stress-free interaction.

Troubleshooting and Maintenance

Ensure mains supply is on and connections are secure. Reset the timer if schedules fail. Clean the display and check for firmware updates regularly for optimal performance.

Common Issues and Solutions

If the display does not light up, ensure the timer is powered and mains supply is on. For scheduling issues, check that programs are saved correctly and the clock is set accurately. If the timer fails to switch appliances, verify electrical connections and ensure the load does not exceed the 16A capacity. For recurring malfunctions, reset the timer by pressing and holding the reset button for 3 seconds. Regularly clean the display with a soft cloth and ensure firmware is updated for optimal performance. Always refer to the manual for detailed troubleshooting steps.

Resetting the Timer and Programs

To reset the Timeguard 7 Day Timer, press and hold the reset button for 3 seconds. This will cancel all programmed settings and return the timer to its default state. After resetting, ensure the mains power is on and re-enter the clock and calendar information. Note that resetting does not affect the timer’s ability to function correctly. Always reset the timer if you encounter persistent issues or plan to reprogram it entirely. This process ensures a clean start for new configurations and maintains optimal performance. Refer to the manual for additional guidance on resetting and reconfiguring your timer effectively.

Maintenance Tips for Longevity

Regularly inspect the timer’s electrical connections to ensure they are secure and free from corrosion. Clean dust from the device using a soft cloth to prevent overheating. Avoid overloading the timer with appliances exceeding its 16A capacity. Do not use it with discharge lighting, as specified. Update your schedules periodically to reflect changing needs. For optimal performance, ensure the timer is installed by a qualified professional. Always switch off mains power before performing any maintenance. These practices will extend the lifespan of your Timeguard 7 Day Timer and ensure reliable operation over time.

Energy-Saving Features

The Timeguard 7 Day Timer offers advanced energy-saving capabilities through customizable schedules and smart programming. Its 7-day programming allows precise control of appliance usage, reducing unnecessary energy consumption and optimizing efficiency. Compatible with room thermostats, it ensures heating systems operate only when needed. By automating your devices, this timer helps minimize standby power and lower overall energy waste, contributing to significant cost savings and environmental benefits over time.

Optimizing Energy Usage with Smart Scheduling

The Timeguard 7 Day Timer excels at optimizing energy usage through smart scheduling. By programming up to 6 ON/OFF periods daily, you can tailor appliance operation to your exact needs, eliminating unnecessary power consumption. The timer’s 7-day and 5-2 programming modes allow flexible scheduling for weekdays and weekends. This customization ensures devices run only when required, reducing standby power and energy waste. Compatible with room thermostats, it optimizes heating systems for maximum efficiency. With smart scheduling, you can significantly lower energy bills and minimize environmental impact while maintaining convenience and control over your home’s appliances.

Using the Timer with Room Thermostats

The Timeguard 7 Day Timer seamlessly integrates with room thermostats, enhancing your heating system’s efficiency. By programming the timer to align with your thermostat, you can achieve smart control over temperature levels. This combination allows you to pre-set heating periods, ensuring warmth only when needed. The timer’s 7-day and 5-2 programming modes enable customization for weekdays and weekends, avoiding unnecessary heating. This integration not only optimizes energy usage but also maintains comfort levels, making it an ideal solution for modern, energy-conscious homes.

Maximizing Efficiency with Custom Programs

The Timeguard 7 Day Timer excels in maximizing efficiency through its custom programming options. With 7-day and 5-2 programming modes, you can tailor schedules to match your daily routines precisely. The timer allows up to 6 ON/OFF settings per day, ensuring your appliances operate only when needed. By aligning these programs with your energy usage patterns, you can significantly reduce standby power consumption. Custom programs also enable seamless integration with room thermostats and manual override functionality, providing flexibility while maintaining energy efficiency. This feature-rich system ensures optimal performance and energy savings tailored to your lifestyle.

Mastering the Timeguard 7 Day Timer enhances your home’s efficiency and convenience. For further support, refer to the official Timeguard manual or contact their customer service team. Additional resources, including troubleshooting guides and installation tips, are available on the Timeguard website, ensuring optimal use of your timer.

Final Tips for Effective Use

For optimal performance, regularly review and update your schedules to match your lifestyle. Ensure all settings align with your energy-saving goals. Use the manual override feature sparingly to avoid disrupting programmed schedules. Clean the timer’s screen periodically to maintain visibility. Always check for firmware updates to access new features. If integrating with a room thermostat, ensure both devices are synchronized. Keep the user manual handy for quick reference. By following these tips, you can maximize the timer’s efficiency and enjoy a smarter, more energy-conscious home environment.

Where to Find Additional Support and Manuals

For additional support or to access manuals, visit the Timeguard website or contact their customer service. Detailed instructions and troubleshooting guides are available online. The user manual provides comprehensive step-by-step guidance for installation, programming, and maintenance. If you encounter issues, refer to the troubleshooting section or reach out to the Timeguard Helpline for assistance. Ensure to register your product for potential updates and support. Online resources, including FAQs and instructional videos, can also aid in resolving common queries efficiently.

mouthpiece saxophone guide

Welcome to our comprehensive saxophone mouthpiece guide, designed to help you master the essentials. Discover how to choose, maintain, and optimize your mouthpiece for the best sound quality and playing comfort.

1.1 Importance of the Mouthpiece in Saxophone Playing

The mouthpiece is the heart of the saxophone, directly influencing tone, pitch, and playability. Its design and size affect how air flows through the reed, shaping the sound produced. A well-chosen mouthpiece enhances articulation, intonation, and overall performance, making it essential for both beginners and advanced players to achieve their musical goals effectively and enjoyably.

1.2 Purpose of the Guide

This guide is designed to provide a detailed understanding of saxophone mouthpieces, helping players of all levels make informed decisions. It covers selection, maintenance, and optimization, offering practical tips and expert insights to enhance your playing experience and sound quality. Whether you’re a beginner or an advanced musician, this comprehensive resource will guide you in mastering the saxophone mouthpiece effectively.

Choosing the Right Saxophone Mouthpiece

Choosing the right saxophone mouthpiece is crucial for optimal sound quality and playability. Consider factors like material, tip opening, and reed strength to find your perfect match.

2.1 Factors to Consider When Selecting a Mouthpiece

When selecting a saxophone mouthpiece, consider material, tip opening, and reed strength. Material options include plastic, metal, and hard rubber, each offering unique tonal qualities. Tip opening affects playability and sound projection. Reed strength must align with your skill level and desired tone. Additionally, ligature compatibility and mouthpiece chambers can influence performance. These factors ensure a balanced setup tailored to your playing style and goals.

2.2 Recommended Mouthpieces for Beginners

For beginners, the Yamaha 4C mouthpiece is highly recommended for its balanced tone and ease of playability. The Vandoren AL3 and D’Addario Evolution mouthpieces are also excellent choices, offering versatility and a smooth response. These options provide a forgiving setup, allowing new players to focus on developing proper technique and tone. Pairing with a 2-2.5 reed strength is advised for optimal performance.

Anatomy of a Saxophone Mouthpiece

The mouthpiece is the heart of the saxophone, featuring a chamber, bore, and tip opening that shape the sound. Materials vary, impacting tone and playability.

3.1 Key Components of the Mouthpiece

The saxophone mouthpiece consists of a chamber, bore, and tip opening. The chamber directs airflow, while the bore and tip opening influence tone and pitch. Materials like metal, hard rubber, or resin affect sound quality and durability. The ligature and reed placement are also critical, ensuring proper vibration and airflow for optimal performance and sound production.

3.2 How the Design Affects Sound Production

The mouthpiece’s design significantly impacts sound quality. A larger tip opening produces a brighter, more projecting tone, while a smaller opening yields a darker, warmer sound. The chamber size and shape influence airflow and resonance, affecting pitch accuracy and tonal richness. Materials, such as metal or hard rubber, also alter the sound’s brightness and warmth, allowing players to tailor their tone to suit their style and musical genre.

Setting Up the Mouthpiece and Reed

Properly setting up your mouthpiece and reed ensures optimal performance. Align the reed securely, adjust the ligature for tightness, and position the mouthpiece correctly on the neck for precise sound quality and playability.

4.1 Proper Reed and Ligature Placement

Proper reed and ligature placement is crucial for optimal sound production. Align the reed with the mouthpiece tip, ensuring it lies flat and centered. Secure the reed using the ligature, tightening it evenly to prevent slipping. Adjust the ligature screws to achieve the right tension, allowing the reed to vibrate freely. Proper placement ensures consistent tone and response, while incorrect alignment can lead to poor sound quality and intonation issues.

4.2 Adjusting the Reed for Optimal Performance

Adjusting the reed is essential for achieving the best sound. Soak the reed in water before use to ensure flexibility. Position it securely on the mouthpiece, aligning the tip with the edge. Use a reed clipper to trim excess length for even response. Experiment with strength and placement to find your ideal setup, ensuring proper vibration and tone consistency across all registers.

Care and Maintenance of the Mouthpiece

Regular care ensures optimal performance and longevity. Clean with warm water and mild soap, rinse thoroughly, and dry with a soft cloth. Store in a protective case to prevent damage and maintain hygiene.

5.1 Cleaning and Sanitizing the Mouthpiece

Regular cleaning is essential for maintaining hygiene and sound quality. Remove the reed and ligature, then gently scrub the mouthpiece with warm water and mild soap. Rinse thoroughly and dry with a clean cloth. Avoid harsh chemicals or abrasive materials, as they can damage the mouthpiece. Proper sanitation ensures optimal performance and prevents bacterial growth.

5.2 Storage Tips to Prevent Damage

Store your saxophone mouthpiece in a protective case or pouch to prevent scratches and dents. Avoid extreme temperatures and humidity, as they can warp the material. Keep the mouthpiece dry and free from moisture to prevent mold. Regularly inspect the case for wear and tear, and replace it if damaged. Proper storage ensures your mouthpiece remains in excellent condition for years of use.

Techniques for Playing the Saxophone Mouthpiece

Mastering the saxophone mouthpiece requires proper embouchure and breath control. Focus on developing a relaxed posture and consistent air support to achieve optimal tone and performance quality.

6.1 Developing Proper Embouchure

Proper embouchure is crucial for producing a clear, resonant sound. Form a firm yet relaxed lip and facial muscles around the mouthpiece. Ensure your jaw is aligned correctly, with even pressure distributed. Practice long tones to build consistency and control. Regular practice and adjustments, guided by a teacher, will help refine your technique for optimal performance and comfort while playing.

6.2 Breath Control and Air Support

Breath control and air support are essential for consistent tone and dynamics. Practice deep breathing exercises to expand lung capacity. Engage your diaphragm to maintain steady airflow. LONG tones and scales can help develop control. Proper posture and relaxed breathing ensure efficient air support, enhancing overall performance and endurance while playing the saxophone.

Selecting Accessories for the Mouthpiece

Explore the essential accessories like ligatures, caps, and reeds. Ligatures secure the reed, while caps protect the mouthpiece. Choose reeds based on strength and type for optimal performance;

7.1 Ligatures and Caps: What You Need to Know

Ligatures securely hold the reed in place, affecting tone and responsiveness. They come in metal or fabric, with screw-adjusted or single-screw designs. Caps protect the mouthpiece when not in use, preventing dust and damage. Both accessories are crucial for maintaining performance and longevity, with options catering to different preferences and needs.

7.2 Reed Strength and Type Recommendations

Reed strength and type significantly impact sound quality and playability. Beginners often start with a 2 or 2.5 strength reed for easier response. Intermediate players may prefer 3 to 3.5 for better tone control. Synthetic reeds offer consistency, while traditional cane reeds provide a richer sound. Experimenting with different strengths and materials helps tailor your sound and improve overall performance.

Common Mistakes to Avoid

Common mistakes include over-tightening the ligature, using excessive mouthpiece pressure, and neglecting regular maintenance. These errors can damage equipment and hinder performance quality significantly.

8.1 Avoiding Poor Reed Placement

Poor reed placement is a common issue that can significantly affect sound quality. Ensure the reed is aligned properly with the mouthpiece tip, avoiding misalignment or uneven tightening. Misplacement can cause uneven vibrations, leading to poor tone and pitch accuracy. Always clean the mouthpiece surface before placing the reed and use the correct ligature to secure it firmly. Proper alignment and tightening are crucial for optimal performance.

8.2 Preventing Damage from Improper Care

Improper care can lead to irreversible damage to your saxophone mouthpiece. Always clean it with warm water and mild soap, avoiding harsh chemicals. Dry thoroughly to prevent water spots. Store it in a protective case to avoid scratches. Regularly inspect for wear and tear, especially around the tip and chamber. Avoid extreme temperature changes, as they can warp the material. Handle with care to prevent accidental drops or bends.

Mastering your saxophone mouthpiece leads to enhanced performance and enjoyment. Regular practice and proper care ensure lasting quality. Seek guidance from professionals for continuous improvement and personalized advice.

9.1 Summary of Key Takeaways

9.2 Encouragement for Continued Practice

Embrace the journey of mastering your saxophone mouthpiece! Consistent practice and patience will yield remarkable progress. Celebrate small milestones, seek guidance from professionals, and stay dedicated. Remember, every session brings you closer to unlocking your full potential and enjoying the rewarding experience of playing the saxophone.