guitar pickup wiring guide

Guitar pickups are essential components that capture string vibrations, converting them into an electrical signal for amplification. Understanding their types, such as single-coil and humbucker, is crucial for achieving desired tones. Proper wiring ensures optimal sound quality and functionality, making it a fundamental skill for guitar technicians and players alike;

1.1 Understanding the Basics of Guitar Pickups

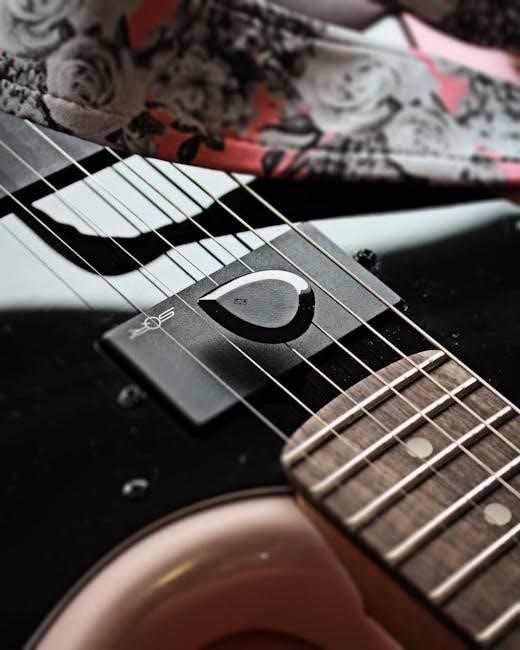
Guitar pickups are magnetic devices that convert string vibrations into an electrical signal. They consist of a coil of wire wrapped around a magnet, capturing the motion of metal strings. Single-coil pickups are bright and articulate but prone to hum, while humbuckers use two coils to cancel noise, offering a fuller tone. Understanding these basics is vital for proper wiring and achieving desired sounds.

1.2 Importance of Proper Pickup Wiring

Proper pickup wiring ensures optimal tone and functionality. Incorrect wiring can lead to hum, noise, or loss of signal, while correct connections enhance clarity and sustain. Shielded cables and precise soldering are crucial for minimizing interference and maintaining signal integrity. A well-wired setup allows players to unlock the full sonic potential of their pickups, ensuring a clean and reliable sound.

Reading and Understanding Guitar Wiring Diagrams

Guitar wiring diagrams provide a visual guide for connecting pickups, pots, and switches. They detail components, connections, and configurations, ensuring a clean and functional setup for optimal tone.

2.1 Key Components of a Wiring Diagram

A wiring diagram includes pickups, tone and volume pots, capacitors, switches, and output jacks. Each component is represented with symbols, and lines show connections. Colors may code wires, while diagrams often include series-parallel configurations, coil-splitting, and grounding details. Understanding these elements is vital for accurate wiring and achieving desired tones. Proper planning ensures a clean, functional setup.

2.2 Tips for Interpreting Pickup Configurations

When interpreting pickup configurations, identify series or parallel wiring, coil-splitting, and phase switching. Use color codes and diagrams to trace wire connections. Plan configurations based on desired tone, ensuring correct pot and switch placements. Shielded wires reduce noise, and proper grounding is essential for hum-free operation. Follow step-by-step guides for accuracy and to achieve optimal sound customization.

Types of Guitar Pickups and Their Wiring

This section introduces single-coil and humbucker pickups, their wiring setups, and tone characteristics. Learn how wiring configurations impact sound quality and overall performance for optimal results.

3.1 Single-Coil Pickups: Wiring and Characteristics

Single-coil pickups are the foundation of classic electric guitar tones; Their wiring typically involves a hot and ground wire, with a capacitor to refine high frequencies. Known for their bright, snappy sound, they are prone to hum. Proper shielding and wiring techniques can minimize noise. Common configurations include series wiring for added warmth and parallel setups for increased clarity. They remain a staple in many guitar designs due to their versatility and tonal purity.

3.2 Humbucker Pickups: Wiring and Tone Differences

Humbuckers are dual-coil pickups designed to eliminate hum and noise. They offer a warmer, fuller tone compared to single-coils. Wiring configurations include series for higher output and parallel for brighter tones. Humbuckers are versatile, suiting various genres. Coil-splitting and tapping further expand tonal options, making them a favorite among players seeking rich, dynamic sounds; Proper wiring ensures their full potential is realized.

Common Pickup Wiring Configurations

Explore popular wiring setups that enhance tone and functionality. Series and parallel configurations offer distinct sonic profiles, while coil-splitting and tapping unlock additional tonal versatility for players seeking unique sounds.

4.1 Series vs. Parallel Wiring: What You Need to Know

Series wiring combines pickups to increase output and sustain, offering a fuller, warmer tone. Parallel wiring maintains clarity and brightness by blending pickups without adding resistance. Series provides a thicker sound, ideal for lead playing, while parallel keeps tones articulate, perfect for clean settings. Experimenting with both configurations allows players to tailor their guitar’s voice to suit their musical style.

4.2 Coil Splitting and Coil Tapping Explained

Coil splitting divides a humbucker into single-coil mode, reducing hum and offering brighter tones. Coil tapping accesses different parts of a pickup’s coil for varied tonal options. Both techniques enhance versatility, allowing players to switch between full and split modes, providing a wide range of tonal possibilities without altering the pickup’s physical structure. These methods are popular for customizing sound in modern guitars.

Common Modifications and Upgrades

Upgrading pickups, adding phase switches, or installing kill switches can unlock new tonal possibilities. These mods enhance versatility, offering unique sounds and expanded creative options for players.

5.1 Phase Switching for Unique Tonal Options

Phase switching allows players to explore a wide range of tonal possibilities by altering the phase relationship between pickups. This modification can produce unique, vibrant sounds, from subtle warmth to crisp clarity. It enables guitarists to achieve distinct tonal variations, enhancing their musical expression. Proper installation ensures these effects are seamlessly integrated into the instrument’s wiring system.

5.2 Adding a Kill Switch or Piezoelectric Pickups

A kill switch provides instant muting, creating dynamic effects during performances. Piezoelectric pickups capture acoustic vibrations, offering a natural, resonant sound. These upgrades enhance versatility, allowing for expanded tonal exploration and expressive control. Proper installation ensures seamless integration with existing wiring, maintaining the guitar’s clarity and responsiveness while adding new dimensions to its sound capabilities.

Tools and Materials Needed for Wiring

Essential tools include wire cutters, soldering iron, and multimeter. Materials like shielded cable, 250k pots, and 0.047μF capacitors ensure a clean, noise-free wiring setup.

6.1 Essential Tools for Pickup Wiring

Essential tools for pickup wiring include a soldering iron, wire cutters, and a multimeter for testing connections. A screwdriver and diagonal cutters are also handy. Shielded cable and high-quality solder ensure clean, noise-free wiring. Additionally, a wiring diagram specific to your guitar model is crucial for accuracy. Invest in a good soldering iron to prevent poor connections and ensure reliability.

6.2 Recommended Materials for a Clean Setup

High-quality materials are crucial for a clean and reliable guitar wiring setup. Use shielded cable to minimize noise and ensure signal integrity. A 22 AWG wire is ideal for its flexibility and durability. Choose 250k pots for single-coil pickups or 500k for humbuckers. A 0.047µF capacitor is recommended for tone shaping. Consider adding a treble bleed circuit for retaining high-end clarity when rolling off the volume. These components ensure a professional-grade installation.

Safety Precautions and Best Practices

Always disconnect the battery or power source before starting work. Use insulated tools to prevent electric shock. Ensure proper grounding to avoid hum or noise issues. Keep the workspace clean and organized to minimize errors. Never touch components with bare hands to prevent static damage. Follow diagrams carefully and test connections before final assembly.

7.1 Avoiding Common Mistakes in Pickup Wiring

Common mistakes in pickup wiring include incorrect soldering, reversed polarity, and improper grounding. These errors can lead to hum, noise, or loss of signal. To avoid them, use high-quality solder, ensure all connections are secure, and verify polarity with a multimeter. Proper shielding and insulation are also crucial for maintaining signal integrity and reducing interference. Always double-check wiring diagrams before starting the job.

7.2 Safety Tips for Working with Electronics

When working with guitar electronics, always unplug the instrument to avoid electric shock. Use proper soldering tools and ensure the work area is well-ventilated. Avoid touching components with bare hands to prevent static damage. Keep loose clothing and long hair tied back, and never solder near flammable materials. Safety glasses are recommended to protect against solder splashes.

Troubleshooting Common Wiring Issues

Identify and resolve grounding problems, faulty pickups, and soldering errors. Use wiring diagrams to diagnose issues, ensuring proper connectivity and tone. Regularly inspect and test components to maintain optimal performance.

8.1 Identifying and Fixing Grounding Problems

Grounding issues can cause hum, noise, or complete loss of signal. Check all connections to ensure the bridge, tremolo, and electronics are properly grounded. Inspect the wiring for breaks or corrosion. Use a multimeter to test continuity between components. Verify that the ground wire is securely soldered to the guitar’s metal parts. Shielded cables can reduce external interference. Consult wiring diagrams to trace grounding paths accurately. If problems persist, consider rewiring with high-quality, shielded materials to eliminate noise and ensure reliable signal transmission.

8.2 Diagnosing and Repairing Faulty Pickups

Faulty pickups can cause weak output or distorted sound. Use a multimeter to measure resistance and inductance, comparing it to the manufacturer’s specifications. Inspect the coils for loose wires or physical damage. Check for shorts between wires or the pickup and guitar body. Clean or replace damaged components. If issues persist, consider rewinding the coil or replacing the pickup entirely. Always refer to a wiring diagram for guidance during repairs to ensure proper functionality and tone restoration;

Advanced Wiring Techniques

Explore advanced wiring methods like multi-pickup configurations, active vs. passive setups, and coil splitting for enhanced tonal versatility. Use specialized switches and circuits to unlock unique sounds.

9.1 Multi-Pickup Configurations and Switching Systems

Multple pickups offer a variety of tonal options. Using switches like DPDT or 3-way toggles allows for series, parallel, or coil-splitting configurations. These setups enhance versatility, enabling players to achieve diverse sounds. Proper wiring ensures each pickup combination functions seamlessly, making it ideal for musicians seeking dynamic tonal control and expanded creative possibilities.

9.2 Active vs. Passive Pickup Wiring: Pros and Cons

Active pickups use external power for boosted output and reduced hum, ideal for high-gain genres. They require a battery, adding maintenance but offering clarity. Passive pickups rely on coil windings for tone, providing organic dynamics without external power. However, they can be noisier and lower in output. Choosing between them depends on tone preferences and playing style.

Mastering guitar pickup wiring unlocks tonal versatility and enhances playing satisfaction. Experiment with configurations, prioritize quality materials, and practice safety. Happy wiring and enjoy your unique sound!

10.1 Summary of Key Wiring Principles

Understanding pickup types and configurations is vital for achieving desired tones. Proper wiring ensures optimal signal flow and functionality. Key principles include using shielded cables, following diagrams, and maintaining clean connections. Series and parallel wiring offer distinct tonal options, while coil-splitting and tapping provide versatility. Prioritize quality materials and safety to ensure reliable performance and avoid common pitfalls in your setup.

10.2 Encouragement to Experiment and Customize

Take control of your guitar’s voice by experimenting with wiring configurations. Discover new tones and textures through coil-splitting, phase switching, or adding unique components like kill switches. Embrace creativity and explore beyond standard setups to craft a sound that’s truly yours. With patience and practice, you can unlock endless possibilities and make your guitar a one-of-a-kind instrument.

mens wetsuit size guide

Men’s Wetsuit Size Guide

Choosing the right wetsuit size ensures optimal performance and comfort․ Key factors include height, weight, chest, waist, and inseam measurements․ A proper fit should feel snug but not restrictive, allowing freedom of movement․ Measure accurately and consult size charts for the best fit․

Proper wetsuit sizing is essential for both performance and comfort in water activities․ A well-fitting wetsuit acts like a second skin, providing insulation, flexibility, and buoyancy․ Incorrect sizing can lead to restricted movement, discomfort, or reduced efficiency in the water․

Wetsuit sizing varies by brand, but most rely on key measurements such as height, weight, chest circumference, and inseam․ These measurements help determine the optimal fit, ensuring the suit is snug without being restrictive․

For men, height and chest measurements are particularly crucial, as they dictate the overall fit․ Weight and inseam provide additional refinement, ensuring the suit aligns with body proportions․

It’s important to note that sizing can differ slightly between brands, so always consult the specific size chart for the brand you’re considering․ If possible, try the wetsuit on before purchasing, or use detailed size guides if shopping online․

Remember, a properly fitting wetsuit should feel tight but not constricting, allowing for a full range of motion․ If you fall between sizes, opt for the smaller size for the best fit․

Key Measurements for Men’s Wetsuits

When determining the right size for a men’s wetsuit, several key measurements are essential: height, weight, chest circumference, waist, and inseam․ These measurements ensure a snug, comfortable fit that allows for maximum mobility and performance in the water․

Height is a critical factor, as it helps determine the overall length of the wetsuit; Measurements typically range from 55 to 63 inches (140-160 cm) across sizes․ Weight is also important, as it helps match body proportions to the suit’s design․ Weight ranges vary by size, generally spanning 57-185 kg depending on the size chart․

Chest circumference is measured at the widest point and should be snug but not restrictive․ Sizes range from about 86-104 cm․ The waist measurement ensures the suit fits comfortably around the midsection, typically ranging from 69-84 cm․ Lastly, the inseam measurement, which is the length of the inner leg, helps ensure the wetsuit legs are neither too long nor too short, usually ranging from 67-73 cm․

By accurately measuring these key areas, you can find a wetsuit that provides the perfect balance of comfort, flexibility, and performance․ Always refer to the specific brand’s size chart for precise measurements․

Understanding Height and Weight Requirements

Height and weight are fundamental factors in selecting the appropriate men’s wetsuit size․ These measurements ensure the wetsuit fits comfortably and provides optimal performance․

Height ranges typically vary from 55 to 63 inches (140-160 cm) across different sizes, with each size catering to specific height brackets․ For instance, smaller sizes like XS and S are designed for shorter individuals, while larger sizes like XL and XXL accommodate taller users․

Weight requirements are equally crucial, as they help determine the suit’s overall fit and buoyancy․ Weight ranges generally span from 57 kg for an XS to 185 kg for an XXL, ensuring the wetsuit is neither too tight nor too loose․

Combining height and weight measurements helps identify the best fit, as these dimensions work together to ensure the wetsuit aligns with your body proportions․ Always consult the specific size chart for accurate guidance, as variations may exist between brands․

A proper fit based on height and weight ensures maximum comfort and performance, making your water activities more enjoyable and efficient․

Chest, Waist, and Inseam Measurements

Chest, waist, and inseam measurements are critical for ensuring a proper wetsuit fit․ The chest measurement, taken at the widest point, typically ranges from 86-91 cm for an XS to 100-105 cm for an XXL․ This ensures the wetsuit fits snugly around the torso without restricting breathing or movement․

Waist measurements are equally important, ranging from 69-74 cm for an XS to 88-93 cm for an XXL․ This ensures the wetsuit stays securely in place around the midsection, preventing unwanted movement or gaps․

Inseam measurements, which measure the length of the legs, range from 67-69 cm for an XS to 78-80 cm for an XXL․ This ensures the wetsuit legs fit comfortably, neither too short nor too long, providing optimal coverage and flexibility․

Accurate measurements of these dimensions are essential for selecting the right size․ They ensure the wetsuit fits like a second skin, offering both comfort and performance․ Always use a flexible tape measure and stand up straight when measuring to get precise results․

By focusing on chest, waist, and inseam, you can ensure a wetsuit that not only fits well but also enhances your experience in the water․ Proper fit is key to maximizing mobility and comfort during activities like surfing, swimming, or diving․

Factors Influencing Wetsuit Fit

Several factors influence how a wetsuit fits, beyond basic measurements․ Body type plays a significant role, as some individuals may have broader shoulders or longer torsos, affecting size selection․ Weight distribution is another key factor, as it impacts how the wetsuit conforms to the body․

Activity type also matters, as different sports require varying levels of flexibility and thickness․ For instance, triathlon wetsuits prioritize flexibility, while diving wetsuits focus on warmth and durability․ Additionally, personal comfort preferences, such as the desire for a looser or tighter fit, can influence size choice․

Neoprene thickness and panel construction also affect fit․ Thicker neoprene provides more warmth but may restrict movement, whereas thinner neoprene offers flexibility but less insulation․ Seam construction, such as sealed seams, can enhance durability and comfort․

Lastly, brand-specific sizing can vary, as some brands cater to different body types or activities․ It’s essential to consider these factors alongside measurements to ensure the best fit․ By understanding how these elements interact, you can select a wetsuit that meets your needs and enhances performance․

How to Choose the Right Size

Choosing the right wetsuit size involves a combination of accurate measurements and understanding size charts․ Start by measuring your height, weight, chest circumference, waist, and inseam․ These measurements are crucial for determining your size accurately․

Consult the manufacturer’s size chart, as sizing can vary between brands․ If you fall between sizes, consider your weight and height to decide․ Generally, if you’re closer to the upper limit of one size and the lower limit of another, opt for the smaller size for a snug fit․

Consider your body type and activity․ For example, triathlon wetsuits may require a different fit compared to diving wetsuits․ Additionally, thickness and flexibility needs should align with your sport’s demands․

Try the wetsuit on if possible, ensuring it feels like a second skin—tight but not restrictive․ If shopping online, check the return policy and read reviews for fit feedback․ Proper fit enhances performance and comfort, making it essential to take the time to choose correctly․

Common Sizing Mistakes to Avoid

When selecting a men’s wetsuit, there are several common sizing mistakes to avoid for the best fit․ One of the most frequent errors is relying solely on height and weight without considering chest, waist, and inseam measurements․ Overlooking these key measurements can lead to a wetsuit that feels too tight or too loose․ Another mistake is ignoring the differences between brands, as sizing can vary significantly․ Always consult the specific manufacturer’s size chart rather than assuming your usual size will fit․ Additionally, some individuals opt for a larger size for comfort, but this can compromise performance by allowing excess water to enter the suit․ Conversely, choosing a size that is too small can restrict movement and cause discomfort․ If you fall between sizes, consider your weight and height to decide, and if unsure, opt for the smaller size for a snug fit․ Avoid guessing your size without proper measurements, as this often leads to poor fit and reduced performance․

Tips for Getting the Best Fit

To ensure the best fit for your men’s wetsuit, start by taking accurate body measurements․ Measure your chest at its widest point, ensuring the tape is snug but not tight․ Waist measurement should be taken at the narrowest part of your torso․ Inseam, which is the length of your legs, should be measured from the crotch to the ankle․ Height and weight are also crucial factors, as they help determine the overall size․ Always refer to the manufacturer’s size chart, as sizes can vary between brands․ If you fall between sizes, consider whether you prefer a tighter or looser fit․ Trying on a wetsuit before purchasing is ideal, but if buying online, look for retailers with a flexible return policy․ Once the wetsuit is on, it should feel like a second skin—snug but not restrictive․ Check for any gaps around the shoulders, neck, and ankles, as these can let water in and reduce warmth․ Proper fit ensures maximum performance and comfort during water activities․ Taking the time to get the right size will enhance your overall experience․

soundcore q30 manual

The Soundcore Q30 offers exceptional sound quality, advanced noise cancellation, and long battery life, making it a top choice for commuters and music enthusiasts alike.

1.1 Overview of the Soundcore Q30 Headphones

The Soundcore Q30 is a wireless over-ear headphone designed for immersive audio experiences. It features active noise cancellation, long battery life, and Bluetooth connectivity. With a comfortable fit and foldable design, it’s ideal for travel and daily use. The Q30 supports both wireless and wired modes via a 3.5mm AUX input, offering versatility for different listening preferences. Its sleek design and advanced features make it a great choice for music lovers seeking quality and convenience.

1.2 Key Features and Benefits

The Soundcore Q30 boasts advanced active noise cancellation, delivering clear audio in noisy environments. It features a long-lasting battery, offering extended listening sessions. With intuitive controls and customizable settings via the Soundcore app, users can tailor their experience. The Q30’s lightweight design ensures comfort for all-day wear, while its foldable structure enhances portability. These features combine to provide a seamless and enjoyable listening experience, making the Q30 a standout choice in its category.

Unboxing and Initial Setup

Inside the box, you’ll find the Soundcore Q30 headphones, a carrying case, USB-C cable, 3.5mm AUX cable, and quick start guide. Follow the manual for easy setup.

2.1 What’s Included in the Box

  • Soundcore Q30 wireless headphones
  • Carrying case for storage
  • USB-C charging cable
  • 3.5mm AUX cable for wired use
  • Quick Start Guide
  • Detailed User Manual

2.2 First-Time Setup and Pairing

Start by charging the headphones. Turn them on by pressing the power button for 2 seconds. They will automatically enter Bluetooth pairing mode. On your device, select “Soundcore Q30” from the Bluetooth list. If prompted, confirm the connection. The LED will flash blue when paired successfully. Ensure your device is within range for a stable connection. The headphones will automatically reconnect to the last paired device.

Charging the Soundcore Q30

Use a USB-C charger to charge the Soundcore Q30. It takes about 2 hours for a full charge, providing up to 40 hours of playtime. Ensure the headphones are dry before charging to prevent damage.

3.1 Charging Methods and Accessories

The Soundcore Q30 supports USB-C charging, ensuring quick and efficient power-ups. Use the included USB-C cable and a compatible charger to replenish the battery. The headphones also feature a 3.5mm AUX input for wired listening. For optimal charging, ensure the headphones are dry to prevent damage. The USB-C port is located on the right earcup, making it easy to access while charging. Always use official Soundcore accessories for reliable performance and safety.

3.2 Charging Time and Battery Life

The Soundcore Q30 offers up to 40 hours of playtime with ANC enabled and 60 hours without. Charging takes approximately 2 hours for a full charge via USB-C. The LED indicator shows charging status, turning off when fully charged. With a quick 5-minute charge, you get 5 hours of playback. The long-lasting battery ensures extended use, making it ideal for long trips or daily commutes.

Bluetooth Pairing and Connectivity

The Soundcore Q30 supports Bluetooth 5.0 for stable, long-range connections up to 15 meters. It offers multipoint pairing and NFC for quick, seamless device connections.

4.1 How to Pair with a Device

To pair the Soundcore Q30 with a device, ensure the headphones are turned off. Press and hold the power button for 5 seconds until the LED flashes blue, indicating Bluetooth pairing mode. Open your device’s Bluetooth settings and select “Soundcore Life Q30” from the available options. The connection will be established automatically. For NFC-enabled devices, simply tap the device on the NFC area of the headphones to initiate pairing.

4.2 Troubleshooting Bluetooth Connections

If Bluetooth connectivity issues arise, reset the headphones by holding the power button for 15 seconds until the LED flashes red and blue. Ensure the headphones are in pairing mode and your device’s Bluetooth is enabled. Restart both devices and check for nearby obstacles that may interfere with the connection. If issues persist, update the firmware via the Soundcore app or reset the headphones to factory settings for a fresh pairing experience.

Active Noise Cancellation (ANC)

The Soundcore Q30 features advanced ANC technology, designed to enhance your listening experience by minimizing background noise for clearer, more immersive audio enjoyment in any environment.

5.1 Understanding ANC Modes

The Soundcore Q30 offers multiple ANC modes, including Ambient Sound mode, which lets you hear your surroundings while listening to music. This feature is ideal for commuting or working in noisy environments. The headphones automatically adjust noise cancellation based on your activity, ensuring optimal performance. With advanced noise-sensing technology, the Q30 delivers precise noise reduction, enhancing your listening experience in various settings. This versatility makes it perfect for both causal use and focused work sessions.

5.2 Customizing ANC Settings

The Soundcore Q30 allows users to tailor ANC settings to their preferences via the Soundcore app. By activating the HearID profile, the headphones adapt noise cancellation and sound quality to your unique hearing. The app also offers customizable EQ options and 3D Surround Sound, enhancing immersion. Users can adjust ANC intensity for different environments, ensuring optimal noise reduction in any setting. For detailed guidance, refer to the Technical Details section of the manual.

Soundcore Q30 Controls and Functions

The Soundcore Q30 features intuitive button controls for play/pause, volume adjustment, and ANC activation. The Soundcore app allows further customization of these functions for enhanced convenience.

6.1 Button Layout and Basic Functions

The Soundcore Q30 features on-ear controls for easy access to key functions. The power button, volume controls, and multifunction button are located on the right earcup, while the noise cancellation button is on the left. These buttons allow users to play/pause music, adjust volume, switch between ANC modes, and pair devices without needing the app. The intuitive layout ensures seamless control over your listening experience;

6.2 Customizing Controls via the Soundcore App

The Soundcore app enables users to customize the Q30’s controls, enhancing their listening experience. Through the app, users can adjust EQ settings, enable 3D Surround Sound, and personalize noise cancellation levels. Additionally, the app allows for firmware updates, ensuring optimal performance. These features provide users with tailored control over their audio preferences, making the Q30 highly adaptable to individual needs.

Using the Soundcore Q30 with Different Devices

The Soundcore Q30 seamlessly connects to smartphones, tablets, PCs, TVs, and gaming consoles, offering versatile use for music, movies, and meetings with its advanced Bluetooth technology.

7.1 Connecting to Smartphones and Tablets

To connect the Soundcore Q30 to your smartphone or tablet, ensure Bluetooth is enabled on your device. With the headphones turned off, press and hold the power button for 5 seconds until the LED flashes blue, indicating pairing mode. Select “Soundcore Life Q30” from your device’s Bluetooth list. Once connected, the headphones will automatically pair with your device for future use, ensuring a seamless listening experience.

7.2 Pairing with PCs, TVs, and Gaming Consoles

To pair the Soundcore Q30 with a PC, TV, or gaming console, enable Bluetooth on your device. Turn off the headphones, press and hold the power button for 5 seconds until the LED flashes blue. Select “Soundcore Life Q30” from your device’s Bluetooth list. For non-Bluetooth devices, use the included 3.5mm AUX cable to connect. The headphones will automatically switch to wired mode, ensuring compatibility across multiple platforms for uninterrupted audio enjoyment.

Auxiliary (AUX) Input and Wired Use

The Soundcore Q30 supports wired use via the 3.5mm AUX input, ensuring high-quality audio and compatibility with non-Bluetooth devices. Plugging in the AUX cable automatically switches to wired mode.

8.1 Using the 3.5mm AUX Cable

Connect the 3.5mm AUX cable to the Soundcore Q30’s AUX input for wired listening. This ensures a stable connection and high-quality audio. Plug one end into the headphones and the other into your device’s audio output. The Q30 automatically switches to wired mode, disabling Bluetooth. This feature is ideal for devices without Bluetooth or when wireless connectivity is unavailable. Ensure the cable is securely connected for optimal sound performance.

8.2 Switching Between Wireless and Wired Modes

Switching between wireless and wired modes on the Soundcore Q30 is designed to be seamless. To use wired mode, simply plug in the 3.5mm AUX cable, and the headphones will automatically switch from wireless to wired mode, disconnecting Bluetooth. To revert to wireless mode, unplug the AUX cable, and the headphones will reconnect to the last paired device via Bluetooth. This feature ensures convenient and automatic switching without the need for manual adjustments. Both modes support features like active noise cancellation, maintaining audio quality and user experience.

Maintenance and Care

Regularly clean ear cushions and avoid exposure to moisture. Update firmware via the Soundcore app for optimal performance. Store in a cool, dry place to maintain longevity.

9.1 Cleaning and Storage Tips

Gently wipe ear cushions with a soft cloth and mild soap. Avoid harsh chemicals or water to prevent damage. Store the Q30 in its protective case, ensuring dry conditions. Regularly update firmware via the Soundcore app for optimal functionality. Proper care extends lifespan and maintains sound quality. Keep away from direct sunlight and extreme temperatures for best performance.

9.2 Updating Firmware and Software

Update the Soundcore Q30’s firmware via the Soundcore app. Ensure a stable internet connection and sufficient battery. Launch the app, select the headphones, and check for updates. Follow prompts to download and install. Keep the headphones powered on during the update. Regular updates improve performance, add features, and fix issues. Always complete the update process to avoid malfunctions. Updated firmware ensures optimal functionality and compatibility with devices.

Troubleshooting Common Issues

Troubleshoot common issues like audio dropouts or connectivity problems by restarting your Soundcore Q30 and ensuring a stable connection. Resetting the headphones can often resolve persistent issues.

10.1 Resolving Audio and Connectivity Problems

For audio dropouts, ensure a stable Bluetooth connection and restart your Soundcore Q30. If issues persist, reset the headphones by holding the power button for 15 seconds. For connectivity problems, disable and re-enable Bluetooth on your device, then reconnect to the Q30. If pairing fails, ensure no other devices are connected and retry the pairing process. Restarting both the headphones and device often resolves these issues effectively.

10.2 Resetting the Headphones

To reset the Soundcore Q30, press and hold the power button for 15 seconds until the LED flashes red and blue. This restores default settings and clears all paired devices. After resetting, turn the headphones off, then on again, and retry pairing. This process resolves persistent connectivity or audio issues and ensures proper functionality. Resetting does not affect battery life or ANC performance.

The Soundcore Q30 stands out as a versatile and feature-rich headphone, offering excellent sound quality, robust ANC, and reliable battery life. Its intuitive controls and customizable settings make it suitable for various use cases. With its affordable price and premium performance, the Q30 is a great choice for both casual listeners and audiophiles seeking value and convenience. It delivers a satisfying audio experience for everyday use, making it a worthwhile investment for music lovers and commuters alike.