This metal roof installation manual serves as a comprehensive guide for both DIY enthusiasts and professional contractors. It covers essential materials, tools, and step-by-step processes while emphasizing safety and proper techniques to ensure a successful and durable installation.
Types of Metal Roofing
Metal roofing comes in various styles, each offering unique benefits and aesthetics. The most common types include corrugated metal roofing, known for its wavy pattern and durability, and standing seam metal roofing, which features raised seams for a sleek, modern look. Metal shingles mimic the appearance of traditional asphalt shingles but with enhanced durability, while stone-coated metal roofing provides a rustic, tile-like finish. Each type is designed to meet specific needs, whether for residential, commercial, or industrial applications. Understanding the differences in materials, designs, and installation requirements is crucial for selecting the best option for your project. This guide will help you explore these options in detail, ensuring you make an informed decision for your metal roof installation.
Benefits of Metal Roofing
Metal roofing offers numerous advantages that make it a popular choice for homeowners and builders. Its exceptional durability can extend the roof’s lifespan to 40-70 years, far surpassing traditional materials. Metal roofs are highly resistant to weathering, including heavy rain, hail, and extreme temperatures, reducing maintenance needs. They are also energy efficient, as certain coatings can reflect solar rays, lowering cooling costs. Additionally, metal roofs are low maintenance, requiring only periodic inspections and cleaning. Their fire resistance adds another layer of safety, especially in fire-prone areas. Furthermore, metal roofing is environmentally friendly, as many systems are made from recycled materials and can be recycled again at the end of their life. These benefits make metal roofing a cost-effective and sustainable option for modern roofing needs.
Importance of Proper Installation
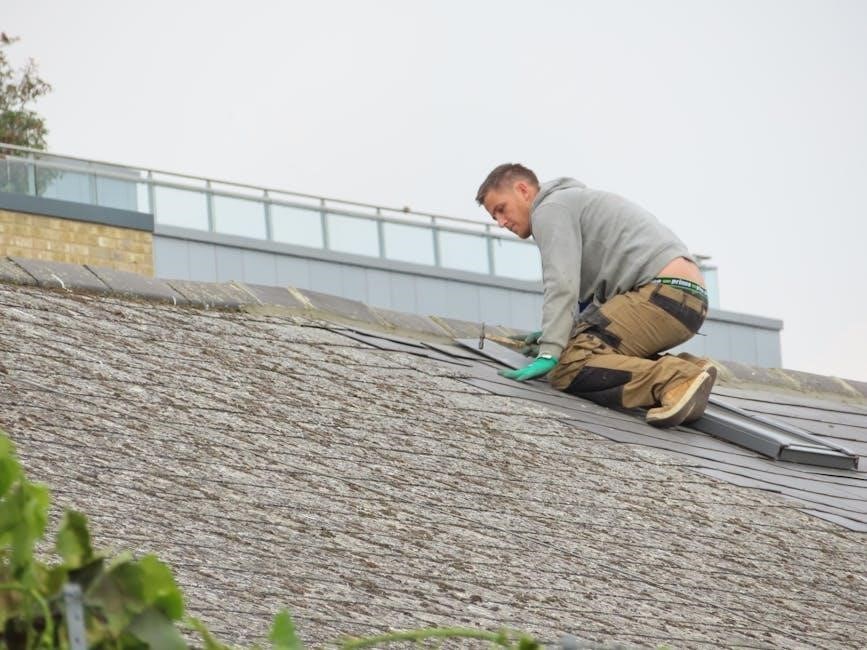
Proper installation is critical to ensure the longevity, performance, and safety of a metal roof. Incorrect techniques can lead to leaks, structural damage, and reduced lifespan. A well-installed metal roof provides a watertight seal, withstands harsh weather, and maintains energy efficiency. Improperly secured panels or flashing can compromise the entire system, leading to costly repairs. Additionally, proper installation ensures compliance with local building codes and manufacturer guidelines, which are essential for warranty validation. Safety is another key factor, as improper installation can create hazards during and after the process. Investing time and effort into correct installation practices guarantees a durable, reliable, and safe roofing system for years to come. Always follow step-by-step instructions and consider professional assistance if unsure to avoid potential risks and ensure optimal results.

Preparation and Planning
Effective planning ensures a smooth metal roof installation, involving accurate measurements, budgeting, and gathering necessary tools and materials. Proper preparation minimizes delays and guarantees a successful project outcome.
Tools and Materials Needed
Installing a metal roof requires specific tools and materials to ensure a professional finish. Essential tools include a roofing shovel, drill, screwdriver, measuring tape, utility knife, and safety harness. Materials needed are metal panels, underlayment, drip edge, flashing, screws with neoprene washers, and closure strips. Additionally, ensure you have a ladder, work boots, and protective gear like gloves and goggles. Proper tools and materials are crucial for a successful installation, as they ensure accuracy, safety, and durability. Always verify the quantity and quality of materials before starting the project to avoid delays. A well-prepared toolkit and material list will streamline the process and help achieve a flawless metal roof installation.
Measuring the Roof
Accurate roof measurement is crucial for a successful metal roof installation. Start by determining the roof’s shape and size, whether it’s a gable, hip, or flat roof. Measure the length, width, and pitch of each section. For complex roofs with multiple slopes or valleys, break the roof into simpler sections and calculate each area separately. Use a measuring tape, chalk, and calculator to record precise dimensions. Calculate the total square footage by summing all sections, adding 10% for waste and cuts. Ensure you measure around obstructions like vents, skylights, and chimneys to fit panels correctly. Double-check measurements to avoid errors, as accurate sizing ensures proper material ordering and a seamless installation process.
Budgeting for the Project
Budgeting for a metal roof installation is essential to ensure the project stays on track financially. Start by estimating material costs, including metal panels, underlayment, flashing, and fasteners. Consider the roof’s size, complexity, and type of metal chosen, as these factors influence pricing. Labor costs vary depending on whether you’re hiring professionals or tackling the project DIY. Research local suppliers for competitive pricing and include delivery fees. Additionally, budget for tools and safety equipment if not already owned. Allocate 10-15% of the total budget for unexpected expenses. Compare quotes from multiple sources to optimize spending. A well-planned budget ensures you cover all necessary expenses without overspending, making your metal roof installation project both successful and cost-effective.
Safety Requirements and Precautions
Metal roof installation requires strict adherence to safety protocols due to risks like falls, cuts, and tool-related accidents. Always wear personal protective equipment (PPE), including a safety harness, gloves, safety glasses, and sturdy, slip-resistant shoes. Ensure ladders and scaffolding are secure and level before use. Never work on a wet or icy roof, as this increases the risk of slips and falls. Use proper lifting techniques to avoid injury when handling heavy materials. Keep power tools in good condition and follow manufacturer guidelines. Maintain a clean workspace to prevent tripping hazards, and ensure all loose items are secured. Work with a partner whenever possible, and stay aware of your surroundings. Additionally, familiarize yourself with local building codes and OSHA regulations. Regular inspections of equipment and proper training can help prevent accidents and ensure a safe installation process.
Removing the Old Roof
Removing the old roof involves tearing off existing shingles, inspecting the deck for damage, and making necessary repairs. Use a roofing shovel and safety gear to ensure a safe and efficient process.
Removing Existing Shingles
Removing existing shingles is the first step in preparing your roof for metal installation. Start by using a roofing shovel or pry bar to gently lift and remove shingles, working from the bottom up. Be cautious not to damage the underlying roof deck. Remove all nails and debris to ensure a clean surface for the new installation. Safety is crucial, so wear protective gear and consider enlisting help to manage the physical demands of the task. Proper disposal of shingles is also important to maintain a tidy workspace and comply with local regulations. This step ensures a smooth transition to the next phase of your metal roof installation.
Inspecting and Repairing the Roof Deck
After removing the old shingles, inspect the roof deck for any damage, rot, or warping. Replace any rotten wood and ensure the surface is clean and dry. Check for loose or protruding nails and secure them to prevent damage to the new roofing. If the deck is uneven or damaged, make necessary repairs to ensure a stable base for the metal roof. This step is critical to prevent future leaks or structural issues. Use appropriate materials like plywood or oriented strand board (OSB) for repairs, ensuring they align with local building codes. Once repaired, inspect the deck again to confirm it is secure and even; A well-prepared roof deck is essential for a successful metal roof installation, providing a solid foundation for the panels and underlayment.
Installing the Underlayment
Apply the underlayment across the entire roof deck, ensuring a smooth, even surface. This layer protects against weather and provides a stable base for the metal panels, enhancing durability and performance.
Choosing the Right Underlayment
Selecting the appropriate underlayment is crucial for a successful metal roof installation. Common options include synthetic underlayment, such as Tyvek or similar products, which are durable and resistant to moisture. Asphalt-saturated felt is another traditional choice, known for its affordability and effectiveness. It’s essential to consider factors such as climate, budget, and roof pitch when making your decision. Ensure the underlayment meets local building codes and is compatible with your metal roofing material. Proper selection will enhance the roof’s performance, protect against leaks, and provide a smooth surface for panel installation.
Applying the Underlayment
Applying the underlayment is a critical step in ensuring a watertight and durable metal roof installation. Begin by cleaning the roof deck to remove dirt, debris, or old adhesive. Roll out the underlayment, aligning it with the roof edges and ensuring even coverage. Secure the material with staples or nails, spacing them 6-12 inches apart, depending on the manufacturer’s instructions. Overlap the edges by 6-12 inches to prevent gaps. Use a utility knife to cut the underlayment around vents, skylights, or other obstructions. Ensure the underlayment is tightly fitted and smooth out wrinkles to avoid air pockets. Seal any seams or cuts with the recommended adhesive or tape. Properly applied underlayment protects the roof deck from moisture and provides a stable surface for metal panels, ensuring long-term performance and structural integrity.
Installing Drip Edge and Flashing
Installing drip edge and flashing is essential for directing water away from the roof and preventing leaks. Secure drip edge along eaves and rakes, ensuring tight fits at corners. Apply flashing around vents, skylights, and valleys, sealing gaps with waterproof materials for long-lasting protection. Measure, cut, and fasten components precisely, using compatible sealants to prevent moisture intrusion. Proper installation ensures the roof’s structural integrity and performance over time. Always follow manufacturer guidelines for specific materials and tools. This step is crucial for maintaining the roof’s durability and preventing future repairs. Ensure all edges are smooth and aligned to avoid damage during installation. Regular inspections can help identify potential issues early. Using high-quality flashing materials enhances the roof’s weather-tightness and longevity.
Drip Edge Installation
Drip edge installation is a critical step in metal roof installation, ensuring water flows freely off the roof. Begin by measuring and cutting the drip edge to fit the roof’s perimeter. Secure it along the eaves and rakes using neoprene washer head screws, spacing them 12-16 inches apart. Align the drip edge tightly against the roof deck, ensuring no gaps. Seal any overlaps or joints with waterproof sealant. After installing the drip edge, proceed to lay the underlayment. Make sure the drip edge is properly seated and aligned before securing it. Always consult the manufacturer’s guidelines for specific drip edge requirements; Proper installation prevents water damage and enhances the roof’s longevity. Inspect the drip edge for tightness and alignment before moving to the next step. This ensures a watertight seal and proper water flow management. Regular inspections can help maintain its effectiveness over time. Follow all safety precautions when working on the roof.
Flashing Installation Around Vents and Skylights
Flashing installation around vents and skylights is essential to prevent water infiltration and ensure a watertight seal. Begin by measuring the flashing material to fit snugly around the vent or skylight. Cut the flashing using tin snips or a utility knife, leaving extra material for overlap. Secure the flashing to the roof deck using neoprene washer head screws, ensuring tight contact. Apply a bead of waterproof sealant around the edges and any seams. Ensure the flashing aligns with the drip edge and underlayment for a seamless connection. Inspect the flashing for proper fit and seal. Repeat the process for all vents and skylights. Properly installed flashing prevents leaks and protects vulnerable areas. Always follow manufacturer guidelines for specific flashing requirements. Regular inspections can help maintain the integrity of the flashing over time. This step is crucial for ensuring the longevity and performance of the metal roof.
Valley Flashing Installation
Valley flashing installation is critical for ensuring water flows smoothly off the roof without causing leaks. Begin by measuring the valley area to determine the length of flashing needed. Cut the flashing material to fit, leaving extra for overlap at the ends. Secure the flashing to the roof deck using screws or nails, ensuring it lies flat and aligns with the roof’s slope. Apply a bead of waterproof sealant along the edges and seams for added protection. Ensure the flashing extends slightly beyond the valley’s edges for complete coverage. Properly installed valley flashing directs water away from vulnerable areas, preventing damage and ensuring the roof’s structural integrity. Inspect the flashing for tight seals and alignment. Follow manufacturer guidelines for specific installation requirements. Regular maintenance will help maintain the flashing’s effectiveness over time. This step is vital for safeguarding the roof from water-related issues.
Installing Metal Roof Panels
Installing metal roof panels involves ordering panels to fit, securing them to the roof deck, aligning and spacing them evenly, and fastening them with screws for a durable finish.
Ordering and Cutting Panels to Fit
Ordering and cutting metal roof panels to fit is a critical step in ensuring a seamless installation. Begin by measuring the roof accurately to determine the required length and width of the panels. When placing your order, consider factors like roof pitch, valley locations, and ventilation needs to ensure the panels are tailored to your specific project. Once the panels arrive, use a saw or metal shear to cut them to size, taking care to wear safety goggles and follow proper cutting techniques. Cutting panels on-site allows for precise fits around vents, skylights, and other roof features. Always double-check measurements before cutting to avoid waste and ensure a professional finish. Properly fitted panels are essential for a watertight and structurally sound metal roof installation.
Securing Panels to the Roof Deck
Securing metal roof panels to the roof deck is a critical step to ensure stability and prevent leaks. Use neoprene washer head screws specifically designed for metal roofing to fasten panels to the deck. Begin by aligning the panels according to your roof layout, ensuring proper spacing as specified by the manufacturer. Drive screws through the designated fastening holes, typically spaced 12-24 inches apart, depending on the panel type and local building codes. Always maintain even alignment to avoid warping or uneven surfaces. Start from the center of the roof and work outward to prevent buckling. Tighten screws firmly but avoid overtightening, which can damage the panels or compromise the seal. Double-check all fasteners for proper torque and alignment to ensure a secure and weather-tight installation.
Aligning and Spacing Panels
Aligning and spacing metal roof panels correctly is essential for a professional finish and optimal performance. Begin by ensuring the first panel is perfectly aligned with the roof’s edge, using a chalk line or laser guide to maintain accuracy. Subsequent panels should be installed with uniform spacing, typically 1/4 inch to 1/2 inch between them, to allow for thermal expansion and contraction. Use a tape measure or spacer tool to maintain consistent gaps. Always refer to the manufacturer’s specifications for recommended spacing, as this may vary depending on the panel type and design. Proper alignment ensures water runs off smoothly, prevents leaks, and maintains the roof’s structural integrity. Double-check each panel’s placement before securing it to avoid costly rework and ensure a seamless installation process.
Fastening Panels with Screws
Securely fastening metal roof panels with screws is crucial for ensuring durability and weather resistance. Use high-quality, weather-resistant screws specifically designed for metal roofing, such as those with neoprene washers to create a watertight seal. Position screws along the panel’s flanges or ribs, following the manufacturer’s spacing recommendations, typically every 12 to 24 inches. Over-tightening can damage the panels, so apply even pressure to avoid dimpling or warping. Ensure screws are driven straight and not at an angle to maintain structural integrity. For standing seam roofs, screws are usually hidden within the seams, while exposed fastener systems require screws to be placed directly through the panels. Always pre-drill holes to prevent metal fracture and double-check torque settings to avoid stripping screw heads. Proper fastening ensures the roof withstands wind loads and prevents leaks, making it a critical step in the installation process.
Finishing Touches
Complete the project by installing ridge caps, sealing gaps, and adding trim for a polished look. Ensure all edges are secure and sealed to prevent leaks and enhance durability.
Installing Ridge Caps
Installing ridge caps is a crucial final step to ensure a watertight and visually appealing roof. Measure the ridge length and cut the cap to fit, using a utility knife or metal shear. Apply a bead of sealant along the ridge to create a secure bond. Position the cap evenly, aligning it with the roof’s slope, and fasten it using screws spaced evenly for stability. Ensure the cap covers the entire ridge without overhanging. This step seals the roof’s peak, protecting it from weather damage and enhancing the overall appearance. Proper alignment and sealing are essential for long-term durability and to prevent leaks. Follow manufacturer instructions for specific installation details to guarantee a professional finish.
Sealing Gaps and Joints
Sealing gaps and joints is essential to ensure a watertight and durable metal roof. Inspect all seams, vents, and flashing for any openings. Use a high-quality silicone sealant or specialized roofing tape to fill these gaps. Apply the sealant evenly, following the manufacturer’s instructions, to avoid air leaks or water infiltration. Pay particular attention to areas around skylights, vents, and where panels overlap. Clean surfaces thoroughly before applying sealant to ensure proper adhesion. For larger gaps, consider using a metal-to-metal sealant or weatherproofing strips. Regularly inspect and reseal gaps as needed, especially after extreme weather conditions. Proper sealing prevents moisture damage, extends the roof’s lifespan, and maintains its energy efficiency. Always follow safety precautions when working at heights and handling sealants.
Installing Trim and Closure Strips
Installing trim and closure strips is a crucial step in completing the metal roof installation. Begin by cutting the trim to fit the roof’s edges, ensuring precise measurements for a seamless fit. Secure the trim using neoprene washer head screws, spacing them evenly to maintain structural integrity. Closure strips are typically installed under the metal panels at the eaves and rakes to prevent weather intrusion. Cut the closure strips to match the length of the panels and slide them into place before fastening. Proper alignment and secure fastening are essential to avoid gaps. This step ensures a watertight seal and enhances the roof’s overall appearance. Always follow the manufacturer’s instructions for specific trim and closure strip applications. This final touch completes the installation, providing both functionality and aesthetic appeal to the metal roof.

Maintenance and Repair
Regular inspections and timely repairs are vital for extending the lifespan of a metal roof. Clean debris, inspect for damage, and address issues like scratches or loose panels promptly to ensure durability and performance.
Regular Roof Inspections
Regular roof inspections are crucial for maintaining the integrity and longevity of a metal roof. Inspectors should check for signs of wear, such as scratches, dents, or rust, particularly around fasteners and seams. Additionally, ensure all screws are tightly secured and that no panels are loose, which could lead to leaks or further damage. It’s also important to examine the condition of the underlayment, flashing, and drip edges to ensure they remain intact and functional. Cleaning debris from the roof surface and gutters can prevent water accumulation, which might cause corrosion or structural issues. Inspections should ideally be conducted twice a year, in spring and fall, to address any potential problems before they escalate. Early detection of issues can save time and money in the long run.
Cleaning and Maintenance Tips
Regular cleaning and maintenance are essential to preserve the appearance and functionality of a metal roof. Start by removing leaves, branches, and other debris that may accumulate, as these can cause rust or corrosion over time. Use a soft-bristle brush or a garden hose with a low-pressure setting to clean the surface gently. Avoid using harsh chemicals, abrasive cleaners, or pressure washers, as they can damage the protective coating on the metal. For tougher stains, mix a mild detergent with water and apply it with a soft cloth. Rinse thoroughly to prevent residue buildup. Additionally, inspect and clean gutters and downspouts to ensure proper water flow. Finally, apply a rust-inhibiting coating every few years to maintain the roof’s protective layer. By following these tips, you can extend the lifespan of your metal roof and keep it looking like new.
Common Issues and Repairs
Metal roofs are durable, but they can develop issues over time. Leaks are among the most common problems, often caused by loose fasteners, damaged flashing, or compromised seams. To address this, inspect and tighten any loose screws, and apply a waterproof sealant to affected areas. Rust can also occur, especially if the protective coating is scratched or worn away. Treat rust spots immediately by sanding them down and applying a rust-inhibiting coating. Another issue is dented or scratched panels, which can be repaired with touch-up paint or replaced if severely damaged. Additionally, clogged gutters and downspouts can lead to water backup, so regular cleaning is essential. For more serious damage, such as holes or large dents, consult a professional to ensure proper repairs. Regular inspections and timely fixes will help maintain your metal roof’s integrity and extend its lifespan.