kirkland cheese ravioli cooking instructions

Kirkland Cheese Ravioli, a Costco favorite, offers a delicious blend of spinach and cheese in pre-made pasta. Perfect for quick meals, it cooks in minutes, combining convenience and flavor.

Overview of Kirkland Signature Ravioli

Kirkland Signature Ravioli is a Costco-exclusive product, offering a convenient and flavorful meal solution. Made with spinach and cheese, it’s free of preservatives, ensuring a fresh taste. Packaged in 22 oz, 2-count bags, it serves approximately 12 people. Ready in just 4 minutes, it’s a perfect option for quick weeknight dinners or satisfying meals. Its pre-made format and simple cooking instructions make it a favorite for those seeking hassle-free, delicious pasta dishes without compromising on quality or taste.

Popularity and Convenience of Pre-Made Ravioli

Pre-made ravioli, like Kirkland Cheese Ravioli, has gained immense popularity due to its convenience. Busy households appreciate the quick cooking time, typically 4-6 minutes, and minimal effort required. Its pre-packaged format eliminates meal prep stress, making it ideal for weeknight dinners. The product’s popularity also stems from its consistent quality and flavor, ensuring a satisfying meal without the hassle of homemade pasta. This convenience factor has solidified its place as a favorite among Costco shoppers seeking efficient, gourmet solutions.

Cooking Methods for Kirkland Cheese Ravioli

Kirkland Cheese Ravioli can be cooked by boiling, baking, or sautéing. Each method offers a unique texture and flavor, making it versatile for various culinary preferences and meal plans.

Boiling Instructions

To boil Kirkland Cheese Ravioli, bring a large pot of salted water to a rolling boil. Gently add the ravioli, ensuring they are not overcrowded. Cook for 4-6 minutes, or until they float to the surface. Remove with a slotted spoon and drain well. Serve immediately with your preferred sauce or toppings. This method ensures tender, evenly cooked pasta with minimal effort. It’s a classic and quick way to prepare Kirkland Cheese Ravioli for a satisfying meal.

Baking Instructions

Preheat your oven to 375°F (190°C). Place the Kirkland Cheese Ravioli on a baking sheet lined with parchment paper. Lightly brush the ravioli with olive oil or sprinkle with grated cheese for extra flavor. Bake for 8-10 minutes, or until golden brown and cooked through. For frozen ravioli, increase the baking time to 12-15 minutes. This method adds a crispy texture while maintaining the creamy cheese filling. Serve hot with your favorite sauce or garnish for a satisfying meal.

Sautéing Instructions

For a crispy texture, heat a skillet over medium heat and add olive oil or melted butter. Add the Kirkland Cheese Ravioli and sauté for 3-4 minutes on each side until golden brown. If using frozen ravioli, cook for 5-7 minutes, flipping occasionally. Season with salt and pepper to taste. Serve with your favorite sauce or garnish for added flavor. This method adds a satisfying crunch to the ravioli while keeping the cheese filling creamy and delicious.

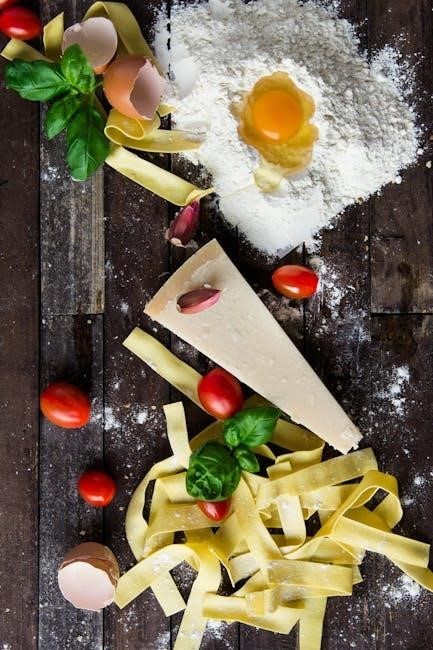
Ingredients and Tools Needed

Essentials include water, salt, olive oil, butter, cheese, and your favorite sauce. Tools needed are a large pot, colander, skillet, and baking sheet for versatile cooking methods.

Pantry Staples for Cooking Ravioli

Essential pantry items for cooking Kirkland Cheese Ravioli include salt for seasoning water, olive oil or butter for tossing, and grated cheese for added flavor. Stock up on marinara, Alfredo, or pesto sauces for a quick and tasty coating. Breadcrumbs or herbs like rosemary can enhance the dish, while garlic and pepper add depth. These staples ensure a flavorful and satisfying meal with minimal effort.

Recommended Cooking Tools

A large pot is essential for boiling Kirkland Cheese Ravioli, while a baking sheet and oven are ideal for baked versions. A skillet is perfect for sautéing, and a colander or strainer is necessary for draining. Use tongs or a slotted spoon to handle the ravioli gently. For serving, a pasta fork or tongs can help portion the dish; These tools ensure a smooth and efficient cooking process, allowing you to achieve perfectly cooked ravioli every time.
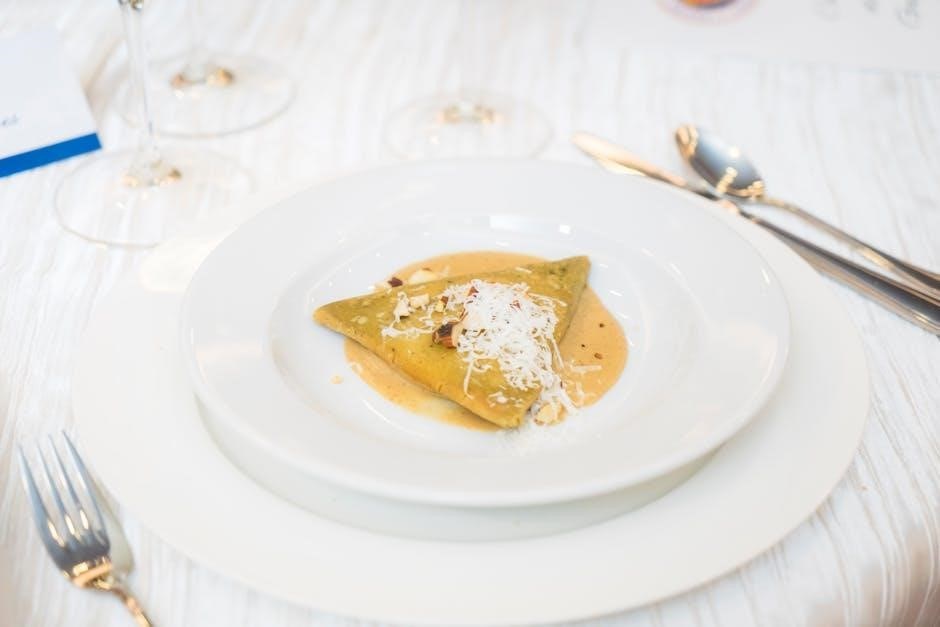
Serving Suggestions

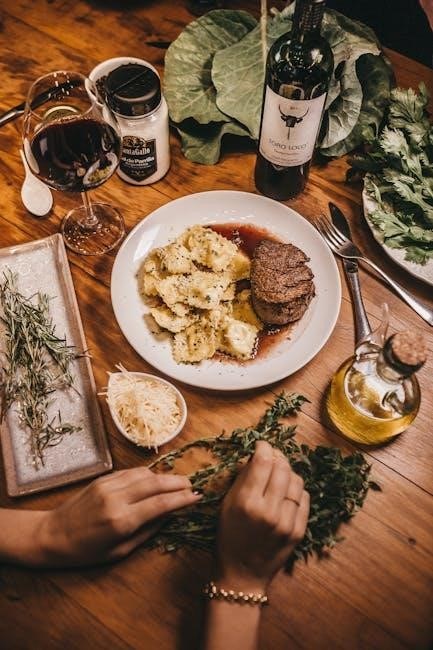
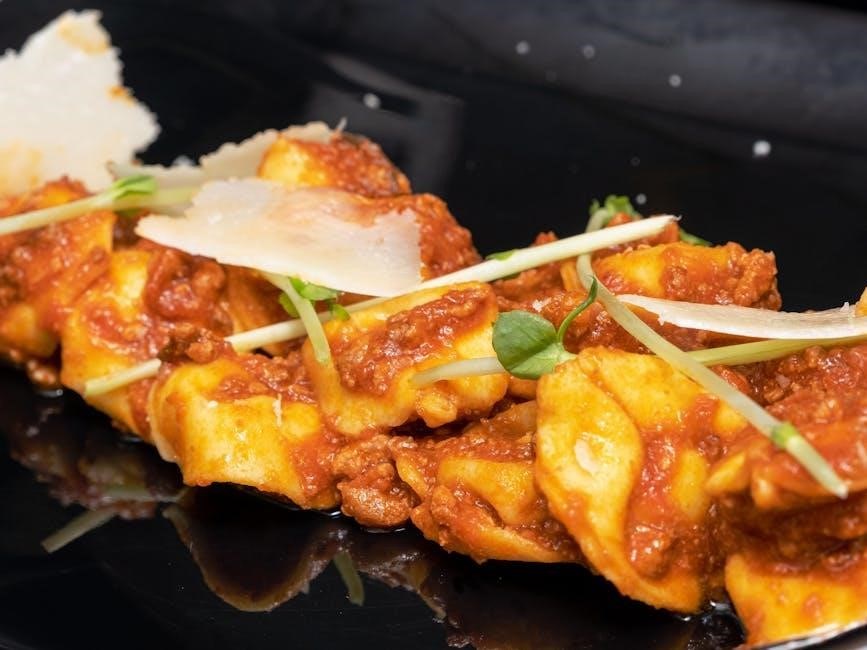
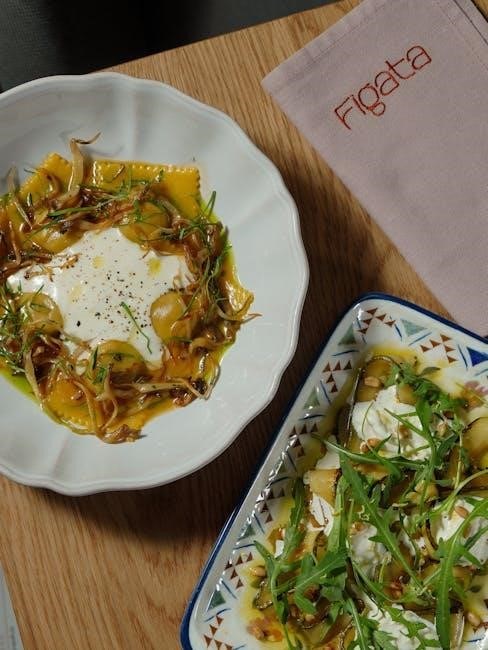
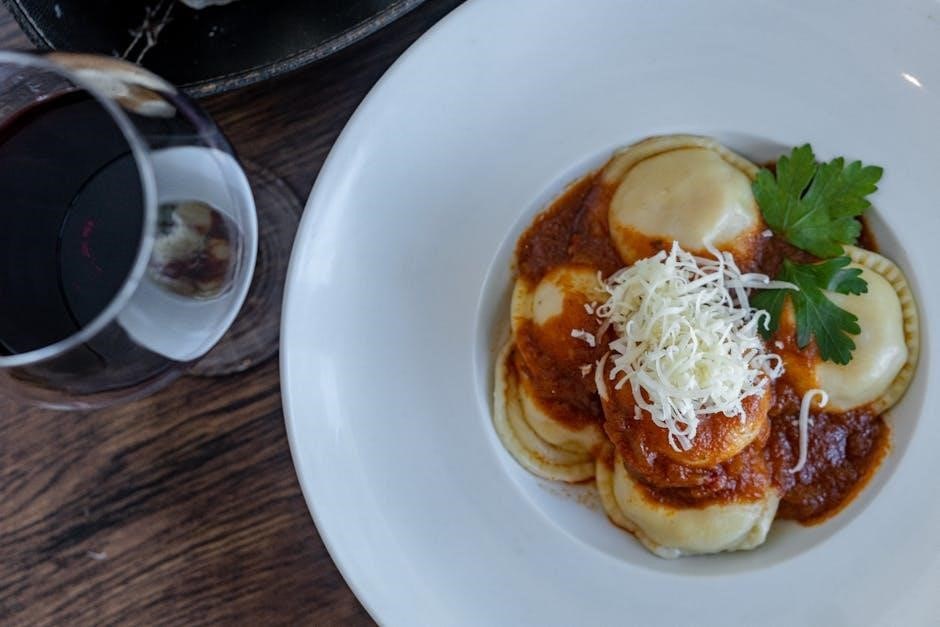
Serve Kirkland Cheese Ravioli with classic marinara, creamy Alfredo, or pesto sauce. Top with grated Parmesan, fresh basil, or parsley for added flavor and a vibrant presentation. Pair with a side salad for a well-rounded meal.

Classic Sauce Pairings

Kirkland Cheese Ravioli pairs perfectly with a variety of classic sauces. Try it with marinara for a tangy, traditional flavor or Alfredo for a rich, creamy texture. Pesto sauce adds a fresh, herby note, while olive oil with garlic and herbs offers a light, aromatic option. For a cheesy twist, toss the ravioli in a homemade or store-bought cheese sauce. Each sauce complements the spinach and cheese filling, creating a satisfying and flavorful meal.

Garnishes and Toppings

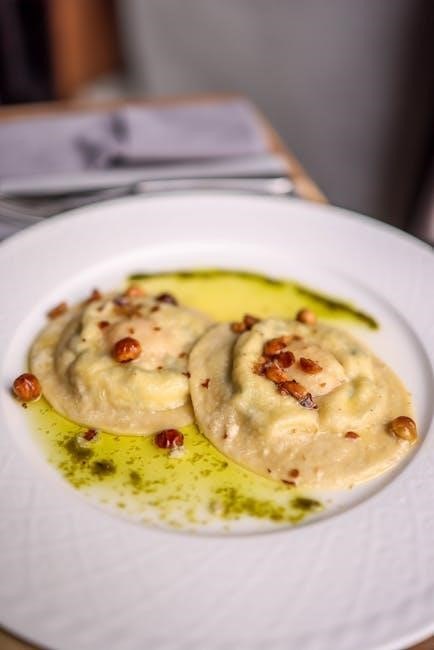
Elevate your Kirkland Cheese Ravioli with simple yet flavorful garnishes. Sprinkle shredded Parmesan cheese for a salty, nutty finish. Add a light dusting of breadcrumbs for a satisfying crunch. Fresh herbs like parsley or basil provide a bright, fresh contrast. Drizzle with olive oil or melted butter for added richness. For extra texture, top with toasted pine nuts or a sprinkle of dried herbs. These garnishes enhance the ravioli’s natural flavors, creating a dish that’s both elegant and delicious.

Tips and Tricks for Perfect Ravioli

For perfect Kirkland Cheese Ravioli, avoid overcrowding the pot, ensuring even cooking. Use 1 tbsp of salt per 4 cups of water for flavor. Add 1 tsp of oil to prevent sticking. Cook until ravioli float, then drain and serve promptly for the best texture and taste.

Common Mistakes to Avoid

Common mistakes when cooking Kirkland Cheese Ravioli include overcooking, which makes the pasta mushy. Avoid overcrowding the pot, as this can cause ravioli to stick together. Not using enough salt in the boiling water can result in bland flavor. Additionally, not patting dry after draining can make the ravioli soggy when adding sauce. Lastly, over-saucing is a mistake—let the ravioli shine with a light, balanced topping for the best taste and texture.

Time-Saving Cooking Hacks

For quick meals, cook Kirkland Cheese Ravioli while preparing the sauce simultaneously. Use pre-made sauces like marinara or pesto for convenience. Bake or sauté ravioli for a crispy texture, adding variety to your dish. To save time, boil ravioli while heating the sauce in a separate pan. Toss gently to combine, ensuring even coating without breaking the pasta. These hacks streamline the process, delivering a flavorful meal in minutes!

Variations and Creative Twists

Elevate Kirkland Cheese Ravioli by adding fresh herbs, cherry tomatoes, or a drizzle of balsamic glaze. Experiment with creamy sauces, roasted vegetables, or grilled chicken for added flavor.

Add-ins for Extra Flavor

Enhance Kirkland Cheese Ravioli by incorporating fresh herbs like basil or parsley, sautéed mushrooms, or caramelized onions. Add a sprinkle of garlic powder or nutmeg for depth. Toss with roasted vegetables, such as zucchini or cherry tomatoes, for added freshness. For a creamy twist, mix in a dollop of ricotta or a sprinkle of grated Parmesan. Alternatively, stir in cooked bacon, pancetta, or diced chicken for a hearty, savory twist. These additions elevate the dish without complicating the cooking process.

Dietary Adaptations

Kirkland Cheese Ravioli can easily adapt to various dietary needs. For vegetarians, it’s a perfect option as it’s meat-free. For gluten-free diets, pair it with gluten-free sauces and sides. Vegans can substitute the cheese with plant-based alternatives or opt for dairy-free sauces. Additionally, the ravioli can be served with lighter sides like steamed vegetables or a fresh salad for a lower-calorie meal. These modifications make it versatile for diverse dietary preferences while maintaining its rich flavor profile.

Troubleshooting Cooking Issues

If ravioli sticks, stir gently with a spatula. For overcooked ravioli, drain immediately and rinse with cold water. Ensure proper water ratio to prevent overcrowding.

Fixing Undercooked or Overcooked Ravioli

If undercooked, return ravioli to boiling water for 1-2 minutes. For overcooked ravioli, drain immediately and rinse with cold water to halt cooking. Ensure proper water ratio to prevent sticking. Avoid overcrowding the pot for even cooking. If ravioli is too soft, toss gently with sauce to restore texture. Always check doneness by observing floatation or texture changes during cooking.

Nutritional Information

Kirkland Cheese Ravioli offers a balanced meal with approximately 250-300 calories per serving, containing 4-6g protein, 4-6g fat, and 30-40g carbs, making it a wholesome choice.

Calorie and Nutrient Breakdown

Kirkland Cheese Ravioli typically contains 250-300 calories per serving, with 4-6g of protein, 4-6g of fat, and 30-40g of carbohydrates. It provides essential nutrients like calcium and iron, supporting a balanced diet. The ravioli is free from artificial preservatives, making it a healthier convenience food option. With its wholesome ingredients, it offers a satisfying and nutritious meal that pairs well with various sauces or sides, catering to both quick meals and gourmet dishes.

Kirkland Cheese Ravioli is a Costco favorite, offering a delicious, quick meal with minimal prep. Its blend of flavors and convenience makes it a perfect choice for any occasion.

Final Thoughts on Cooking Kirkland Cheese Ravioli

Cooking Kirkland Cheese Ravioli is a breeze, offering a perfect blend of convenience and flavor. Whether boiled, baked, or sautéed, it serves as a versatile base for various sauces and toppings. Its quick preparation makes it ideal for busy households, while the delicious taste ensures satisfaction. With minimal effort, you can create a gourmet meal that’s both nourishing and delightful, making it a staple for any home chef or food lover.

Additional Resources

For more Kirkland Cheese Ravioli recipes and tips, explore Costco’s official website and food blogs featuring creative sauce ideas and cooking hacks to enhance your dish.

Recommended Sauces and Recipes Online

Explore various sauce options like marinara, alfredo, or pesto to complement Kirkland Cheese Ravioli. For a creamy touch, try a boursin cheese sauce with milk. Food bloggers suggest pairing it with a homemade tomato sauce or a light olive oil drizzle. Visit Costco’s website or popular food blogs for inspiring recipes and step-by-step guides to elevate your ravioli dish with creative twists and flavor combinations.

cuisinart electric pressure cooker instruction manual

The Cuisinart Electric Pressure Cooker (CPC-600) is a versatile 6-quart kitchen appliance with an LED display and push-button controls, offering high (15 psi) and low (10 psi) pressure settings.

Overview of the Cuisinart Electric Pressure Cooker

The Cuisinart Electric Pressure Cooker (CPC-600) is a 6-quart multifunctional appliance designed for versatility and efficiency in the kitchen. With its sleek design and user-friendly interface, it combines the functionality of a pressure cooker, slow cooker, sauté pan, and steamer in one convenient unit. The cooker features an LED display and push-button controls, making it easy to navigate through its multiple settings. It offers high (15 psi) and low (10 psi) pressure options, allowing for precise control over cooking tasks. Built with durable stainless steel and BPA-free parts, it ensures safe and healthy cooking. Perfect for home cooks and culinary enthusiasts alike, this cooker simplifies meal preparation while delivering delicious results.

Key Features and Benefits

The Cuisinart Electric Pressure Cooker (CPC-600) offers a 6-quart capacity, ideal for preparing meals for families or large groups. Its LED display and push-button controls provide easy navigation, while the multiple preset settings simplify cooking tasks; The cooker features high (15 psi) and low (10 psi) pressure options, allowing for precise control. Additional functions include sauté, slow cook, and steam, making it a versatile kitchen companion. Built with durable stainless steel and BPA-free parts, it ensures safe and healthy cooking. The cooker’s compact design and easy-to-clean components make maintenance hassle-free, while its ability to cook up to 70% faster than traditional methods saves time without compromising flavor or nutrients.

Safety Precautions and Guidelines

Always follow safety guidelines to avoid hazards. Never force the lid open, keep children away, and use oven mitts when handling hot components. Ensure proper ventilation and avoid overfilling. Regularly inspect seals and gaskets for damage. Unplug the cooker when not in use and store it in a cool, dry place. Read the manual thoroughly before first use to understand all safety measures and operating instructions.

Important Safety Tips for First-Time Users

Before using your Cuisinart Electric Pressure Cooker, ensure all parts are clean and free from shipping dust. Always read the manual thoroughly to understand proper operation. Keep children away during cooking. Use oven mitts when handling hot components. Never force the lid open; wait for pressure to release naturally or via quick release; Avoid overfilling the cooker, as this can clog the valve. Regularly inspect the gasket and lid for damage. Store the cooker in a cool, dry place when not in use. Always unplug the unit after cooking to ensure safety.

Understanding Pressure Cooking Risks and Precautions

Pressure cooking involves high temperatures and pressures, posing risks if mishandled. Overfilling the cooker can clog the valve and lead to dangerous pressure buildup. Always follow recipe guidelines for liquid ratios. Never force the lid open; allow pressure to release naturally or via quick release. Inspect the gasket and lid regularly for wear or damage. Keep the cooker away from children and flammable materials. Store it in a secure, upright position when not in use. Failure to adhere to these precautions can result in accidents, injuries, or damage to the appliance. Proper maintenance ensures safe and efficient cooking.

Getting Started with Your Cuisinart Electric Pressure Cooker

Begin by unboxing and cleaning your Cuisinart Electric Pressure Cooker with a damp cloth. Remove any shipping dust and ensure all parts are spotless before first use.

Unboxing and Initial Cleaning

When you unbox your Cuisinart Electric Pressure Cooker, carefully inspect all components, including the cooking pot, lid, and accessories. Remove any packaging materials and labels. Before first use, clean the cooker thoroughly with a damp cloth to eliminate any dust or residue from shipping. Avoid immersing electrical parts in water; instead, wipe them clean with a soft, damp cloth. Pay special attention to the lid, seal, and steam release handle, ensuring they are free from debris. Once cleaned, dry the cooker with a clean towel to prevent water spots. This step ensures your cooker is ready for safe and hygienic use.

Understanding the Control Panel and Settings

The Cuisinart Electric Pressure Cooker features an intuitive control panel with an LED display and push-button controls. The panel allows you to easily select from various cooking modes, including high and low pressure settings (15 psi and 10 psi, respectively). Additional functions like Sauté, Slow Cook, and Steam are also accessible via the control panel. Use the buttons to adjust cooking time, pressure levels, or to switch between modes. The LED display provides clear feedback on the selected settings and cooking progress. Familiarizing yourself with the control panel ensures you can navigate and customize your cooking experience effortlessly.

Cooking Modes and Functions

The Cuisinart Electric Pressure Cooker offers multiple cooking modes, including pressure cooking, sauté, slow cooking, and steaming, making it a versatile addition to your kitchen.

Pressure Cooking Settings (High and Low Pressure)

The Cuisinart Electric Pressure Cooker features two pressure settings: high (15 psi) and low (10 psi). High pressure is ideal for tougher meats and quicker cooking, while low pressure is better for delicate foods like fish or vegetables. Always ensure the lid is securely locked before cooking. Overfilling can clog the valve, so follow the manual’s guidelines for maximum capacity. After cooking, allow natural pressure release or use the quick-release valve for faster results. Proper use of these settings ensures safe and efficient cooking outcomes. Refer to your manual for specific instructions on pressure adjustments and safety precautions.

Additional Functions (Saute, Slow Cook, Steam)

The Cuisinart Electric Pressure Cooker offers versatile cooking options beyond pressure cooking. The sauté function allows for browning meat or simmering sauces directly in the pot. The slow cook setting is perfect for dishes requiring extended cooking times, while the steam function gently cooks vegetables and seafood. These multifunctional features make the cooker ideal for a variety of recipes, from hearty stews to tender fish. Always refer to the manual for specific instructions on using these modes safely and effectively. This versatility enhances your cooking experience, making the appliance a valuable addition to any kitchen.

Cooking Techniques and Recipes

Master various cooking techniques and explore delicious recipes tailored for the Cuisinart Electric Pressure Cooker. From hearty stews to tender meats, achieve perfect results with ease and precision.

Best Practices for Pressure Cooking

Always follow recipe instructions for pressure release to ensure safety and optimal results. Avoid overfilling the cooker, as this can clog the valve. Clean the cooker thoroughly after each use to prevent residue buildup. Start with simple recipes to familiarize yourself with the appliance. Use the quick pressure release feature immediately after cooking to prevent overcooking. Regularly check and maintain the seal and gasket for proper function. These practices will enhance your cooking experience and extend the lifespan of your Cuisinart Electric Pressure Cooker.

Popular Recipes for Beginners

Start with simple recipes like chicken tacos or hearty stews, which are easy to prepare and quick to cook. Try a classic chicken soup or a flavorful ground beef dish. Beans and grains also cook perfectly in the Cuisinart Electric Pressure Cooker. For a quick meal, attempt hard-boiled eggs or a variety of vegetable dishes. These recipes are ideal for mastering pressure cooking techniques and exploring the appliance’s capabilities. They offer delicious results with minimal effort, making them perfect for beginners to build confidence in their cooking skills.

Cleaning and Maintenance

Regular cleaning is essential for your Cuisinart Electric Pressure Cooker. After each use, wash the pot, lid, and gasket with warm soapy water. For tougher residue, soak parts before cleaning. Dry thoroughly to prevent moisture buildup.

  • Clean the steam vent and valve regularly to ensure proper function.
  • Avoid using abrasive cleaners to maintain the cooker’s finish and performance.

How to Clean the Pressure Cooker After Use

Cleaning your Cuisinart Electric Pressure Cooker after each use is crucial for maintaining its performance and hygiene. Start by washing the cooking pot, lid, and gasket with warm soapy water. For tough residues, soak these parts in hot water before scrubbing; Use a soft sponge or brush to avoid scratching the surfaces. Rinse thoroughly and dry with a clean towel to prevent water spots and bacterial growth. Regularly check and clean the steam vent and valve to ensure proper function. Avoid using abrasive cleaners or scouring pads, as they may damage the cooker’s finish. Cleaning promptly prevents food particles from hardening and makes maintenance easier. Always refer to the manual for specific cleaning instructions to keep your cooker in optimal condition.

Regular Maintenance Tips

Regular maintenance ensures your Cuisinart Electric Pressure Cooker performs optimally. After cleaning, inspect the gasket and lid for wear or damage, replacing them if necessary. Check the steam vent and valve for blockages and clean them with a small brush or toothpick. Ensure the sealing ring is free from food residue and replace it every 2-3 years. Avoid using abrasive cleaners or scouring pads, as they can damage the cooker’s surfaces. For hard water users, descale the cooker periodically to prevent mineral buildup. Store the cooker in a dry place with the lid slightly ajar to prevent moisture accumulation. Regularly reviewing these tips ensures longevity and reliability of your appliance. Always refer to the manual for detailed maintenance guidelines.

Troubleshooting Common Issues

If the lid is hard to open, ensure all pressure is released. For error codes, reset the cooker. Clean the steam vent regularly to avoid blockages. Refer to the manual for detailed solutions and maintenance tips to address common malfunctions effectively.

Resolving Errors and Malfunctions

Common issues with the Cuisinart Electric Pressure Cooker include error codes, lid difficulty, and steam vent blockages. If an error code appears, reset the cooker by unplugging it and plugging it back in. For lid issues, ensure all pressure has been released. Clean the steam vent regularly to prevent clogs. If the cooker does not turn on, check the power cord and outlet. Refer to the manual for specific error code solutions. Regular maintenance and proper usage can prevent most malfunctions. Always follow the manufacturer’s guidelines for troubleshooting to ensure safety and optimal performance.

Addressing Common Cooking Mistakes

Common mistakes when using the Cuisinart Electric Pressure Cooker include overfilling, improper pressure release, and ignoring lid alignment. Overfilling can clog the valve, so avoid exceeding the maximum line. Always release pressure immediately after cooking to prevent overcooking. Ensure the lid is properly sealed to avoid steam leaks. If recipes fail, check liquid levels and seasoning placement. Clean the steam vent regularly to maintain proper function. Follow the manual’s guidelines for cooking times and liquid ratios. Addressing these issues ensures safe and effective cooking with your Cuisinart Electric Pressure Cooker.

conair curl secret instructions

The Conair Curl Secret is an innovative, automatic curling device that creates long-lasting curls effortlessly. It features a tourmaline ceramic curl chamber for reduced frizz and enhanced shine, making it suitable for all hair types and textures; With its advanced technology, it gently draws hair into the chamber, forming perfect curls without manual wrapping. This user-friendly tool is designed to simplify the curling process while delivering professional-quality results at home.

Overview of the Conair Curl Secret

The Conair Curl Secret is a cutting-edge, automatic curling device designed to create beautiful, long-lasting curls with minimal effort. It features a tourmaline ceramic curl chamber that reduces frizz and enhances shine, ensuring smooth and healthy-looking curls. The device automatically draws hair into the chamber, wrapping it gently around the barrel to form perfect curls. Its advanced technology and user-friendly design make it an ideal tool for achieving salon-quality results at home, suitable for various hair types and styles.

Benefits of Using the Conair Curl Secret

The Conair Curl Secret offers a revolutionary way to achieve stunning curls effortlessly. Its tourmaline ceramic chamber reduces frizz and enhances shine, ensuring healthy-looking curls. The device provides consistent results, is easy to use, and requires minimal effort. Suitable for all hair types, it minimizes heat damage while creating long-lasting curls. With customizable settings for tightness and direction, it offers versatility for various styles. This tool is a must-have for anyone seeking salon-quality curls without the hassle of traditional curling methods.

Preparing Your Hair and the Device

Ensure hair is clean, dry, and combed to avoid tangles. Plugin the device, turn it on, and wait for the temperature light to stop blinking before use.

Ensuring Hair is Clean, Dry, and Combed

For optimal results, start with clean, dry hair free from styling products or hairspray, as these can interfere with curl formation. Comb your hair thoroughly to remove tangles and knots, ensuring smooth passage through the curl chamber. Dry hair is essential, as damp hair may not curl effectively. Proper preparation prevents damage and ensures the device works efficiently. Always comb hair before use to maintain its health and achieve the best curl quality.

Choosing the Right Temperature Setting

Selecting the appropriate temperature is crucial for achieving desired curls. For fine or damaged hair, use lower settings (around 300°F-350°F). For thicker or coarser hair, higher temperatures (up to 410°F) are ideal. Always start with a lower setting and adjust based on your hair’s response. Higher heat creates tighter curls and adds volume, while lower heat produces looser, more natural waves. Ensure the red temperature light stops blinking before use, indicating the device is ready. Adjust settings to suit your hair type for optimal results.

Operating the Conair Curl Secret

Assemble the device and turn it on, ensuring the curl chamber faces toward your head. Select your desired curl type and direction before use for optimal results.

Assembling and Turning On the Device

Before use, ensure the Conair Curl Secret is properly assembled. Plug the device into a nearby electrical outlet and turn it on using the power switch. The red LED light will begin blinking, indicating the device is heating up. Once the light stops blinking, the device is ready for use. Always ensure the curl chamber is facing toward your head to avoid tangles and achieve the best results. Proper assembly and orientation are key for safe and effective curling.

Selecting Curl Type and Direction

The Conair Curl Secret allows you to customize your curls by selecting from various types and directions. Choose between tight, medium, or loose curls using the device’s controls. Additionally, you can set the curl direction to left, right, or alternate for a more natural look. Use the digital interface to easily navigate through settings and achieve your desired style. For thicker hair, tighter curls may be more effective, while looser curls suit finer textures. Experiment with different settings to find your perfect curl. Proper selection ensures lasting, professional-quality results.

Creating Perfect Curls

Place hair in the curl chamber, set the timer, and let the device work. It automatically curls hair for salon-quality results with minimal effort and consistent timing.

Placing Hair in the Curl Chamber

To achieve perfect curls, take a small section of hair, about an inch wide, and gently place it into the curl chamber. Ensure the hair is clean, dry, and free of tangles for smooth processing. Align the section so it rests flat in the chamber, facing towards your head. Avoid overlapping hair strands to prevent tangles and uneven curls. Hold the device vertically and let the machine guide the hair into the chamber for consistent results.

Setting the Timer and Processing Time

Select the desired timer setting based on your curl preference: 8-12 seconds for loose to medium curls or up to 15 seconds for tighter curls. Once hair is placed in the chamber, press the start button. The device will process the hair for the selected time, ensuring even heating. A beep or light signal indicates completion. Avoid exceeding recommended times to prevent hair damage. Adjust timer settings for different hair types or curl tightness needs. Consistent timing ensures uniform curls;

Safety Precautions and Maintenance

Use only Conair-approved attachments and avoid heat protectants. Regularly clean the curl chamber with a soft cloth. Store the device in a cool, dry place when not in use.

Important Safety Tips for Usage

Always ensure hair is completely dry and free of hairspray before use to prevent damage. Use only Conair-approved attachments to maintain safety and functionality. Keep the device out of reach of children and avoid touching the curl chamber during operation. Ensure the opening faces toward your head to prevent burns. Never leave the device unattended while in use. Regularly clean the curl chamber with a soft cloth to remove residue.

Cleaning and Storing the Device

Turn off and unplug the device, allowing it to cool completely before cleaning. Use a soft, damp cloth to wipe the exterior and curl chamber, avoiding harsh chemicals. For stubborn residue, a gentle cleaning wipe may be used. Store the Conair Curl Secret in its original packaging or a protective case to prevent damage. Keep it in a dry, cool place away from direct sunlight. Regular maintenance ensures optimal performance and longevity of the device.

Advanced Techniques for Styling

Explore customized curls by adjusting temperature, timer, and direction settings. Use the device for various hair types to achieve versatile styles, from tight spirals to loose waves effortlessly.

Customizing Curl Tightness and Volume

To customize curl tightness, adjust the timer and temperature settings. For tighter curls, use shorter timer durations and higher heat. For looser curls, opt for longer durations and lower heat. To add volume, start curls at the roots and use the alternate rotation feature. This ensures a natural, voluminous look without compromising on curl definition. Experiment with these settings to find your perfect style and achieve desired results effortlessly.

Using the Device for Different Hair Types

The Conair Curl Secret works well for various hair types by adjusting settings. For thicker hair, use higher heat and longer timer settings. Fine or damaged hair benefits from lower heat and shorter durations. The device’s ceramic chamber minimizes damage, while its adjustable features ensure customized results. Whether your hair is fine, medium, or thick, the Curl Secret adapts to create stunning, long-lasting curls tailored to your hair’s unique needs and texture.

Troubleshooting Common Issues

Gently remove tangled hair from the curl chamber if it gets stuck. Ensure the device is preheated correctly and adjust temperature settings for optimal curl formation.

Resolving Hair Tangles or Uneven Curls

If hair tangles, gently remove it from the curl chamber. For uneven curls, ensure consistent section sizes and temperature settings. Use a lower heat setting for damaged hair to prevent breakage; Avoid using thick hair strands, as this can cause uneven curl formation. Comb hair thoroughly before curling to minimize tangles. For tighter curls, reduce timer settings, and for looser curls, increase them. Regularly clean the device to maintain optimal performance and curl quality.

Addressing Device Malfunctions

If the Conair Curl Secret stops working, first ensure it is properly plugged in and the outlet is functional. Allow the device to cool down before restarting. Check for blockages in the curl chamber and clean it thoroughly with a soft cloth. Avoid using non-Conair attachments, as they may damage the device. For persistent issues, refer to the user manual or contact Conair customer support. Regular maintenance, like cleaning, can prevent malfunctions and extend the device’s lifespan. Always unplug it when not in use to ensure safety.

The Conair Curl Secret simplifies curling with its innovative design; For best results, always prep hair by cleaning and drying, choose the right temperature, and avoid damage. Regularly clean the device to maintain performance and longevity; Experiment with settings to achieve your desired curl style, and enjoy long-lasting, beautiful curls effortlessly!

For optimal results with the Conair Curl Secret, ensure hair is clean, dry, and free of tangles. Choose the appropriate temperature based on hair type and desired curl tightness. Place hair into the curl chamber with the opening facing your head, select curl type and direction, and set the timer. For thicker hair, use shorter sections and higher heat. To maintain curls, avoid using heavy styling products beforehand and let curls cool before touching. Regularly clean the device and store it safely to prolong its lifespan. Follow safety guidelines to prevent damage or injury, and experiment with settings to achieve your desired style. Proper maintenance and care will ensure consistent performance and long-lasting curls.

Final Tips for Achieving Long-Lasting Curls

To achieve long-lasting curls with the Conair Curl Secret, avoid using heavy styling products beforehand, as they may weigh hair down. Allow curls to cool completely before touching or brushing them. For enhanced hold, use a light-hold hairspray after curling. Experiment with lower temperatures for finer hair and higher settings for thicker hair. Regularly clean the device to prevent product buildup and ensure optimal performance. With proper care and technique, your curls will remain vibrant and defined all day long.

damaged handling per shipper instructions

Understanding damaged handling per shipper instructions is crucial for minimizing losses and ensuring efficient claims processing․ This process involves adhering to specific protocols for managing damaged goods during transit, ensuring proper documentation, and maintaining clear communication between shippers and carriers․ By following these guidelines, stakeholders can mitigate risks and streamline resolution processes effectively․

Understanding the Concept

Damaged handling per shipper instructions refers to the standardized procedures shippers and carriers follow when a package is damaged during transit․ This concept ensures that all parties involved understand their roles in managing and resolving such incidents efficiently․ The process typically begins with inspecting the damage, documenting it thoroughly, and notifying the relevant parties․ Proper documentation is critical for filing claims and determining liability․ By adhering to these guidelines, shippers and carriers can minimize delays, reduce financial losses, and maintain customer satisfaction․ This structured approach also helps prevent future damages by identifying and addressing root causes, ensuring smoother shipping experiences․

Importance of Adhering to Shipper Instructions

Adhering to shipper instructions is vital for ensuring smooth operations and minimizing potential disputes․ When carriers follow these guidelines, they can handle damaged goods appropriately, preventing further deterioration and ensuring compliance with legal and regulatory standards․ Proper adherence also facilitates efficient claims processing, as all parties have clear documentation of the damage and the steps taken to address it․ This reduces delays and financial losses for both shippers and carriers․ Moreover, following instructions enhances trust and maintains positive relationships between all stakeholders involved in the shipping process, ultimately contributing to a more reliable and customer-focused logistics system․

Key Steps in Handling Damaged Shipments

Inspecting and documenting damage immediately upon discovery is critical․ Separate damaged goods from undamaged ones to prevent further issues․ Notify carriers and shippers promptly for guidance․

Initial Inspection and Documentation

Conduct a thorough inspection of the shipment upon receipt to identify any visible damage․ Document all findings with detailed notes, photographs, and videos․ Record the extent of damage, including packaging condition and item specifics․ This documentation serves as critical evidence for claims and communication with carriers․ Immediate action ensures accuracy and supports efficient resolution․ Proper records help prevent disputes and facilitate reimbursement or replacement processes․ Timely and precise documentation is essential for protecting both shippers and recipients’ interests․ This step is foundational in managing damaged goods effectively and maintaining smooth interactions with carriers and shippers․

Separating Damaged Goods from Undamaged Ones

Immediately upon identifying damaged goods, separate them from undamaged items to prevent further contamination or confusion․ This step ensures clarity in processing and minimizes potential mix-ups․ Store damaged goods in a secure, designated area for inspection and documentation․ Proper segregation also aids in identifying the extent of damage and facilitates claims processing․ Clearly label damaged items to avoid accidental use or misshipment․ This separation is critical for maintaining organizational efficiency and ensuring that undamaged goods remain intact for their intended use․ It also helps in resolving issues with carriers and shippers more effectively by isolating the affected items․

Notifying the Carrier and Shipper

Notify the carrier and shipper promptly upon discovering damaged goods․ Provide detailed documentation, including photos and descriptions of the damage․ This ensures both parties are aware of the issue and can initiate appropriate actions․ Clear communication helps prevent further complications and expedites the claims process․ Use official channels, such as email or designated claim portals, to ensure records are maintained․ Prompt notification also demonstrates proactive handling, fostering collaboration between all stakeholders․ Timely updates help resolve issues efficiently, minimizing delays and potential disputes․ Effective communication is key to ensuring accountability and resolving damaged shipment cases effectively․ Act swiftly to preserve your rights and facilitate resolution․

Common Reasons for Shipping Damage

Shipping damage often results from improper packaging, mishandling by carriers, or transit-related issues․ These factors can lead to compromised goods, highlighting the need for robust protective measures and careful handling practices․

Improper Packaging and Handling

Improper packaging and handling are leading causes of shipping damage․ Inadequate cushioning, insufficient box strength, and poor sealing increase the risk of goods being damaged during transit․ Fragile items often suffer when not properly secured, while heavy objects may shift and cause internal damage․ Additionally, mishandling by carriers, such as dropping packages or exposing them to harsh conditions, exacerbates the issue․ Proper packaging materials, like bubble wrap and sturdy boxes, are essential to protect items․ Clear labeling of fragile goods and adherence to handling instructions can also mitigate damage, ensuring safer transit and reducing claims related to improper care․

Carrier Mishandling and Transit Issues

Carrier mishandling and transit issues often result in damaged shipments․ Rough handling, such as dropping or stacking packages improperly, can cause significant harm․ Transit delays or exposure to extreme temperatures and weather conditions may also degrade goods․ Mishandling during loading or unloading increases the risk of damage․ Carriers must ensure packages are handled with care, especially fragile or sensitive items․ Proper training for staff and adherence to handling procedures can minimize transit-related damage․ Additionally, using tracking technology helps monitor shipments and identify potential issues early, ensuring timely resolution and reducing the impact of mishandling on delivery outcomes․ Proper oversight is essential to prevent such incidents․

Best Practices for Shippers and Carriers

Shippers and carriers must adopt robust packaging, clear labeling, and proper handling procedures to minimize damage․ Regular staff training ensures compliance with guidelines, enhancing shipment safety and efficiency, reducing claims and delays, and improving customer satisfaction․

Proper Labeling and Packaging Guidelines

Proper labeling and packaging are essential to prevent shipping damage․ Shippers should use durable materials, clearly mark fragile items, and ensure labels are legible․ Secure sealing prevents contents from shifting, while appropriate filler materials cushion goods during transit․ Fragile, hazardous, or temperature-sensitive items require specialized packaging and clear warnings․ Standardized labels for handling instructions, such as “Fragile” or “Handle with Care,” guide carriers in managing packages․ Adequate packaging reduces the risk of damage, ensuring goods arrive intact and minimizing claims․ Regularly reviewing and updating packaging strategies based on shipping conditions and carrier requirements further enhances protection and efficiency․ Proper labeling also aids in quick identification and handling․

Training Staff on Handling Procedures

Training staff on proper handling procedures is vital to minimize shipping damage․ Employees should be educated on careful package handling, proper lifting techniques, and the importance of adhering to shipper instructions․ Regular training sessions can ensure staff understand how to inspect shipments for damage, document issues, and communicate effectively with carriers․ Emphasizing the significance of following protocols for damaged goods, such as separation and reporting, helps maintain efficiency and reduces liability․ Ongoing training also fosters a culture of accountability, ensuring that all team members are aligned with best practices for handling shipments responsibly and addressing any damages promptly to prevent further complications․

Filing a Claim for Damaged Goods

Filing a claim for damaged goods requires detailed documentation, including photos and proof of damage․ Retain all packaging and contact the carrier promptly to initiate the process․

Required Documentation and Evidence

Filing a claim for damaged goods requires thorough documentation․ This includes photos and videos of the damaged package and contents, as well as the original packaging materials․ Retain all shipping labels, invoices, and delivery receipts․ Detailed reports from the carrier or shipper acknowledging the damage are also essential․ Maintain records of communication with the carrier and shipper, including emails, letters, or call logs․ Properly completed claim forms and itemized lists of damaged goods are typically required․ Ensure all evidence is submitted within the carrier’s specified timeframe to avoid delays or claim denials․ Timely and accurate documentation is critical for a successful resolution․

Communication with the Carrier and Shipper

Effective communication is vital when handling damaged shipments․ Shippers must promptly notify carriers about any damage, providing detailed descriptions and supporting evidence․ Carriers should respond with clear instructions on how to proceed, such as returning, holding, or disposing of the damaged goods․ Regular updates and transparent dialogue ensure both parties are aligned․ Shippers should also inquire about the carrier’s claims process and required timelines․ Maintaining open lines of communication helps resolve issues efficiently, minimizing delays and financial losses․ Clear and timely interactions are essential for a smooth resolution and maintaining a positive working relationship between shippers and carriers․

Preventive Measures to Minimize Damage

Implementing robust packaging, secure sealing, and clear labeling reduces damage risks․ Proper handling procedures and staff training further ensure safe transit and minimize potential harm to shipments․

Robust Packaging and Secure Sealing

Robust packaging and secure sealing are essential to minimize shipping damage․ Use high-quality materials, such as sturdy boxes and protective fillers, to prevent movement during transit․ Ensure items are properly cushioned with bubble wrap or foam inserts, especially for fragile goods․ Securely seal all seams with reliable tape to avoid openings․ Properly sized packaging reduces the risk of damage, while clear labeling provides handling instructions to carriers․ Regularly inspect packaging materials for wear and tear․ Implementing these measures ensures shipments arrive intact, reducing claims and enhancing customer satisfaction․ Secure sealing and robust packaging are critical first steps in preventing transit-related damage․

Selecting Reliable Carriers and Services

Selecting reliable carriers and services is vital to minimize shipping damage and ensure smooth delivery․ Research carriers with strong track records for handling fragile or sensitive items․ Compare services based on their reputation, transit times, and claims handling processes․ Consider carriers offering real-time tracking and proactive communication․ Ensure they adhere to shipper instructions and provide clear guidelines for handling damaged goods․ Choosing a trustworthy carrier enhances customer satisfaction and reduces the likelihood of disputes․ Additionally, reviewing carrier policies on damaged shipments helps in aligning expectations and streamlining resolution processes, ultimately protecting both shippers and recipients from potential losses․

Proper handling of damaged shipments ensures minimal loss and customer satisfaction․ Key steps include prompt inspection, thorough documentation, and clear communication with carriers and shippers always․

Effective damaged handling per shipper instructions involves prompt inspection, thorough documentation, and clear communication with carriers․ Separating damaged goods prevents further issues, while proper labeling ensures safe transit․ Carriers must adhere to shipper guidelines, and shippers should provide clear instructions for handling damaged items․ Filing claims promptly with required evidence is essential for resolving issues efficiently․ Preventive measures, such as robust packaging and selecting reliable carriers, minimize damage risks․ By following these steps, stakeholders can reduce losses, enhance customer satisfaction, and streamline the shipping process overall․ Proper documentation and adherence to protocols are key to successful damaged goods management․

Final Thoughts on Effective Damaged Handling

Effective damaged handling requires a proactive approach, combining clear communication, proper documentation, and adherence to shipper instructions․ By understanding the importance of damaged handling per shipper instructions, all parties involved can minimize losses and ensure smoother resolution processes․ Investing in staff training, robust packaging, and reliable carriers further enhances the shipping experience․ Regularly reviewing and updating procedures ensures long-term efficiency and customer satisfaction, making damaged handling a critical component of successful logistics management․

shelby county instructional services

Overview of Shelby County Instructional Services

Shelby County Instructional Services Center, located at 601 First Street South in Alabaster, AL, serves as an annex of the Central Office, supporting educational programs and community services.

The Shelby County Instructional Services Center, located at 601 First Street South in Alabaster, AL 35007, is a key educational support facility. It functions as an annex of the Central Office, providing resources for students, teachers, and the community. The center offers programs such as textbook services, alternative education, and career training. Its mission is to enhance learning opportunities and ensure access to quality education for all students in Shelby County.

1.2. Location and Contact Information

The Shelby County Instructional Services Center is located at 601 First Street South, Alabaster, AL 35007. The center can be reached by phone at 205-682-5900. Directions to the facility are available via Waze, ensuring easy access for visitors. This location serves as a central hub for educational support services, making it a key resource for the community.

1.3. Mission and Vision of Shelby County Instructional Services

The mission of Shelby County Instructional Services is to empower students by providing high-quality educational resources and support. The vision is to inspire academic excellence and foster a lifelong love of learning. By collaborating with educators, families, and the community, the center aims to create a nurturing environment that prepares students for future success and contributes positively to society.

Instructional Programs and Services

Shelby County Instructional Services offers comprehensive programs, including textbook services, alternative education, and career-technical opportunities, ensuring diverse learning needs are met effectively.

2.1. Textbook Services and Educational Resources

Shelby County Instructional Services provides textbooks and resources to support academic programs, ensuring access to essential materials for all students. Textbooks are reviewed and updated on a six-year cycle to maintain relevance and quality. Additional resources, such as instructional videos and at-home learning packets, are available to enhance student learning experiences and accommodate diverse educational needs.

2.2. Alternative School Programs and Support

Shelby County Instructional Services Center offers alternative school programs, providing a supportive environment for students with unique needs. Located at 601 First Street South in Alabaster, these programs cater to diverse learning requirements. The center also manages the Homebound Program, offering instructional support to students confined at home, ensuring they meet state educational standards and receive necessary academic support.

2.3. Career and Technical Education Opportunities

Shelby County Instructional Services offers career and technical education programs, equipping students with essential skills for future careers. Located at 601 First Street South, Alabaster, these programs provide hands-on training in various fields, preparing students for both professional and academic pathways. The center collaborates with local organizations to enhance learning experiences, ensuring students gain practical knowledge and industry-specific expertise.

Technology and Virtual Learning

Shelby County Instructional Services integrates technology and virtual learning tools, such as Clever and Chromebooks, to enhance student access to educational resources and support remote education initiatives.

3.1. Access to Clever and Chromebook Programs

Shelby County Instructional Services provides students with access to Clever, an online platform offering educational resources. Students in grades 6-12 can log in via Shelby County Chromebooks or personal devices using their shelbyed.org accounts. Chromebooks are distributed to support virtual learning, ensuring access to digital tools and materials. Clever streamlines access to instructional apps, fostering a seamless learning experience. Technical support is available for families needing assistance with device setup or platform navigation.

3.2. At-Home Learning Packets and Instructional Videos

Shelby County Instructional Services offers at-home learning packets and instructional videos to support students; These resources, accessible via the official website, provide lessons and activities for ELA, Math, and Science. Instructional videos are produced by cross-departmental teams to enhance learning. Parents and students can access these materials to complete assignments at home, ensuring continuity of education. Additional support is available through the Curriculum Access page for families needing further assistance.

3.3. Role of the Technology Department

The Technology Department at Shelby County Instructional Services Center supports digital learning by managing Chromebook programs, online registration, and device distribution. They provide technical support for students and staff, ensuring seamless access to educational tools. The department also oversees network infrastructure and cybersecurity to maintain reliable connectivity. Their efforts enable efficient virtual learning and instructional services, playing a crucial role in modern education delivery within Shelby County schools.

Community Involvement and Partnerships

Shelby County Instructional Services fosters partnerships with local schools, organizations, and the community to enhance educational opportunities, support student well-being, and promote collaborative learning environments.

4;1. Collaboration with Local Schools and Organizations

The Shelby County Instructional Services Center actively collaborates with local schools, businesses, and community organizations to enhance educational opportunities. Partnerships focus on career and technical education, extracurricular activities, and student support services. The Center works closely with organizations like GLOBE and local businesses to provide hands-on learning experiences. These collaborations ensure students receive well-rounded education and community involvement, fostering a strong connection between schools and the community they serve.

4.2. Extended Learning Programs and Before/After-Care Services

Shelby County Instructional Services offers extended learning programs and before/after-care services to support students’ academic and personal growth. These programs provide enrichment activities, homework assistance, and safe environments for students outside regular school hours. The services are designed to accommodate working families, ensuring students have access to structured learning and care. The Center also collaborates with local organizations to enhance these programs, fostering a supportive and engaging environment for all participants.

4.3. Health Services and Student Support

Shelby County Instructional Services provides comprehensive health services, including school nursing programs and wellness initiatives, to ensure students’ physical and emotional well-being. Support services are tailored to meet diverse needs, such as special education accommodations and counseling. The Homebound Program offers instructional support for students unable to attend school. Additionally, the Center collaborates with community organizations to provide resources, ensuring students receive holistic support for their educational and personal development.

Facility and Administrative Support

The Shelby County Instructional Services Center serves as an annex of the Central Office, providing administrative support and coordinating educational programs, while also aiding in facilities planning and maintenance.

5.1. Shelby County Instructional Services Center as an Annex of the Central Office

The Shelby County Instructional Services Center, located at 601 First Street South in Alabaster, AL, functions as an annex of the Central Office. This facility supports various educational programs and administrative functions, serving as a hub for instructional resources and services. The county retains ownership of the building, ensuring it remains a vital part of the school system’s operations. Its role underscores the importance of centralized support for efficient education management and resource allocation.

5.2. Address and Directions to the Instructional Services Center

The Shelby County Instructional Services Center is located at 601 First Street South, Alabaster, AL 35007; Situated on U.S. 31, the center is easily accessible via major highways. For real-time directions, visitors can use navigation apps like Waze, which provides updates on traffic and road conditions. The center’s address is centrally located, making it a convenient hub for educational and administrative activities within Shelby County.

5.3. Role in Community Education and Facilities Planning

The Shelby County Instructional Services Center plays a vital role in community education and facilities planning, supporting the school system’s strategic initiatives. It serves as a hub for educational resources, health services, and student support programs. The center collaborates with local schools and organizations to ensure facilities meet educational needs, fostering a conducive learning environment for all students across Shelby County.

COVID-19 Response and Adaptations

Shelby County Instructional Services implemented online registration, device distribution, and health safety protocols to support continued education during the pandemic, ensuring student and staff well-being.

6.1. Impact of COVID-19 on Instructional Services

The COVID-19 pandemic significantly impacted Shelby County Instructional Services, prompting school closures, virtual learning adoption, and the implementation of health safety measures. The district swiftly transitioned to online learning, distributing Chromebooks and providing instructional packets to ensure continuity of education. Online registration and device distribution became essential services, while health protocols were enforced to protect students and staff. These adaptations aimed to minimize educational disruptions while prioritizing community well-being.

6.2. Online Registration and Device Distribution

Shelby County introduced online registration to streamline student enrollment processes during the pandemic. Families could conveniently register and access resources remotely. Additionally, the district distributed Chromebooks to students, ensuring equitable access to virtual learning tools. This initiative supported students in grades 6-12, enabling them to log into Clever and access instructional programs. The distribution was coordinated efficiently, with devices provided to those without personal access, fostering a connected and continuous learning environment for all students.

6.3. Health and Safety Protocols in Schools

Shelby County Schools implemented rigorous health and safety protocols to address COVID-19. These included enhanced sanitation, mask policies, and social distancing measures. Contact tracing was prioritized to identify and mitigate potential outbreaks. Schools also promoted handwashing and hygiene practices. Communication with families and staff was emphasized to ensure awareness and compliance. These efforts aimed to create a safer learning environment while maintaining academic continuity for all students and employees.

Shelby County Instructional Services plays a vital role in fostering education and community growth, ensuring access to quality programs and resources for all students and families.

7.1. The Importance of Shelby County Instructional Services in Education

Shelby County Instructional Services is crucial for providing equitable access to high-quality education, supporting both students and educators with resources, programs, and innovative learning opportunities. By offering textbook services, alternative school programs, and career-technical education, the center ensures diverse learning needs are met. Its focus on technology, virtual learning, and community partnerships fosters academic success and prepares students for future challenges, making it a cornerstone of education in Shelby County.

7.2. Future Goals and Initiatives

Shelby County Instructional Services aims to expand virtual learning opportunities, enhance career-technical education, and strengthen community partnerships. Future initiatives include improving technology access, ensuring equitable resources, and advancing teacher professional development. The center also plans to broaden health and safety protocols, fostering a supportive learning environment. By prioritizing innovation and collaboration, Shelby County Instructional Services will continue to empower students and educators, driving academic excellence and preparing the next generation for success.

7.3. Final Thoughts on the Role of the Instructional Services Center

The Shelby County Instructional Services Center is pivotal in coordinating educational resources and support services. By serving as a hub for curriculum development, technology integration, and community engagement, it ensures a cohesive and effective educational framework. Its commitment to innovation and student success underscores its vital role in shaping the future of education within Shelby County, making it an indispensable asset to the community and its schools.

mantis tiller operating instructions

Welcome to the Mantis Tiller operating guide! This manual provides essential information for safe and effective use, covering assembly, maintenance, and troubleshooting to ensure optimal performance.

1.1 Overview of the Mantis Tiller

The Mantis Tiller is a lightweight, versatile gardening tool designed for efficient soil preparation. Weighing only 21-26 pounds, it combines portability with powerful tilling capabilities, making it ideal for small to medium-sized gardens. Its unique serpentine tines churn soil up to 10 inches deep, ensuring thorough cultivation. Unlike larger tillers, the Mantis is easy to maneuver, allowing precise control for weeding and tilling. This innovative design makes it a favorite among gardeners seeking a durable, user-friendly tool for various landscaping tasks.

1.2 Importance of Following Operating Instructions

Adhering to the Mantis Tiller operating instructions ensures safe and efficient use, preventing accidents and prolonging the tool’s lifespan. Proper assembly, maintenance, and storage guidelines are crucial for optimal performance. By following the instructions, users can avoid common issues like engine problems or tine damage. Additionally, the manual provides troubleshooting tips to address malfunctions quickly. Complying with safety precautions and usage recommendations guarantees reliable operation and enhances gardening success. Always refer to the manual for specific guidance tailored to your Mantis Tiller model.

Safety Precautions

Always wear protective gear, including gloves and eyewear, when operating the Mantis Tiller. Ensure the area is clear of obstacles and keep children away. Store the tiller in a dry, secure location inaccessible to children. Never use the tiller in wet conditions or near open flames, and avoid smoking while handling fuel. Proper storage and maintenance are critical for safe operation and longevity.

2.1 General Safety Guidelines

Always wear protective gear, including gloves and eyewear, when operating the Mantis Tiller. Ensure the area is clear of obstacles and keep children away. Store the tiller in a dry, secure location inaccessible to children. Never use the tiller in wet conditions or near open flames, and avoid smoking while handling fuel. Proper storage and maintenance are critical for safe operation and longevity. Regularly inspect the tiller for damage and ensure all parts are securely fastened before use. Follow all safety instructions provided in the manual to minimize risks and ensure safe operation.

2.2 Protective Gear and Clothing

Always wear protective gear, including gloves, safety glasses, and sturdy footwear, when operating the Mantis Tiller. Long sleeves and pants can protect against debris. Avoid loose clothing that may get caught in moving parts. Hearing protection is recommended due to engine noise. Ensure proper fit and visibility by wearing bright or reflective clothing if necessary. Adhere to these guidelines to minimize risks and ensure safe operation. Proper attire is crucial for protecting yourself while using the tiller effectively.

2.3 Storage and Accessibility Restrictions

Store the Mantis Tiller in a dry, sheltered area inaccessible to children and pets. Keep fuel and tiller separate from living spaces to avoid fire hazards. Ensure the storage location is well-ventilated to prevent fume buildup. Secure the tiller to prevent accidental movement. Always remove the spark plug or disconnect the ignition before storing. Follow these guidelines to ensure safety and maintain the tiller’s condition for long-term use; Proper storage protects both the equipment and those around it.

Assembly and Preparation

This section guides you through unpacking, inventory, and assembling your Mantis Tiller. Follow step-by-step instructions to ensure all components are correctly attached and tested for safety.

3.1 Unpacking and Inventory

When unpacking your Mantis Tiller, carefully inspect all components for damage. Ensure all parts, including tines, handles, and engine components, are accounted for. Refer to the provided inventory list to verify completeness. If any parts are missing or damaged, contact Mantis customer support immediately. Properly organize the components to avoid losing small hardware. This step is crucial for a smooth assembly process and ensures your tiller functions optimally right from the start. Always follow the manufacturer’s guidelines for unpacking and inventory.

3.2 Attaching Handles and Components

Begin by attaching the handles and other components using the provided hardware. Align each part according to the assembly instructions and tighten securely with a wrench. Ensure all bolts and nuts are properly aligned to avoid damage. Use two 11 mm spanners or adjustable wrenches for this step. Double-check that all components, such as tines and handlebars, are securely fastened. Proper alignment and tightening are crucial for safe operation and optimal performance. Refer to the manual for specific torque specifications and assembly diagrams.

3.3 Final Inspection Before Use

Before operating your Mantis Tiller, conduct a final inspection to ensure all components are secure and functioning properly. Check the tines for damage or debris and ensure they are correctly attached. Verify that all handles and bolts are tightened firmly. Inspect the fuel and oil levels, and confirm that all safety features are in place. Make sure the throttle and choke mechanisms are working smoothly. Finally, ensure the tines stop completely when the engine is off. This step is crucial for safe and efficient operation.

Operating the Mantis Tiller

Start the engine and allow it to warm up before use. Operate the tiller on dry soil, pulling it backward for optimal tilling. Always maintain control and balance.

4.1 Starting the Engine

To start the engine, ensure the choke is in the closed position. Pull the start cord firmly until the engine engages. Once running, slowly release the choke. For a flooded engine, fully open the choke and throttle, then pull the cord. Always let the engine warm up for 1-2 minutes before tilling. Ensure the area is clear of debris and maintain a firm grip to prevent loss of control while operating. Follow these steps for smooth ignition and operation.

4.2 Tilling Techniques and Best Practices

For effective tilling, start in small sections, working in a consistent pattern. Move the tiller slowly backward, overlapping passes to ensure thorough soil preparation. Maintain a steady pace, allowing the tines to break up the soil evenly. Avoid applying too much pressure, as the machine is designed to operate efficiently at its own speed. For deeper tilling, pull the tiller backward while engaging the tines. Keep loose clothing tied back and stay alert to your surroundings for safe operation.

4.3 Basic Controls and Throttle Usage

The Mantis Tiller features intuitive controls, including a throttle trigger for adjusting speed and a choke button for starting the engine. To operate, ensure the choke is in the closed position when starting cold, then gradually open it as the engine warms up. Use the throttle to regulate tine speed, matching it to soil conditions. Always maintain a firm grip on the handles for control. For optimal performance, move the tiller slowly backward, engaging the tines evenly across the soil.

Maintenance and Care

Regular maintenance ensures your Mantis Tiller performs optimally. Clean the tines after use, check fuel levels, and store the tiller in a dry, secure location. Always follow the manual’s guidelines for routine checks and seasonal preparation to extend the machine’s lifespan and reliability.

5.1 Routine Maintenance Checks

Regular inspections are crucial for maintaining your Mantis Tiller’s performance. Clean the tines after each use to prevent soil buildup. Check fuel levels and ensure proper oil mixtures. Inspect the throttle and choke for smooth operation. Lubricate moving parts as recommended. Store the tiller in a dry, secure location, away from children. Follow the manual’s maintenance schedule to prevent wear and tear, ensuring your tiller remains efficient and reliable for years of gardening success.

5;2 Handling and Cleaning the Tines

Proper care of the tines ensures efficient tilling and longevity. After use, remove soil with a wire brush to prevent buildup. Lubricate tines periodically to avoid rust. Always handle tines with gloves, as edges can be sharp. For deep cleaning, detach tines and soak in mild detergent. Rinse thoroughly and dry before reattaching. Regular maintenance prevents corrosion and ensures optimal performance. This care routine keeps your Mantis Tiller in prime condition for consistent gardening results.

5.3 Seasonal Storage and Preparation

Proper seasonal storage ensures your Mantis Tiller remains in excellent condition; After the gardening season, clean the tiller thoroughly, removing dirt and debris. Drain fuel if not using a fuel stabilizer. Lubricate moving parts and store in a dry, sheltered area inaccessible to children. Avoid storing in a house or near open flames. Regular pre-storage maintenance prevents rust and ensures the tiller is ready for the next season. Follow these steps to protect your investment and maintain its performance.

Troubleshooting Common Issues

Address common problems like engine issues or tine malfunctions by checking fuel flow, spark plugs, and tine engagement. Refer to the manual for specific solutions and guidance.

6.1 Engine Not Starting

If the engine fails to start, check the choke position and ensure it’s set correctly. Verify the spark plug is clean and properly gapped. For flooded engines, open the throttle fully and pull the start cord several times. Ensure the fuel mix is correct (50:1 for 2-cycle engines). If issues persist, inspect the air filter and fuel line for blockages. Consult the manual for specific troubleshooting steps or contact Mantis customer support for assistance. Regular maintenance can prevent such issues.

6.2 Tines Not Engaging Properly

If the tines fail to engage, first ensure they are properly attached and aligned. Check for debris or soil buildup on the tines, as this can prevent proper operation. Verify the drive belt is secure and not worn or misaligned. Ensure the throttle is fully engaged and the tines are positioned correctly for the task. If issues persist, consult the manual for specific adjustment instructions or contact Mantis customer support for further assistance. Proper maintenance can help avoid such problems.

6.3 How to Address Common Problems

For common issues, start by reviewing the manual for specific troubleshooting steps. Regular maintenance, such as cleaning debris from tines and checking fuel mixture, can prevent many problems. Ensure proper storage in a dry, secure location to avoid damage. If issues persist, contact Mantis customer support for guidance or repair. Addressing problems promptly ensures optimal performance and extends the tiller’s lifespan. Always follow safety guidelines and manufacturer recommendations when troubleshooting or repairing your Mantis tiller.

Additional Resources

Access comprehensive guides, troubleshooting tips, and FAQs for your Mantis Tiller. Visit the official website or contact customer support for detailed assistance and maintenance advice.

7.1 Accessing the Full Manual

Accessing the full manual for your Mantis Tiller is straightforward. Visit the official Mantis website or authorized retailers like ManualsLib to download PDF versions. Models such as the Mantis Tiller Original, 7940, and 3558 are readily available. Ensure compatibility with your device for easy viewing. The manual includes detailed instructions, diagrams, and troubleshooting tips. Key sections cover assembly, operation, and maintenance. Download here for a comprehensive guide to optimal performance and care.

7.2 Frequently Asked Questions

Common questions about the Mantis Tiller include starting issues, tine maintenance, and storage tips. Users often ask how to address engine problems, such as flooding, and how to properly engage the tines. Storage in a dry, secure location is recommended. For troubleshooting, refer to the manual or contact customer support. Visit the FAQ page for detailed answers and solutions to ensure optimal performance and longevity of your tiller.

7.3 Customer Support and Assistance

Mantis offers comprehensive customer support to ensure your tiller operates smoothly. For inquiries or issues, contact their dedicated team at 1-800-366-6268. Visit the support page for troubleshooting guides, manuals, and FAQs. Their team is ready to assist with parts, repairs, or operational questions, ensuring your Mantis Tiller continues to perform effectively. Reach out for help with maintenance, troubleshooting, or ordering replacement parts.

By following these guidelines, you can ensure optimal performance and longevity of your Mantis Tiller, making it a valuable tool for your gardening needs.

8.1 Summary of Key Operating Tips

Always assemble and inspect your Mantis Tiller before use, ensuring all components are secure. Start the engine with the choke in the correct position and allow it to warm up. Tiller efficiently by pulling backward slowly, maintaining control. Use protective gear and follow safety precautions to avoid accidents. Regular maintenance, including cleaning tines and checking fuel, ensures longevity. Store the tiller in a dry, secure location, out of children’s reach. Proper care and adherence to guidelines will maximize performance and extend the life of your Mantis Tiller.

8.2 Ensuring Long-Term Performance

Regular maintenance is key to ensuring your Mantis Tiller performs optimally over time. Always clean the tines after use and lubricate moving parts to prevent rust and wear. Store the tiller in a dry, protected area during off-seasons, and follow the manufacturer’s guidelines for seasonal preparation. Refer to the user manual for specific maintenance schedules and tips. By adhering to these practices, you can extend the lifespan of your Mantis Tiller and ensure it continues to deliver reliable performance for years to come.

nikon d7500 instruction manual

The Nikon D7500 is a powerful DSLR with advanced features, offering speed, versatility, and exceptional image quality. Designed for professionals and enthusiasts, it delivers outstanding performance in various conditions. With its robust autofocus system, intuitive controls, and extensive customization options, the D7500 is ideal for capturing stunning photos and videos. This guide provides a comprehensive overview of its capabilities, helping users maximize their photography experience.

Overview of the Camera and Its Key Features

The Nikon D7500 is a high-performance DSLR camera designed for enthusiasts and professionals. It features a 20.9MP APS-C sensor, EXPEED 5 image processor, and 4K UHD video recording. The camera boasts a weather-sealed body, 51-point autofocus system, and 8 fps burst shooting. It supports RAW image capture, Bluetooth, and Wi-Fi for seamless connectivity. The D7500 also offers a tilting 3.2-inch touchscreen LCD and compatibility with Nikon’s extensive lens lineup. Its robust design and advanced features make it ideal for capturing high-quality images in various lighting conditions.

Understanding the Camera’s Design and Layout

The Nikon D7500 features an ergonomic design with a weather-sealed body, ensuring durability and comfort during use. Its intuitive button placement and robust build make it ideal for handling various photography scenarios.

Mode Dial and External Controls Explained

The Nikon D7500’s mode dial provides quick access to shooting modes like Auto, Program, Aperture Priority, Shutter Priority, and Manual. External controls include the ISO button, exposure compensation button, and multi-selector for intuitive adjustments. Customizable buttons allow users to assign frequently used functions, enhancing workflow efficiency. The camera’s ergonomic design ensures easy access to these controls, enabling seamless operation during photography sessions.

Setting Up the Camera

Setting up the Nikon D7500 involves configuring essential settings like date/time, language, and display options. Ensure the camera is updated with the latest firmware for optimal performance.

Inserting the Battery and Memory Cards

Insert the battery by aligning it with the compartment and securing it until it clicks. For memory cards, open the slot on the right side, insert the card with the label facing up, and gently push until it clicks. Use high-speed cards for optimal performance. Always turn off the camera before inserting or removing cards to prevent data loss or damage to the camera or card.

Mounting Lenses and Initial Setup

Turn off the camera before mounting a lens. Align the lens mount with the camera’s mount, ensuring the white dot on the lens matches the camera’s mark. Gently rotate the lens clockwise until it clicks securely. After mounting, perform initial setup by navigating to the menu, setting the date, time, and language. Check the firmware version and update if necessary. Familiarize yourself with basic settings like autofocus and metering modes to optimize your shooting experience.

Autofocus Modes and Customization

The Nikon D7500 offers advanced autofocus modes, including Single AF, Continuous AF, and Auto-Area AF. Customization options allow users to tailor autofocus performance for precise control and optimal results.

Understanding Autofocus Modes (Single AF, Continuous AF, etc.)

The Nikon D7500 features multiple autofocus modes to suit different shooting scenarios. Single AF (AF-S) locks focus on a stationary subject, ideal for portraits. Continuous AF (AF-C) tracks moving subjects, perfect for action photography. Auto-Area AF (AF-A) automatically selects the mode based on subject movement. Additionally, the camera offers Manual Focus (MF) for precise control. Customization options allow users to adjust AF sensitivity and tracking behavior, ensuring optimal performance for various photography needs, enhancing overall image sharpness and focus accuracy.

Shooting Modes

The Nikon D7500 offers versatile shooting modes, including Manual (M), Aperture Priority (A), Shutter Priority (S), Program (P), and Auto modes, catering to creative control and ease of use.

Manual Mode, Aperture Priority, Shutter Priority, Program Mode, and Auto Mode

The Nikon D7500 offers multiple shooting modes to suit different photography needs. Manual Mode provides full control over aperture and shutter speed for precise results. Aperture Priority allows you to set the aperture while the camera adjusts the shutter speed. Shutter Priority lets you control the shutter speed, ideal for capturing motion. Program Mode offers automatic settings with flexibility to adjust parameters, while Auto Mode simplifies photography by handling all settings, making it perfect for beginners or quick shots. Each mode is designed to enhance creativity and convenience, ensuring optimal image capture in various lighting conditions.

Exposure Compensation and Metering Modes

The Nikon D7500 allows precise control over exposure with exposure compensation, adjusting brightness in ±5 EV increments. It features metering modes like Matrix, Center-Weighted, and Spot, ensuring accurate light measurement for optimal results.

Adjusting Exposure Compensation

Exposure compensation on the Nikon D7500 allows fine-tuning of brightness in ±5 EV increments. Use the dedicated button or touchscreen to adjust settings quickly. For backlit subjects, increase EV to brighten shadows. In high-contrast scenes, lower EV to preserve highlights. The camera’s metering modes (Matrix, Center-Weighted, Spot) work seamlessly with compensation for precise control. This feature ensures balanced exposures, even in challenging lighting conditions, helping you achieve professional-quality results with ease.

Understanding Metering Modes (Matrix, Center-Weighted, Spot)

The Nikon D7500 offers three metering modes: Matrix, Center-Weighted, and Spot. Matrix metering analyzes the entire scene, using advanced algorithms to balance brightness and shadows. Center-Weighted focuses on the central area, prioritizing subjects in the middle. Spot metering measures light from a small, select area, ideal for high-contrast scenes. Each mode provides precise control over exposure, ensuring accurate results in various lighting conditions. Understanding these modes enhances your ability to capture images with optimal brightness and detail.

White Balance and ISO Settings

White Balance ensures accurate colors under various lighting, while ISO adjusts sensitivity for optimal image quality. These settings work together to enhance your photography outcomes effectively.

Customizing White Balance for Different Lighting Conditions

Customizing white balance on the Nikon D7500 ensures accurate color reproduction in various lighting scenarios. The camera offers multiple preset modes, including Auto, Daylight, and Fluorescent, to match your environment. For precise control, you can manually set a custom white balance by capturing a reference object under the lighting conditions. This feature is particularly useful for professional photographers who need consistent results. Adjusting white balance enhances image quality and reduces post-processing time significantly, ensuring natural-looking colors in every shot. This customization capability makes the D7500 versatile for diverse photography needs and lighting challenges. By leveraging these options, users can achieve professional-grade imagery with ease and precision.

Managing ISO Sensitivity for Optimal Image Quality

Managing ISO sensitivity on the Nikon D7500 is crucial for achieving optimal image quality. The ISO range spans from 100 to 51200, allowing flexibility in various lighting conditions. Lower ISO settings minimize noise, ideal for bright environments, while higher ISOs enable shooting in low light. To maintain image integrity, it’s recommended to use the lowest necessary ISO. The camera also features Auto ISO, which adjusts sensitivity automatically based on lighting, though manual control ensures creative precision. Balancing ISO with aperture and shutter speed helps preserve detail and reduce noise, ensuring professional-grade results in diverse situations.

Image Quality and File Formats

The Nikon D7500 offers high image quality with various file formats, including NEF (RAW), JPEG, and TIFF. It features compression options and adjustable resolution settings for optimal results.

Settings for Resolution, Compression, and File Formats

The Nikon D7500 allows customization of image resolution, compression, and file formats. Users can choose from NEF (RAW), JPEG, or TIFF formats, with options for fine or basic compression. Resolution settings range from large to small, ensuring flexibility for different needs. The camera also supports RAW + JPEG capture, enabling simultaneous storage of uncompressed and processed images. These settings are accessible via the Shooting Menu, offering precise control over image quality and file size for optimal results.

Viewfinder and LCD Monitor

The Nikon D7500 features an optical viewfinder with 100% frame coverage and 0.94x magnification for precise composition. The 3.2-inch tilting touchscreen LCD monitor offers sharp visuals and intuitive navigation for playback, menu adjustments, and focusing. Both tools enhance shooting and reviewing experiences, providing clarity and convenience for photographers.

Using the Viewfinder for Composition

The Nikon D7500’s optical viewfinder provides a clear and immersive framing experience with 100% coverage and 0.94x magnification. This ensures precise control over composition, allowing photographers to accurately capture their intended scene. The viewfinder also displays essential shooting information, such as aperture, shutter speed, and ISO, making it easier to adjust settings without taking your eye off the subject. Additionally, the built-in grid display aids in aligning elements, enhancing compositional balance and professionalism in every shot.

Navigating the LCD Monitor and Playback Options

The Nikon D7500’s 3.2-inch LCD monitor offers vivid and detailed image playback, allowing for precise review of your shots. During playback, you can scroll through images using the multi-selector, zoom in to check focus, and quickly delete unwanted photos. Protecting important images is also straightforward, preventing accidental deletion. The menu system is easily navigated using the same controls, providing access to various camera settings. This intuitive design ensures efficient management of your photography workflow.

Advanced Features

The Nikon D7500 offers burst mode for rapid continuous shooting, capturing up to 50 shots in 14-bit RAW; Bracketing options enhance dynamic range, ensuring versatile image capture.

Burst Mode and Continuous Shooting

The Nikon D7500 excels in continuous shooting, offering a burst mode that captures up to 50 consecutive shots in 14-bit RAW format. This feature is ideal for sports, wildlife, and action photography, allowing photographers to freeze fleeting moments. With a buffer capacity of up to 50 shots, the camera ensures minimal interruptions during high-speed shooting sessions. Additionally, the D7500 supports customizable burst modes, enabling photographers to tailor the shooting experience to their specific needs.

Capturing RAW Images and Bracketing Options

The Nikon D7500 allows photographers to capture images in RAW format, preserving maximum image detail for post-processing. RAW files are uncompressed, enabling greater flexibility in editing. The camera also supports Auto Bracketing, capturing multiple exposures of a scene at varying settings. This feature is particularly useful for HDR photography, ensuring a wide dynamic range. Additionally, the D7500 offers customizable bracketing options, allowing photographers to tailor the number of shots and exposure increments according to their creative vision.

Troubleshooting Common Issues

Troubleshooting the Nikon D7500 involves addressing issues like camera freezes, memory card errors, or LCD display problems. Resetting the camera to default settings often resolves unexpected behavior. Regular firmware updates ensure optimal performance. Cleaning the sensor and lenses can improve image quality. For persistent issues, consulting the manual or contacting Nikon support is recommended. Proper maintenance and care help minimize common operational problems. Always refer to the manual for detailed solutions. Regularly backing up data prevents loss during troubleshooting. Understanding error messages helps in quick resolution; Keeping the camera firmware updated ensures compatibility with new features and fixes bugs. If issues persist, resetting the camera or formatting memory cards may be necessary. Consulting online forums or Nikon’s official resources provides additional troubleshooting guidance. Familiarizing yourself with the camera’s error codes helps in identifying and resolving problems efficiently.

Resolving Focus Errors and Optimizing Camera Performance

Focus errors on the Nikon D7500 can often be resolved by resetting the autofocus system or cleaning the camera’s sensor. Ensure lenses are properly mounted and free from debris. Updating firmware improves performance and fixes bugs. Regularly calibrating lenses enhances accuracy. Using the correct autofocus mode for the scene minimizes errors. Checking shutter count and ensuring proper camera maintenance also optimizes functionality. Refer to the manual for detailed troubleshooting steps and solutions. Proper care ensures consistent performance and image quality. Always use genuine Nikon accessories for reliability. Regular backups prevent data loss during troubleshooting. Familiarizing yourself with error codes speeds up resolution.

disney accutime watch instructions

The Disney Accutime Watch is a kid-friendly smartwatch packed with interactive features like a built-in camera, pedometer, and customizable watch faces. Designed for fun and functionality, it combines entertainment with essential tools for everyday use.

Setting Up the Disney Accutime Watch

Start by installing the KESSARIS app and charging the watch. Power it on and follow in-app instructions to pair the device. Set the time, date, and basic preferences for initial setup.

Setting the Time and Date

To set the time and date on your Disney Accutime Watch, press and hold the MODE button until the time display flashes. Use the LIGHT button to cycle through hours, minutes, and seconds, adjusting as needed. Press START to confirm each setting. For the date, press MODE again and repeat the process, selecting the correct day, month, and year. Ensure the watch is in the correct time zone for accurate updates. If synced with the KESSARIS app, the time and date will automatically update. Always verify the 12/24-hour format matches your preference. Proper setup ensures all features, like alarms and timers, function correctly. Refer to the user manual for additional guidance if needed.

KESSARIS App Setup

Setting up the KESSARIS app is essential for maximizing the features of your Disney Accutime Watch. Begin by downloading the app from the Apple App Store or Google Play Store. Once installed, open the app and create an account or log in if you already have one. Pairing the watch with your smartphone is the next step, typically done through the app’s pairing option. Ensure the watch is in discoverable mode, often activated by pressing and holding a button on the device. After pairing, sync the watch with the app to transfer data like time, date, and settings. The app also allows for music uploads, customizable watch faces, and activity tracking. Explore these features to enhance your experience. For any issues, refer to the user manual or online troubleshooting guides. Ensure both the app and watch are updated for optimal performance.

Using Core Features

The Disney Accutime Watch offers a variety of fun and functional features. Use the camera to capture memories, play built-in games for entertainment, and track activity with the pedometer. Take selfies, change watch faces, and explore more features to enhance your experience.

Using the Camera

The Disney Accutime Watch features a built-in camera, allowing kids to capture fun moments effortlessly. To access the camera, navigate to the main menu and select the camera icon. Once opened, the camera will display a live view. Press the confirmation button to take a photo or switch to video mode for recording. The watch also includes a selfie option, making it easy for kids to take self-portraits. After capturing images, users can review them in the photo gallery. The camera feature is simple to use, with intuitive controls designed for children. Parents can also limit camera usage through the KESSARIS app settings. To ensure the best results, make sure the lens is clean and well-lit. The camera is a great way to encourage creativity and preserve memories. With its user-friendly interface, the Disney Accutime Watch camera is a delightful feature for kids to enjoy. Always supervise children when using the camera to ensure proper use and safety.

Playing Built-in Games

To access the built-in games on the Disney Accutime Watch, navigate to the main menu by swiping or pressing the appropriate button. Select the “Games” icon to view the available options. The watch typically includes six interactive games designed for kids. Each game has its own set of controls and objectives, which are usually explained briefly when the game starts. Use the side buttons or touchscreen to interact with the games, such as pressing to jump or swiping to move. Some games may involve simple puzzles, quizzes, or action-based challenges. To switch games, return to the menu and select a different option. The watch does not save high scores, focusing instead on fun and casual play. Ensure the screen is clean and brightness is adjusted for optimal visibility. Battery life may decrease with extended gameplay, so monitor usage and charge when necessary. These games are designed to be easy to understand and enjoy, making them perfect for children to play on the go.

Utilizing the Pedometer

The Disney Accutime Watch features a built-in pedometer to track daily activity, encouraging kids to stay active. To access the pedometer, navigate to the “Fitness” or “Activity” section via the main menu. Once selected, the watch will display the step count, distance, and sometimes calories burned. The pedometer starts tracking automatically when the watch is worn and moved. For accuracy, ensure the watch is securely fastened and kept close to the wrist. The data resets daily at midnight, allowing for a fresh start each morning. Parents can use this feature to motivate kids to reach daily step goals, fostering a healthy lifestyle. The pedometer is a simple yet effective tool that makes fitness fun and engaging for children. Regular use can help monitor progress and encourage physical activity. This feature is user-friendly and requires no additional setup beyond initial watch activation. It’s a great way to keep kids moving and excited about staying active.

Taking Selfies

Taking selfies with the Disney Accutime Watch is a fun feature that kids will love. To access the camera, navigate to the “Camera” icon in the main menu and select it. Ensure your child’s face is centered in the frame and press the capture button to take the photo. The watch features a built-in camera with a simple interface, making it easy for kids to use. After taking a selfie, the image is saved to the watch’s gallery for later viewing. Parents can also transfer photos to a computer or smartphone using the KESSARIS app. The camera is a great way for kids to capture memories and express their creativity. While the camera’s resolution is basic, it’s perfect for casual use and adding a touch of fun to daily activities. Regularly cleaning the camera lens with a soft cloth can help maintain photo quality. This feature is both entertaining and educational, teaching kids about photography basics.

Changing Watch Faces

Changing the watch face on your Disney Accutime Watch is a breeze, allowing your child to personalize their experience. To change the watch face, touch and hold the clock face on the home screen until the option to change appears. Swipe left or right to browse through the available designs, which include various Disney-themed options. Once you find a design your child likes, release the screen to set it as the new watch face.

The watch comes with 10 pre-installed interchangeable faces, offering a variety of styles to match different moods or outfits. For additional customization, the KESSARIS app allows parents to sync new watch faces from a library of designs. This feature keeps the watch fresh and exciting for kids, letting them showcase their favorite Disney characters or themes. Regularly updating the watch face can also help keep the device feeling new and engaging. The simplicity of this feature ensures that even young users can easily switch between designs without assistance. Changing watch faces is a great way to add a personal touch to the Disney Accutime Watch, making it a unique accessory for any child.

Maintenance Tips

Regular maintenance ensures your Disney Accutime Watch remains in top condition. Keep the watch clean by gently wiping the screen with a soft cloth and avoid using harsh chemicals or abrasive materials. Moisture can damage the device, so ensure the Micro-USB port cover is tightly closed when not in use. If the watch is exposed to water, discontinue use immediately and allow it to dry completely before resuming operation.

  • Charge the battery regularly to prevent it from draining completely, as this can affect performance.
  • Avoid extreme temperatures, as they may impact the watch’s internal components.
  • Periodically sync the watch with the KESSARIS app to ensure all features are updated and functioning properly;
  • If issues arise, reset the watch by holding the appropriate button (refer to the user manual for specific instructions).

By following these maintenance tips, you can extend the lifespan of the Disney Accutime Watch and ensure it continues to provide a seamless and enjoyable experience for your child.

Troubleshooting Common Issues

If you encounter issues with your Disney Accutime Watch, there are several steps you can take to resolve them. First, ensure the watch is fully charged, as a low battery can cause malfunction. If the watch does not turn on, press and hold the power button for 10 seconds to force a restart.

  • Syncing Issues: If the watch fails to connect to the KESSARIS app, restart both the watch and your smartphone, then retry the pairing process.
  • Camera Malfunction: If the camera is not working, check that it is enabled in the settings and that no obstructions are covering the lens.
  • Time Inaccuracy: If the time is incorrect, manually set the time and date in the app or on the watch and ensure the time zone is correct.
  • Pedometer Issues: If the pedometer is not tracking steps, reset it through the app or restart the watch.

If problems persist, perform a factory reset by holding the appropriate button (refer to the user manual for specific instructions). This will restore the watch to its default settings. Regularly updating the watch’s software through the app can also prevent many issues. By addressing these common problems, you can ensure your Disney Accutime Watch functions smoothly and reliably.

Safety Precautions

To ensure safe and optimal use of your Disney Accutime Watch, follow these guidelines:

  • Avoid Water Exposure: While the watch is water-resistant, it should not be submerged in water. Keep the Micro-USB port cover tightly closed to prevent moisture damage.
  • Handle with Care: Avoid dropping the watch or exposing it to extreme temperatures, as this may damage the internal components or screen.
  • Charging Safely: Use only the provided charger to avoid overheating or electrical issues. Do not charge the watch near flammable materials.
  • Skin Sensitivity: If your child experiences skin irritation, discontinue use and consult a healthcare professional.
  • Regular Maintenance: Clean the watch with a soft cloth and avoid exposing it to harsh chemicals or abrasive materials.

By adhering to these safety precautions, you can ensure the longevity and proper functioning of the Disney Accutime Watch while keeping your child safe during use.

The Disney Accutime Watch is a versatile and engaging smartwatch designed for kids, offering a mix of fun features like games, a camera, and customizable watch faces. Its user-friendly interface and interactive tools make it both entertaining and educational. With step-by-step guides for setup, feature usage, and maintenance, this watch is easy to integrate into daily life. The built-in pedometer and selfie function encourage physical activity and creativity, while safety precautions ensure durability. Parents can trust the watch to provide a safe and enjoyable experience for their children. For any issues, troubleshooting tips and additional resources are available. Explore all the features and settings to maximize the watch’s potential, and refer to official guides for further assistance. This concludes the comprehensive guide to the Disney Accutime Watch, helping you make the most of its innovative capabilities.

Where to Find More Information

For additional guidance on the Disney Accutime Watch, visit the official Accutime Watch Corp website, which offers detailed user manuals and setup instructions. The KESSARIS App Setup Guide is also available online, providing step-by-step instructions for pairing the watch with your device.Authorized retailers and Disney-themed product websites often include downloadable PDF manuals for specific models, such as the Disney Lilo and Stitch Blue Digital LCD Quartz Children’s Wrist Watch. Online forums like WDWMAGIC.COM and Manuals.plus feature discussions and resources for troubleshooting and maintenance; YouTube channels offer video tutorials, such as “How to Set the Time on Accutime Touchscreen Kids Watch.” For interactive features, refer to the Interactive Watch User Guide or the Itimewearables.com portal. Ensure to consult these resources for the most accurate and up-to-date information to maximize your Disney Accutime Watch experience.

jlab go air pop instructions

Experience high-quality sound with the JLab Go Air Pop earbuds‚ offering a perfect blend of style‚ comfort‚ and affordability․ Designed for everyday use‚ these lightweight earbuds deliver crystal-clear audio‚ long battery life‚ and intuitive touch controls․ With customizable settings and a sleek design‚ they are an excellent choice for music lovers seeking a seamless listening experience․ Elevate your audio with JLab’s innovative technology and enjoy unparalleled sound quality on the go․

1․1 Overview of the JLab Go Air Pop

The JLab Go Air Pop earbuds are a stylish and feature-packed wireless audio solution․ Designed with comfort in mind‚ they offer a snug fit and crystal-clear sound quality․ Equipped with touch controls‚ voice assistant integration‚ and a long-lasting battery‚ these earbuds are perfect for daily use․ With customizable ear tips and an IP55 sweat-resistant design‚ they cater to diverse preferences and active lifestyles․ Whether you’re listening to music‚ taking calls‚ or streaming content‚ the JLab Go Air Pop delivers a seamless and enjoyable audio experience for everyone․

1․2 Importance of Proper Setup

Proper setup of your JLab Go Air Pop earbuds is crucial for maximizing their performance and ensuring a seamless listening experience․ Correct pairing‚ charging‚ and fitting are essential to unlock all features and functionalities․ A well-executed setup ensures stable connectivity‚ optimal sound quality‚ and personalized comfort․ By following the instructions carefully‚ you can avoid common issues and enjoy uninterrupted audio․ Taking the time to set up your earbuds correctly will enhance their durability and overall user satisfaction‚ making them a reliable companion for your daily audio needs․

Unboxing and Initial Setup

Unbox your JLab Go Air Pop earbuds and discover a sleek‚ compact design․ Inside‚ you’ll find the earbuds‚ charging case‚ and essential accessories for a quick‚ seamless setup experience․

2․1 What’s Included in the Box

Your JLab Go Air Pop package includes the earbuds‚ a compact charging case‚ multiple sizes of ear tips for a secure fit‚ a USB-C charging cable‚ and a quick-start guide․ These accessories ensure a smooth setup process and tailored comfort for your listening experience․

2․2 Preparing for First Use

Before using your JLab Go Air Pop earbuds‚ ensure the charging case and earbuds are fully charged․ Place the earbuds in the case‚ plug in the USB-C cable‚ and wait for the LED light to indicate charging․ Once charged‚ remove the earbuds and select the appropriate ear tips from the included sizes for a secure fit․ Pairing will be done later‚ but have your device ready for a seamless connection․ Proper preparation ensures optimal performance and comfort right out of the box․

Charging the Earbuds

Charge your JLab Go Air Pop earbuds using the included USB-C cable․ Place them in the case‚ plug in‚ and wait for the LED to confirm charging․ Easy and efficient․

3․1 Charging the Case

To charge the JLab Go Air Pop case‚ connect the included USB-C cable to a power source․ The case features LED indicators to show charging status․ A full charge typically takes about two hours and provides up to 24 hours of playtime for your earbuds․ Ensure the case is properly aligned with the charging port to avoid any charging issues․ Keep the case charged to always have power for your earbuds on the go․

3․2 Charging the Earbuds

To charge your JLab Go Air Pop earbuds‚ place them in the case‚ ensuring they align correctly for proper charging․ The case’s LED indicators will show an amber light when charging and turn green when fully charged․ A full charge typically takes 1․5 to 2 hours‚ providing up to 5 hours of playtime․ Keep the case charged and store the earbuds properly when not in use to maintain battery health and ensure reliable performance․

Pairing the Earbuds

Pairing your JLab Go Air Pop earbuds is straightforward‚ ensuring a seamless connection to your device․ Follow the pairing process for a reliable and stable audio experience․

4․1 Pairing for the First Time

To pair your JLab Go Air Pop earbuds for the first time‚ ensure they are removed from the charging case to activate pairing mode․ Open your device’s Bluetooth settings and select “JLab Go Air Pop” from the available options․ The earbuds will connect automatically once selected․ A confirmation tone or voice prompt will indicate successful pairing․ The LED indicator will also flash to confirm the connection․ Your earbuds are now ready to use and will reconnect automatically to your device in the future․

4․2 Reconnecting to a Familiar Device

To reconnect your JLab Go Air Pop earbuds to a familiar device‚ open the charging case near your device with Bluetooth enabled․ The earbuds will automatically appear in your device’s Bluetooth menu under “Available Devices․” Select “JLab Go Air Pop” to reestablish the connection․ The LED indicator will flash briefly to confirm pairing․ If the earbuds do not reconnect automatically‚ ensure they are in pairing mode and restart your device if necessary․ The connection should resume seamlessly once the device recognizes the earbuds․

Using the Touch Controls

Master the intuitive touch controls of your JLab Go Air Pop earbuds to effortlessly manage music playback‚ calls‚ and voice assistant activation․ Simple taps and gestures provide seamless control over your listening experience‚ allowing you to pause‚ play‚ skip tracks‚ and adjust volume with precision․ This feature enhances convenience‚ making it easy to navigate your audio without needing your device․ The touch-sensitive surface ensures responsive and reliable operation for a hassle-free experience․

5․1 Understanding Gesture Commands

Mastering the gesture commands on your JLab Go Air Pop earbuds enhances your listening experience․ A single tap on either earbud plays or pauses your music‚ while a double-tap skips to the next track․ Triple-tapping restarts the current track‚ and a touch-and-hold gesture adjusts the volume․ These intuitive gestures allow seamless control without needing to use your device․ By default‚ the commands are preset‚ but they can be customized via the JLab Audio app to suit your preferences‚ ensuring a personalized and convenient user experience․

5․2 Customizing Touch Functions

Personalize your JLab Go Air Pop earbuds by customizing the touch functions through the JLab Audio app․ You can reassign gestures to suit your preferences‚ such as changing the double-tap function from skipping tracks to activating voice assistant․ Additionally‚ you can disable specific gestures to avoid accidental triggers․ This feature allows you to tailor the controls to your listening habits‚ enhancing your overall user experience and ensuring seamless interaction with your earbuds․

Achieving the Best Fit

Achieving the best fit ensures optimal sound quality and comfort․ Experiment with different ear tip sizes and adjust the earbuds’ position to secure a snug‚ stable fit․

6․1 Selecting the Right Ear Tips

Selecting the right ear tips is crucial for optimal sound quality and comfort․ The JLab Go Air Pop comes with multiple sizes of ear tips to ensure a secure fit․ Experiment with the included sizes to find the one that seals your ear canal best‚ providing clear audio and proper noise isolation․ A proper fit also enhances bass response and overall listening experience․ Always test the fit by gently tugging on the earbud to ensure it stays in place․

6․2 Adjusting the Earbuds for Comfort

For maximum comfort‚ gently rotate and angle the earbuds to fit naturally in your ears․ The stem is designed to flex slightly‚ accommodating different ear shapes․ Experiment with the position to avoid pressure points․ Once placed‚ lightly twist the earbud to secure it․ Ensure the touch sensor is facing forward for easy control access․ If discomfort persists‚ try a different ear tip size․ Proper adjustment ensures all-day wearability and a seamless listening experience․

Customizing Your Experience

Personalize your JLab Go Air Pop earbuds to suit your preferences․ Use the JLab Audio App to tailor sound settings‚ customize touch controls‚ and enhance your listening experience․

7․1 Using the JLab Audio App

Enhance your listening experience with the JLab Audio App‚ designed to complement your Go Air Pop earbuds․ Download the app to access EQ settings‚ customize touch controls‚ and monitor battery life․ Connect your earbuds seamlessly and explore features like sound customization‚ firmware updates‚ and personalized preferences․ The app allows you to tailor your audio experience‚ ensuring optimal sound quality and functionality․ It’s a one-stop solution to maximize your earbuds’ potential and enjoy a personalized listening journey․

7․2 Adjusting Sound Settings

Customize your audio experience by adjusting sound settings to your preference․ Use the JLab Audio App or your device’s settings to tweak EQ levels‚ bass‚ and treble․ Many devices also offer spatial audio or noise cancellation options․ Experiment with different preset modes or create a custom sound profile․ For enhanced clarity‚ ensure your device’s audio settings are optimized for your earbuds․ Adjusting these settings allows you to personalize your listening experience‚ whether you’re enjoying music‚ podcasts‚ or calls․

Troubleshooting Common Issues

Resolve issues like connectivity problems or sound loss by resetting the earbuds or checking device connections․ Ensure proper pairing and charge levels․ Refer to the user manual for detailed solutions․

8․1 Resolving Connectivity Problems

If your JLab Go Air Pop earbuds disconnect unexpectedly‚ try resetting them by pressing the case’s button until the light flashes․ Restart your connected device and ensure Bluetooth is enabled․ Forget the device in your Bluetooth settings‚ then reconnect․ Check for firmware updates and ensure the earbuds are fully charged․ If issues persist‚ reset the earbuds again or contact JLab support for further assistance․ Ensure no physical obstructions are blocking the connection and keep devices within range․

8․2 Fixing Sound Quality Issues

If experiencing muffled or distorted sound‚ ensure the earbuds fit securely and ear tips are clean․ Try adjusting the sound settings via the JLab Audio App or using the touch controls to boost bass or treble․ Restart both the earbuds and your connected device․ If issues persist‚ reset the earbuds by holding the case button until the light flashes․ Ensure the firmware is up to date and avoid using equalizer settings that may alter sound quality․ For severe issues‚ contact JLab support for further troubleshooting․

With proper setup and care‚ your JLab Go Air Pop earbuds will deliver an exceptional audio experience․ Enjoy seamless pairing‚ customizable controls‚ and rich sound quality on the go․

9․1 Final Tips for Enjoying Your JLab Go Air Pop

To maximize your experience‚ keep your JLab Go Air Pop earbuds updated with the latest firmware․ Regularly clean the ear tips and charging case to maintain performance․ Experiment with different sound profiles in the JLab Audio App to find your perfect audio balance․ Store the earbuds in the case when not in use to preserve battery life․ By following these simple tips‚ you’ll enjoy uninterrupted‚ high-quality sound and long-lasting comfort from your JLab Go Air Pop earbuds․